Epson Printer Setup Issue? How to Fix It on Windows and Mac
Printer showing an error the first time you turn it on? Ink charging stopped halfway? Epson's installer says it can't find the printer, or your Mac added it but the ink levels are missing? This guide follows an Epson setup in the order it actually happens, so you can go straight to the point where yours got stuck.
Every Epson setup has three parts. First, the printer runs its own first-time routine: protective material out, ink in, ink charged. Next, it joins your network or connects by cable. Last, your computer, Mac, phone, or Chromebook gets what it needs to print to it.
A problem in the first part can look like a problem in the last one. If the printer never finished charging its ink, reinstalling the driver five times won't help. That's why the steps below start at the printer, not the computer.
Give it time, too. Epson's own setup sheets put ink charging at about 10 to 11 minutes on many EcoTank models and about 5 minutes on a WorkForce cartridge model like the WF-2960, and that's before unpacking or software. A setup that "takes forever" may simply be a setup that's still running.
The guide covers EcoTank ink tank printers, Expression and WorkForce cartridge printers, and printers with or without a screen.
Where Did Your Epson Printer Setup Stop?
Think about the last thing that happened before setup went wrong, then jump to the matching step.
What you're seeing
Most likely cause
Go to
An error code or flashing lights the first time you turn the printer on
Protective material or tape still inside
Step 1
Ink won't flow into a tank, or ink charging never finished
A bottle that isn't seated, or a charge that got interrupted
Step 1
The printer is asking you to load paper to "adjust print quality"
Part of Epson's first-run routine
Step 1
You aren't sure what to download, or a "setup" site wants you to call or pay
The wrong website
Step 2
The installer asks how the printer is connected and you're not sure
Choosing a connection
Step 3
Your network isn't in the printer's list, or the password keeps failing
A 5 GHz network, a typo, or router security
Step 4
The printer printed a report with a code like E-2 or E-6
A specific network problem
Step 5
The installer says it can't find the printer, or a firewall alert pops up
Firewall, guest network, or router setting
Step 6
The driver install fails, freezes, or the printer shows up twice
Leftovers from an earlier attempt
Step 7
Windows added the printer by itself before you ran Epson's installer
Windows used its built-in driver
Step 7
Your Mac prints, but ink levels and maintenance options are missing
macOS picked AirPrint instead of Epson's driver
Step 8
Your Mac keeps asking to let an app "find devices on local networks"
A macOS privacy setting
Step 8
Epson Smart Panel can't find the printer, or you're on a Chromebook
Phone permissions, Bluetooth, or a different network
Step 9
Epson Connect registration or a printer password prompt is blocking you
Epson Global ID, or the Web Config password
Step 10
Why Epson Printer Setup Fails
Almost every failed Epson setup comes back to one of three places.
At the printer
Protective material is still inside. Epson ships printers with tape and packing pieces inside, not just outside. Epson's setup sheets say that if an error code appears when you first turn the printer on, you should switch it off and check for protective material you missed.
Ink charging was interrupted. Epson warns against unplugging the printer, turning it off, or opening the cover or scanner unit while it charges. Doing any of those wastes ink and can leave setup half done.
The ink isn't in right. On EcoTank models, a bottle that isn't fully inserted won't flow. On cartridge models, a cartridge that isn't clicked down, or has the wrong tape removed, stops setup.
On the network
The printer can't use your Wi-Fi band. Many Epson home printers can only connect on 2.4 GHz. If your router or mesh system puts 2.4 GHz and 5 GHz under one name, the printer may not find the network at all.
The router's security doesn't match. Older Epson models list WEP, WPA, and WPA2 as their supported security types. A router set to WPA3 only will turn them away.
Router features block the printer. MAC address filtering and the "privacy separator" (also called AP or client isolation) can stop the printer from joining, or stop your computer from seeing it once it has.
The printer is on a different network from your computer. A guest network, an extender with its own name, or a neighbor's open network keeps the two apart.
On the computer or phone
The software came from the wrong place. An old disc, a driver for a different model, or a lookalike "Epson setup" site.
The USB cable went in too early. Epson's setup sheets say to keep the printer disconnected from your computer until the installer asks for the cable.
Security software or a VPN blocks the search. Epson's installer has to scan your network to find the printer. Firewalls, VPNs, and some privacy settings stop it.
An earlier attempt left pieces behind. A half-installed driver or a duplicate printer entry can make the next install fail.
The computer used a generic driver. Windows and macOS can add an Epson printer on their own with a built-in driver. It prints, but some Epson options are missing.
No administrator rights. On a work or shared computer, the installer may need an administrator account to finish.
How to Fix Epson Printer Setup Problems
Starting from scratch? Work through these steps in order. Stuck somewhere specific? Use the table above and jump in at that step.
Step 1: Let the Printer Finish Its Own Setup First
Your printer has to finish its first-time routine before it can connect to anything. The Start Here sheet in the box shows the exact steps for your model, and you can find a copy on your model's page at epson.com/support. These are the parts that trip people up most.
Remove every piece of tape and protective material, outside and inside. On models with a scanner unit on top, lift it and check inside as well. Epson's sheets warn not to touch the flat white cable inside, and on some EcoTank models, the ink tubes and their clear cover.
Plug in the power cord, but not the USB cable. Epson's setup sheets say not to connect the printer to your computer yet. The installer will tell you when.
Turn the printer on and answer the first questions. Models with a screen ask for your language, and often your country, date, and time. If you see an Epson Smart Panel setup screen and you're setting up from a computer instead, choose the option to continue without the app. (Setting up from a phone? Step 9.)
Put the ink in the way your model expects.
EcoTank (ink bottles): Open one tank cap at a time and insert the matching bottle. Each bottle is keyed to its color, so don't force it. Ink stops flowing on its own when the tank reaches the upper line. If nothing flows, lift the bottle out and insert it again. Don't squeeze or shake the bottles.
Cartridge models (Expression, WorkForce): For the WF-2960, Epson says to gently shake only the black cartridge, remove only the yellow tape from each cartridge, and press each one down until it clicks. Other models vary a little, so follow your Start Here sheet.
Start ink charging and leave it alone. How you start it depends on the model (see the table below). While it charges, don't unplug the printer, switch it off, or open the front cover or scanner unit. Epson says doing that wastes ink.
Load plain paper and finish the print quality step. Many models print an adjustment pattern at the end of setup. The WF-2960 needs 4 sheets of Letter-size paper for this. If you're not ready, Epson lets you choose Adjust Later.
How ink charging works on three common Epson setups
Printer type (Epson example)
How charging starts
How long Epson says it takes
How you know it's done
EcoTank without a screen (ET-2400)
Turn it on, wait for the power and ink lights to stay on, then hold the stop button for 5 seconds
About 11 minutes
The power light stops flashing
EcoTank with a screen (ET-3830, ET-3850, ET-4850)
Follow the prompts on the screen. When the screen tells you to see the Start Here sheet, hold the help button for 5 seconds
About 10 minutes
The power light stops flashing
Cartridge model (WorkForce WF-2960)
Install the cartridges, lower the scanner unit, and select Installed
About 5 minutes
A completion message on the screen
Error code or strange lights right after you turn it on? Turn the printer off and look again for tape or packing material, especially around the print head and under the scanner unit. That's Epson's first instruction for this situation. If an error keeps coming back once everything is clear, see our guide to Epson printer error codes and messages.
Some EcoTank Photo models have a transportation lock that closes off the ink supply for shipping. If the screen says the lock is in the transporting position, move it to the printing position as your User's Guide shows, then continue.
Step 2: Get Epson's Setup Software, and Only From Epson
On a Windows PC or Mac
Go to epson.com/support and search for your exact model. It's printed on the front of the printer, such as ET-2800, ET-4850, or WF-2960. Epson's setup sheets also give a shortcut in the form epson.com/support/[model], for example epson.com/support/et2800.
Check that the page has detected the right operating system. If not, pick yours from the list.
Download the full setup package. On Epson's US support pages, it's usually called the Drivers and Utilities Combo Package Installer. It installs the printer driver plus Epson's scanning and update tools, and it can connect the printer to Wi-Fi for you.
Before you run it, unplug any USB cable between the printer and the computer. If Windows pops up a "found new hardware" style message, Epson says to cancel it and disconnect the cable.
Run the installer and follow the prompts. It asks how the printer is connected, which is Step 3.
Don't have a disc drive? You don't need one. Epson's setup sheets note that some printers don't include a CD at all, and Mac users always download the software.
On a phone or tablet
Epson's current setup app is Epson Smart Panel, free in the App Store and Google Play. Step 9 covers it.
Outside the US? Epson's international setup site, Epson Setup Navi, lives at epson.sn. It offers the same kind of setup download for your region's models.
Watch out for fake Epson setup and support sites. Search for Epson printer setup help and you'll find sites that borrow Epson's name and logo. Some push a fake "driver error," then offer a phone number or chat window that charges you to fix it, often by taking remote control of your computer. Epson's US fraud alert says its customer service and support is always free. Real downloads come from epson.com, and real contact options are on the Contact Us tab of your model's support page. If you think you've been caught by one of these, Epson points to the FTC at reportfraud.ftc.gov.
Want to know more about which driver to use? Our Epson printer driver guide covers downloading and updating it.
Step 3: Choose How the Printer Will Connect
Epson's installer shows a Select Your Connection screen. Decide before you get there, because switching later usually means running setup again.
Connection
Best for
Keep in mind
Wireless connection
Several computers and phones sharing one printer
Every device must be on the same network as the printer. Epson's installer usually tries to set up Wi-Fi for you and only asks for your network name and password if that fails
Direct USB connection
One computer at one desk
Epson doesn't include a USB cable with many models. Phones can't print through it
Wired network connection (models with an Ethernet port)
A printer that sits near the router
The steadiest connection. Epson doesn't include the Ethernet cable either
If you choose USB, plug the cable in only when the installer asks, and connect it straight to the computer, not through a hub or dock. If the installer can't find the printer after that, Epson's advice is simple: make sure the printer is on and the cable is securely connected at both ends.
USB is also a useful test. If the printer works over USB, the printer and driver are fine, and whatever's left is a network problem.
Step 4: Get the Printer Onto Your Wi-Fi
Joining Wi-Fi and being added to your computer are two separate jobs. This step handles the first one.
Before you start, check three things
The band. Many Epson setup sheets say the printer can only connect to a network that supports 2.4 GHz. If your router offers both bands, make sure 2.4 GHz is turned on. If both bands share one network name and setup fails, Epson suggests giving each band its own name. A few higher-end models, such as the EcoTank ET-8550, can also use 5 GHz.
The security type. If your router is set to WPA3 only and your printer's User's Guide doesn't list WPA3, switch the router to WPA2/WPA3 mixed (sometimes called transition) mode, or WPA2.
The network name. Epson says the printer can't display names that use non-standard characters, like emoji or accented letters. If your network shows up garbled or not at all, that could be why.
Method A: The printer's own screen (models with a screen)
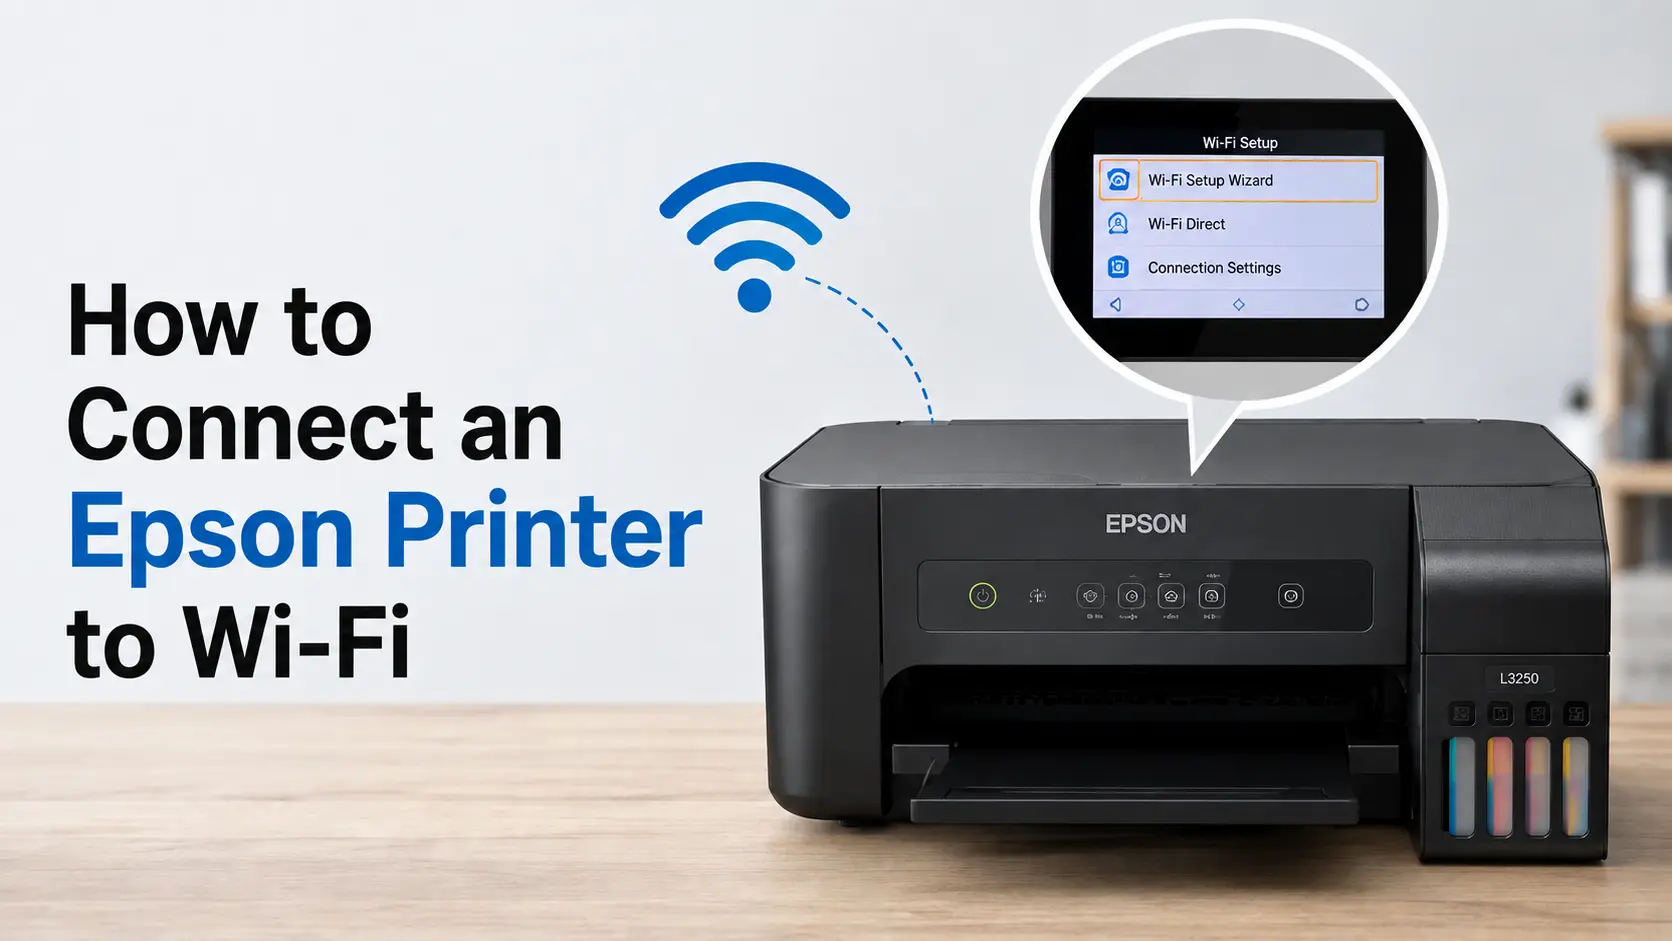
Select the Wi-Fi icon on the home screen, or go to Settings > Network Settings > Wi-Fi Setup. Menu names vary a little by model.
Choose Wi-Fi Setup Wizard, pick your network, and enter the password. It's case sensitive, so watch for capital letters, and for lookalikes like 0 and O.
Confirm and wait for the connected message. If it fails, the printer usually offers to print a check report. Say yes and go to Step 5.
Method B: WPS push button
Use this if your router has a WPS button and WPS is turned on. On models with a screen, choose Push Button Setup (WPS) from the Wi-Fi setup menu and follow the on-screen order. On screenless models like the ET-2400, press the router's WPS button, then within about two minutes, hold the printer's Wi-Fi button for about five seconds, until the Wi-Fi lights flash alternately. WPS won't work if the router has it turned off, and many routers don't allow WPS on WPA3-only networks.
Method C: Epson's installer or the Epson Smart Panel app
The setup package from Step 2 can connect the printer for you when you pick Wireless connection. On a phone, Epson Smart Panel does the same job (Step 9). Both are the easiest options for printers with no screen.
How to tell it worked
A steady Wi-Fi light or a connected icon means the printer joined a network. To make sure it's the right one, print a network status sheet (on many screen models, Settings > Network Settings > Print Status Sheet) and check the network name and IP address. An IP address starting with 169.254, or all zeros, means the printer joined Wi-Fi but never got a working address from the router.
If the printer still won't join, our guide to an Epson printer not connecting to Wi-Fi covers the router settings behind it. For a start-to-finish walkthrough, see how to connect an Epson printer to Wi-Fi.
Step 5: Read the Network Connection Report
When Wi-Fi setup fails, don't just retype the password and hope. Epson printers can print a network connection report that names the problem with a code.
How to print it
Models with a screen: Go to Settings > Network Settings > Connection Check (on some models, Settings > General Settings > Network Settings > Connection Check) and print the report.
Models without a screen: Press the network status button (the button with the i icon). Your User's Guide shows the exact press for your model.
What the codes mean
Code
What Epson's report is telling you
What to do
E-1
A network cable or network device problem
Only matters for a wired connection. Check the Ethernet cable and make sure the router is on
E-2, E-3, E-7
The printer can't find your network, or the password doesn't match
Check the network name and password, move the printer closer to the router for setup, make sure 2.4 GHz is on, and check the name uses standard characters only
E-5
The router's security type doesn't match what the printer supports
Change the router's security to a type your printer lists. For older models, that's WEP, WPA, or WPA2
E-6
The router may be filtering the printer's MAC address
Add the printer's MAC address (it's on the status sheet) to the router's allowed list, or raise the router's device limit
E-8
The printer got a bad IP address
Turn on DHCP in the router, or set the printer to get its address automatically. Restart the printer and router
E-9
The problem is on the computer or device side
Check that the computer and router are on and online, restart the router, then reinstall Epson's software
E-10
The IP address, subnet mask, or gateway is set wrong
Set the printer to get its IP address automatically unless you know you need a manual address
E-11
The default gateway can't be reached
Check the gateway address on the report and make sure the router is on
E-12, E-13
Several settings are wrong at once
Recheck the password and IP settings, restart the router, and if needed reset the printer's network settings and start again (see the FAQ below)
If the report says the connection is fine but your computer still can't see the printer, the printer's side is done. Go to Step 6.
Step 6: Fix "Setup Can't Find the Printer"
This is the most common place an Epson setup stalls. The printer is on Wi-Fi, but the installer on your computer can't see it. Work through Epson's checks in this order.
Confirm the printer really is on your network. Check the Wi-Fi status on the printer's screen, or print a status sheet (Step 4). Look at the network name, not just the Wi-Fi icon.
Make sure it isn't on a guest network. Guest networks usually keep devices apart on purpose. Epson lists this as a common cause. Move the printer (and computer) to your main network.
Allow the installer through your firewall. Epson's setup sheets say that if a firewall alert appears during setup, click Unblock or Allow. Don't choose "Ask Me Later," "Keep Blocking," or "Block." If you pause your security software to finish setup, turn it back on right after.
Check the router. Turn off the privacy separator (AP or client isolation) if it's on. If both bands share one name, give each band its own name. Epson lists both of these as reasons its software can't find a printer on the network.
Restart the router, then run the installer again. If you've replaced your router since the printer was last set up, Epson says to reinstall the printer software.
Three more things to check on the computer
Is a VPN running? It can route your computer around your home network, so the installer searches in the wrong place. Pause it until setup is done.
Is Windows treating your home Wi-Fi as a Public network? Windows keeps devices on Public networks from discovering each other. Go to Settings > Network & internet > Wi-Fi, open your network's properties, and set Network profile type to Private.
On a Mac, did you click "Don't Allow"? macOS asks before any app can find devices on your local network. If you said no, the Epson software can't see the printer. Step 8 shows how to fix it.
Try Epson Printer Connection Checker (Windows). Many Epson software packages install this diagnostic tool. On Windows 11, open Start > All apps > Epson Software > Epson Printer Connection Checker (or search for it) and follow the prompts. If your printer's name doesn't appear in it, Epson says to install a genuine Epson printer driver.
If the printer sets up but keeps dropping off later, our Epson printer offline guide picks up from there.
Step 7: Clean Up a Failed Install on Windows 11 or 10
If Epson's installer errors out, freezes, or keeps starting over, clean up before trying again.
Unplug the USB cable, if one is connected.
Go to Settings > Bluetooth & devices > Printers & scanners. Select each entry for this Epson printer, including ones ending in "(Copy 1)" or a number, and choose Remove.
Go to Settings > Apps > Installed apps and uninstall the Epson printer driver and software for this model.
Restart the computer. This clears files Windows is still holding on to.
Download a fresh copy of the setup package from your model's page at epson.com/support. An older saved copy may not support your version of Windows.
Run it from an administrator account. Choose Yes when Windows asks for permission to make changes.
If you're using USB, plug the cable in only when the installer asks.
Did Windows add the printer on its own?
That's Windows doing its job, not an error. Windows 10 (version 21H2 and later) and Windows 11 include the Microsoft IPP Class Driver, which works with Mopria-certified printers over the network and over USB, and Epson is a Mopria member. Starting July 1, 2026, Windows prefers that built-in driver over the manufacturer's driver when you add a new printer.
Basic printing works fine that way, but some of Epson's options may be missing. To see which driver you have, open Printers & scanners, select the printer, choose Printer properties, and look on the Advanced tab. If it says Microsoft IPP Class Driver and you want Epson's full settings, run Epson's installer from Step 2. Microsoft says manufacturers can still offer their own installers, and in February 2026 it clarified that printers already working on Windows keep working.
If "Driver is unavailable" shows up under the printer, see our Epson printer driver guide. If your Epson worked fine until an update, see Epson printer issues after a Windows update. Jobs stuck in the queue during setup? Our Epson print queue guide clears them.
Step 8: Set Up an Epson Printer on a Mac
On a Mac, the big question is which driver macOS used. When you first connect an Epson printer, Epson says macOS may add it with Apple's built-in AirPrint driver instead of Epson's. AirPrint prints fine, but according to Epson, you lose features like ink level monitoring, maintenance tools, and some advanced print quality options.
Check which driver your Mac is using
Open Apple menu > System Settings > Printers & Scanners and select your Epson.
Look at the Kind line. Epson says that if it ends in AirPrint, or shows Secure AirPrint, Generic PostScript Printer, or Bonjour, your Mac is using a generic driver. Another quick tell: Epson's own driver adds Options and Utility tabs to the printer's settings.
AirPrint is perfectly fine if basic printing is all you need. If you want Epson's full driver, switch over like this.
Switch to Epson's driver
In Printers & Scanners, select each copy of the Epson printer and click Remove Printer.
Go to your model's page at epson.com/support, check that your macOS version is selected, and download the printer driver.
Install it, then go back to Printers & Scanners and click Add Printer, Scanner, or Fax.
Select your Epson. Before you click Add, open the Use menu and choose the entry with the Epson driver name (for example, "EPSON ET-2800 Series"), not AirPrint or Secure AirPrint.
Printer not in the list? Click the IP tab and type in the printer's IP address from the status sheet.
macOS keeps asking to let an app "find devices on local networks"
Since macOS 15 Sequoia, apps need your permission to talk to devices on your home network. Epson's advice: if the app named in the message is an Epson program you're using, click Allow. If you already clicked "Don't Allow," go to System Settings > Privacy & Security > Local Network and turn on the Epson items. Epson warns that if you don't allow access, the app or some of the printer's features may not work.
Using macOS 26 Tahoe?
USB printing doesn't work: Epson's fix is to download and install the latest printer driver for your model, then restart the Mac.
"Support Ending for Intel-based Apps" message: Epson says its drivers and apps work normally on macOS 26. The message is Apple warning that future macOS versions may affect some older apps. Keep an eye on your model's support page for updates.
Still stuck? Check the Mac firewall at System Settings > Network > Firewall. As a last resort, Control-click an empty area of the printer list in Printers & Scanners and choose Reset printing system. This removes every printer and scanner on the Mac, so only use it when nothing else works, then add the Epson back.
Step 9: Set Up an Epson Printer on a Phone, Tablet, or Chromebook
Epson Smart Panel (iPhone, iPad, and Android)
Epson Smart Panel is Epson's free app for setup, printing, scanning, and checking ink. Epson's setup sheets give it a specific order, and following it avoids a lot of "printer not found" messages.
Connect your phone to the Wi-Fi network you want the printer on. If your router splits the bands, use the 2.4 GHz one.
Download Epson Smart Panel, but don't open it yet.
Turn the printer on.
Open the app and follow its instructions. If it doesn't find the printer on its own, tap the + icon and choose Start setting up.
What the app needs, according to Epson:
Bluetooth turned on, with the phone close enough to the printer to hold the connection.
The permissions it asks for, such as local network access, Bluetooth, and location. Deny one, and the app may not find the printer.
A finished printer. Epson says to complete initial setup and ink installation before setting up wireless printing.
If the printer still isn't listed, move closer and try again. If that fails, connect the printer to Wi-Fi from its own control panel (Step 4), then use the app's option for a printer that's already connected to Wi-Fi. A VPN or private DNS setting on the phone can also get in the way, so pause them during setup.
Printing from an iPhone or iPad without the app
Open what you want to print, tap Share, then Print, and choose your Epson. AirPrint works as soon as the printer and the device are on the same network.
Printing from Android without the app
Epson says Android devices can print straight to its printers on the same network, though some may need the Epson Print Enabler or Mopria Print Service app from Google Play.
Chromebook
Chromebooks don't use Epson drivers, so there's nothing to download. Epson keeps instructions at epson.com/support/chromebookprint.
Make sure the Chromebook and the printer are on the same network.
Select the time in the bottom-right corner, then Settings.
Under Device, go to Printers and scanners > Print, find your Epson, and add it.
Not listed? Choose Add printer manually. Type in the printer's IP address, choose Internet Printing Protocol (IPP), and use ipp/print as the queue.
Step 10: Finish the Optional Extras: Epson Connect and the Printer Password
You don't need Epson Connect to print at home. Printing from a computer or phone on the same network works without any account. Epson Connect is Epson's cloud service for extras:
Email Print: send a document to the printer's own email address.
Remote Print: print from the Epson Smart Panel app when you're away from home.
Scan to Cloud: send scans to online storage.
Remote Print Driver: print from a laptop to your printer from anywhere.
Epson Connect now uses an Epson Global ID. That's Epson's single sign-in for its services. Epson says older Epson Connect accounts can't switch back, and in 2026 Epson strengthened its ID security, so if you haven't signed in for a while, you may need to reset your password. You can create an Epson Global ID during registration.
Three ways to register your printer
Where
How
From a computer
Download and run Epson Connect Printer Setup from Epson's Epson Connect downloads page, then sign in or create an account
From a phone or tablet
Install Epson's Epson Printer Finder app and follow its prompts
From the printer
Go to Settings > (General Settings >) Web Service Settings > Epson Connect Services > Register. The printer prints a registration sheet with a QR code and a code to enter online
Whichever way you choose, the printer must already be connected to your network, with internet access. Epson says Epson Connect won't work over a Wi-Fi Direct connection. When registration finishes, the printer prints a setup information sheet, and Epson sends a confirmation email.
Why is the printer asking for an administrator password?
You'll usually see this in Web Config, the printer's settings page you open by typing its IP address into a browser. On many current Epson models, Epson says the default administrator password is the printer's serial number, printed on a label on the printer (inside the cover, on the back, or on the bottom, depending on the model). Leave the user name blank. Some models have a separate label marked PASSWORD. If both labels are there, the value next to PASSWORD is the default. If someone already changed the password, you'll need that password or a reset.
FAQs
How long does Epson printer setup take?
Longer than most people expect, because ink charging alone takes several minutes. Epson's setup sheets list about 5 minutes for the WorkForce WF-2960, about 10 minutes for the EcoTank ET-3830, ET-3850, and ET-4850, and about 11 minutes for the EcoTank ET-2400. Add time for unpacking, filling ink, loading paper, and installing software. Leave the printer alone while it charges, even if it seems stuck.
Do I still need the CD that came with my Epson printer?
No. Many Epson printers don't include a CD anymore, Macs always need the download, and a disc only holds software from when the printer shipped. Download the current setup package for your model from epson.com/support instead. It does the same job and is up to date.
Can I set up an Epson printer without a computer?
Yes. You can finish the printer's first-time setup, then connect it to Wi-Fi from its control panel, with WPS, or through the Epson Smart Panel app on a phone or tablet. You only need a computer if you want to print from one. Then you just run Epson's installer or add the printer in your computer's settings.
Setup offered a firmware update. Should I install it?
Usually, yes. Epson says its firmware updates address security, performance, and minor bugs. On printers designed for genuine Epson cartridges, Epson also warns that updates may stop some third-party or altered cartridges from working, so keep that in mind if you use them. Keep the printer on and connected until the update finishes.
Do I need an Epson account to use my printer?
No. Printing and scanning on your home network work without an account. You only need an Epson Global ID for Epson Connect services like Email Print and Remote Print (Step 10).
How do I switch my Epson printer from USB to Wi-Fi after setup?
Connect the printer to your Wi-Fi first (Step 4). Then run Epson's setup package again and choose Wireless connection this time. Afterward, remove the old USB copy of the printer from your computer so your print jobs don't go to the wrong one.
How do I start Epson printer setup over from the beginning?
Reset the printer's network settings, then clean up your computer. On models with a screen, go to Settings > Restore Default Settings > Network Settings. Save Clear All Data and Settings for last, because it wipes every setting and stored information. On models without a screen, the reset uses a button combination listed in your User's Guide. Then remove the printer and Epson's software from your computer (Step 7), restart, and run setup again.
Printer Tales is an independent troubleshooting resource and is not affiliated with, authorized by, endorsed by, or sponsored by Epson. "Epson" and all related names, logos and model names are trademarks or registered trademarks of Epson or its affiliates, used here only to identify the products these guides cover. Full disclosure.
Cookie Consent
We use cookies to give you the best possible experience on our website. Cookie Policy