Brother MFC-J1010DW Not Printing [Fixed]
![Brother MFC-J1010DW Not Printing [Fixed]](https://printertales.com/public/upload/blog/683fff645da83_brother-mfc-j1010dw-not-printing-fixed-.webp)
It may be surprising to see your Brother MFC-J1010DW showing a printing issue, but the issue is quite common. The printer can get into a “not printing” state for a variety of reasons, such as low ink level, wrong print settings, firmware issues, outdated drivers, and others. The issue can be resolved easily, but sometimes, it can be a big hassle to remove the problem.
If you also want to troubleshoot your printer issue, then it is necessary to learn about the cause of the issue and use a specific solution. Plus, if you are unable to figure out the issue, use the various primary methods. Here are the top 7 solutions to help you.
Method 1: Check Connection
If the printer is not printing documents properly, then you need to check the connection of your device to ensure they are communicating perfectly.
1. If you are using a USB cable/cord, ensure it is properly connected on both ends.
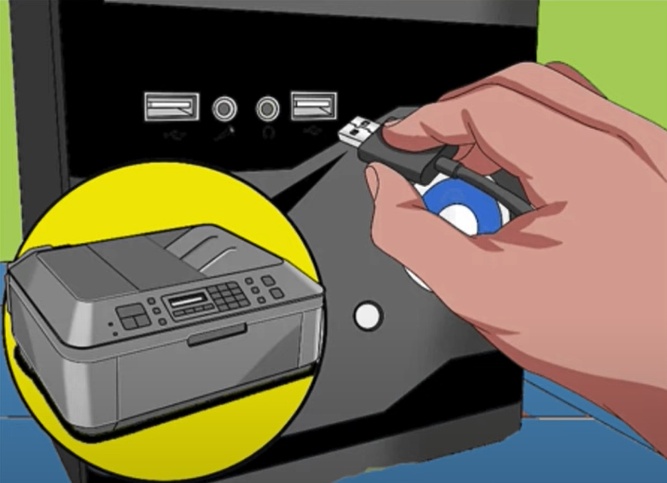
2. Verify that your printer and computer are connected to the same network.
3. Check the printer to see if it is printing.
Method 2: Cancel All Print Jobs
Your Brother printer can show the not printing issue if there are too many print jobs stuck in the queue. Follow the guide below to cancel the printer jobs.
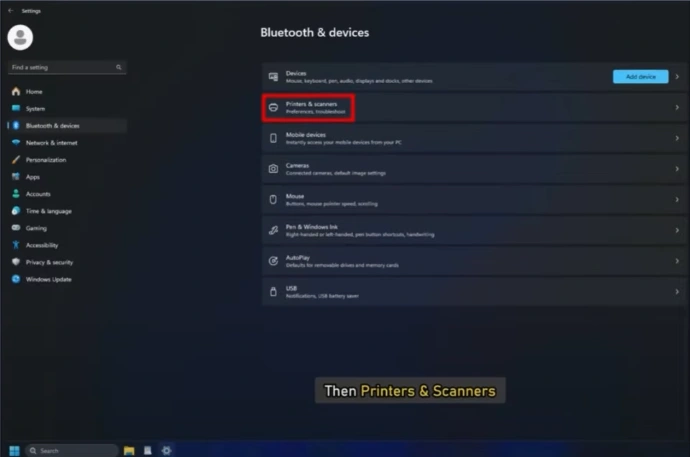
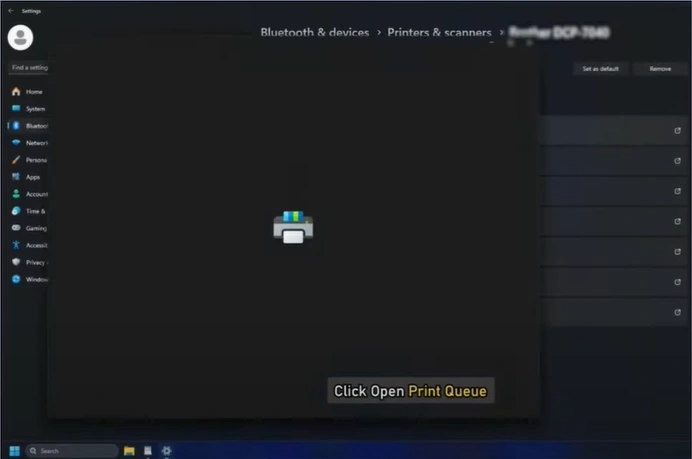
1. Open Settings and select “Bluetooth and other devices” from the sidebar.
2. Open ‘Printers & Scanners’ and select the MFC-J1010DW printer.
3. Click on Open Print Queue.
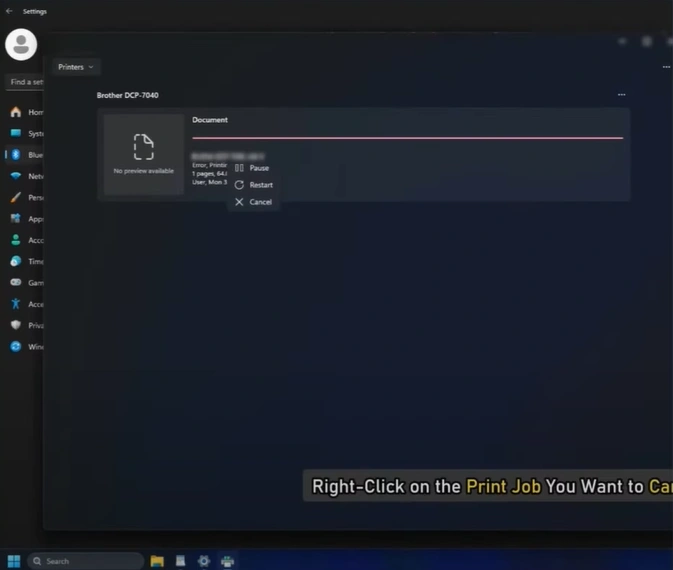
4. Click on the three dots, then select the Cancel All option, and click Yes.
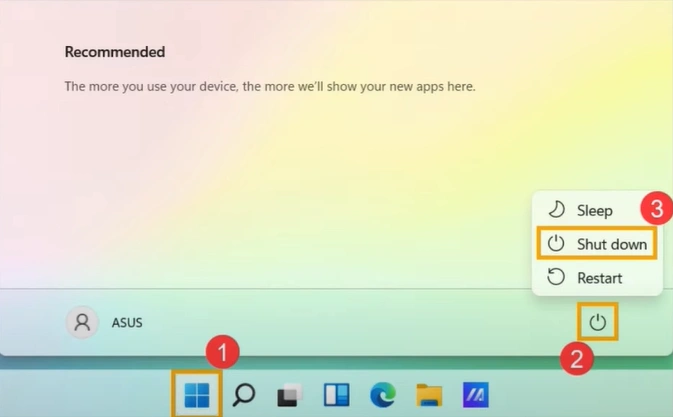
5. Turn off your computer, then turn it ON again.
Method 3: Check the Default Print
If you have not selected your printer as the default device, then it can show problems in printing the documents. With the help of the steps below, ensure that your printer is selected as your default printing device.
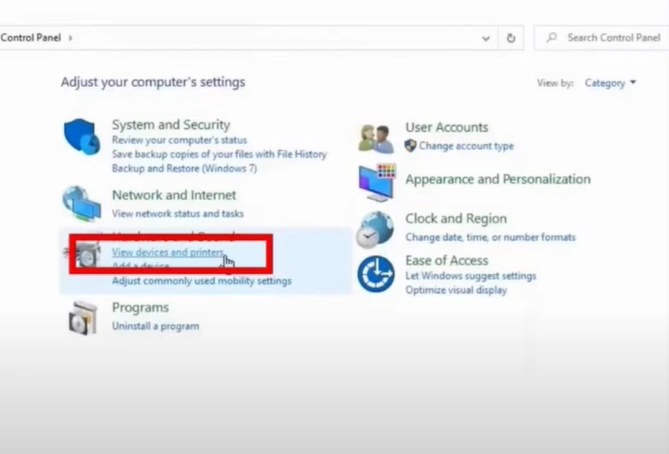
1. Open your Control Panel.
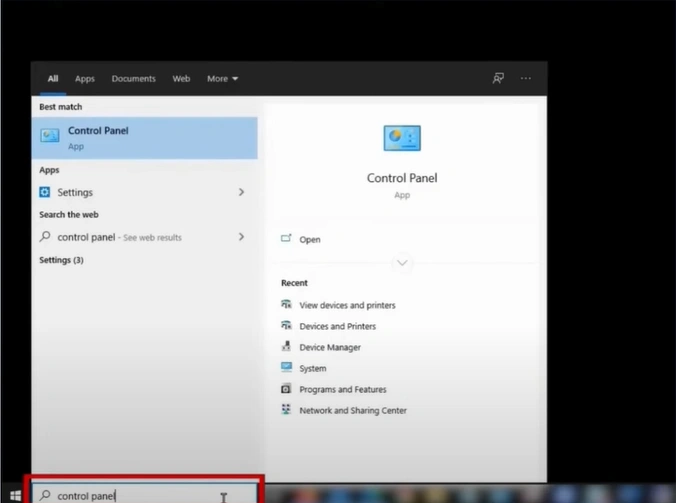
2. Under Hardware and Sound, click on the View Devices and Printers option.
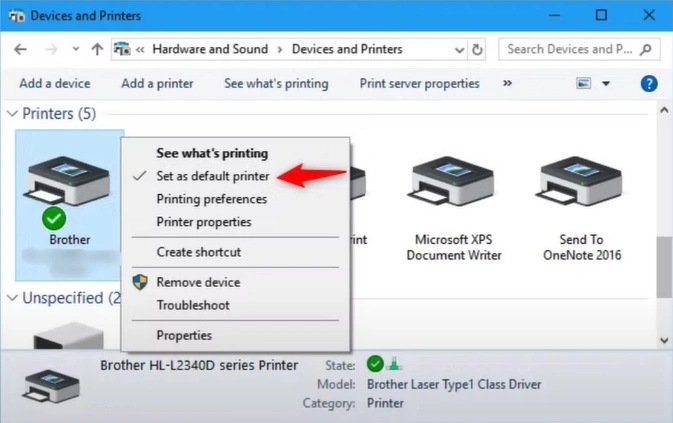
3. Right-click on the MFC-J1010DW printer icon and select the “Set as default printer” option.
4. If your printer problem still exists, then move to the next step.
Method 4: Check the Printer Status
If the printer is selected for offline use, then you may encounter problems in printing documents. Follow the steps below to deselect the ‘Use Printer Offline’ option for your Brother printer.
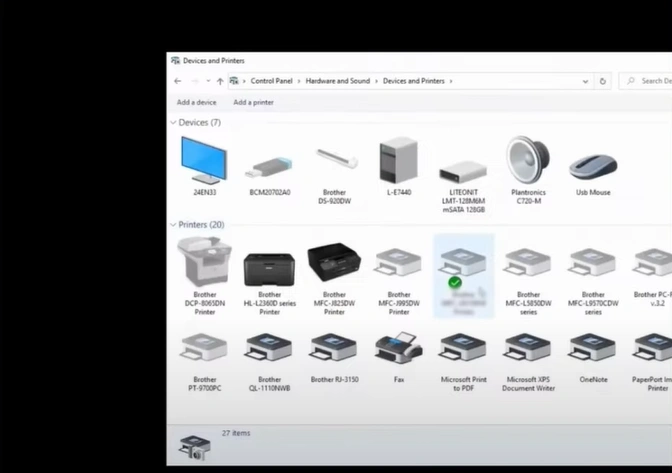
1. Open your control panel, under the Hardware and Sounds section, click on the View Devices and Printers option.
_1749026069.webp)
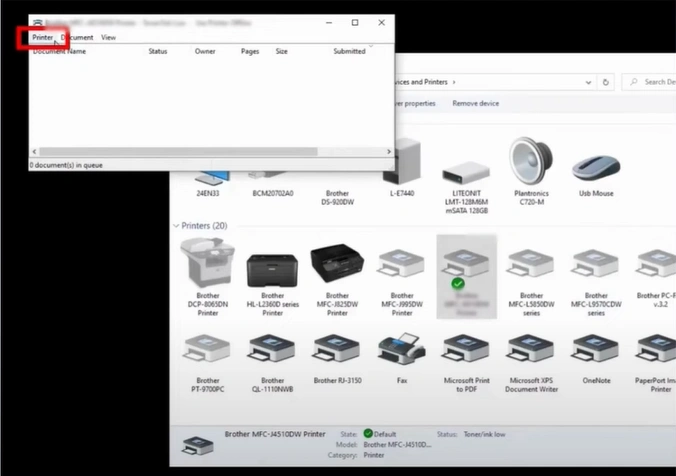
2. After that, you should right-click on the MFC-J1010DW printer name.
3. Click on the See what’s printing option.

4. Click on Printers, then uncheck the “Use Printer Offline” option.
Method 5: Restart the Print Spooler
Follow the steps below to restart the print spooler service to see if it can fix the issue. Restarting the print spooler can help you fix the printing issue of your Brother printer.
1. You need to push the Windows + R keys together to open the Run dialog box.
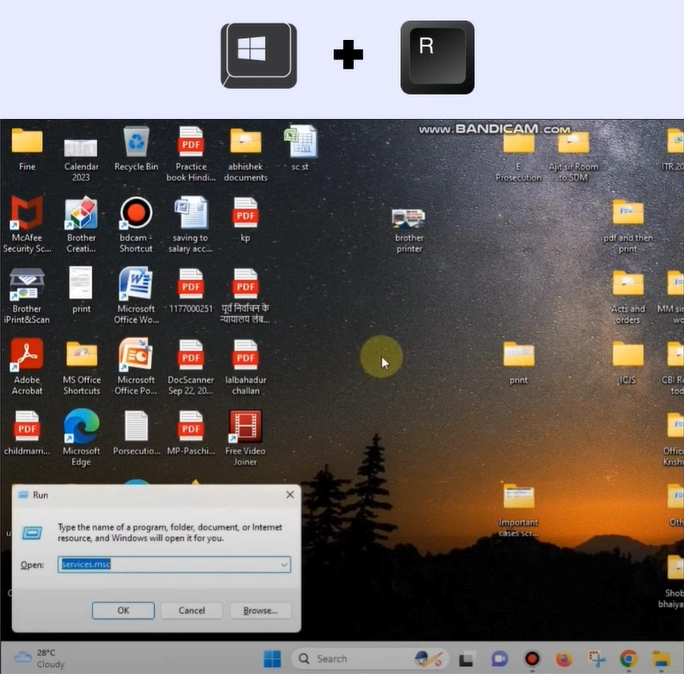
2. Type “service.msc” and click on OK.
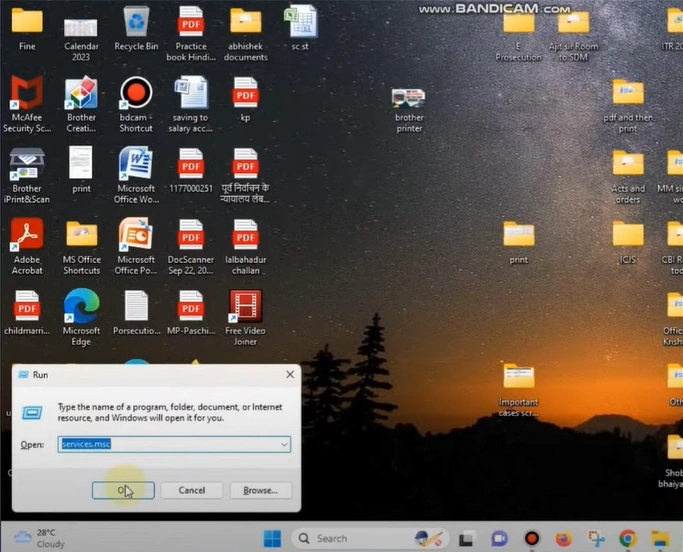
3. Scroll down, right-click on Print Spooler, and select Restart.
_1749026504.webp)
4. Check if your printer has started printing the documents.
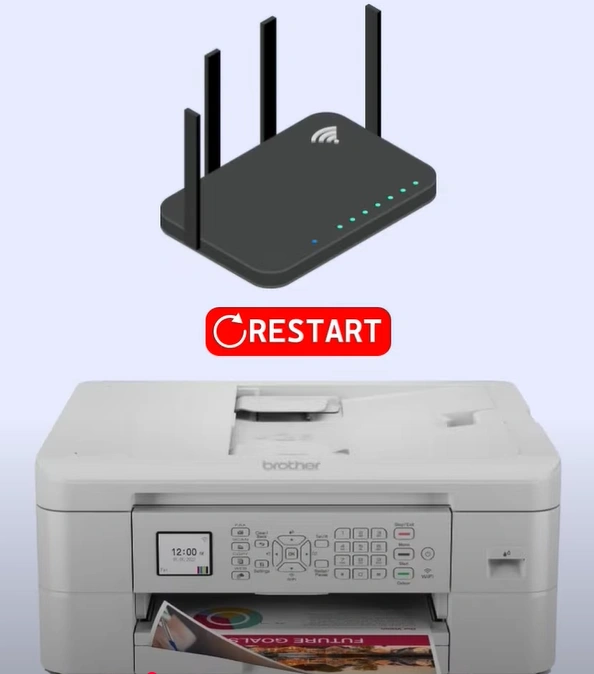
Method 6: Check Firewall Settings
1. Restart your Wi-Fi router and printer.
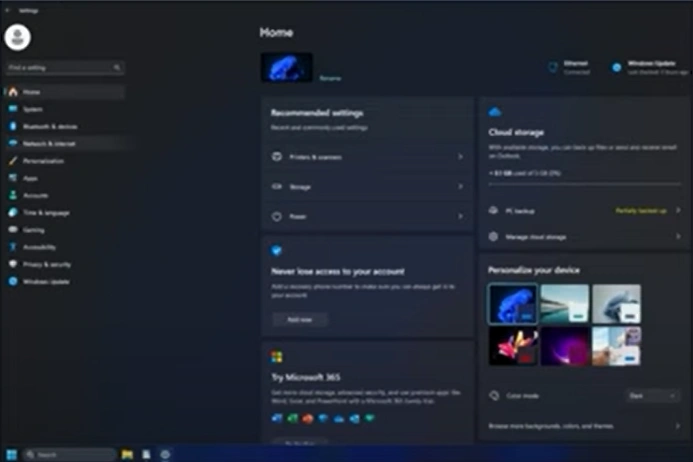
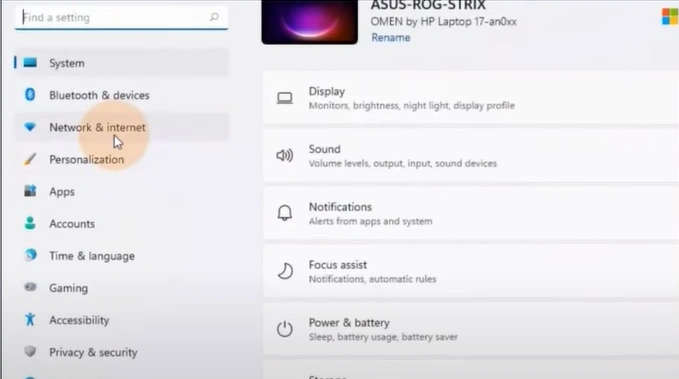
2. Click on the Start menu and open Settings.
_1749026624.webp)
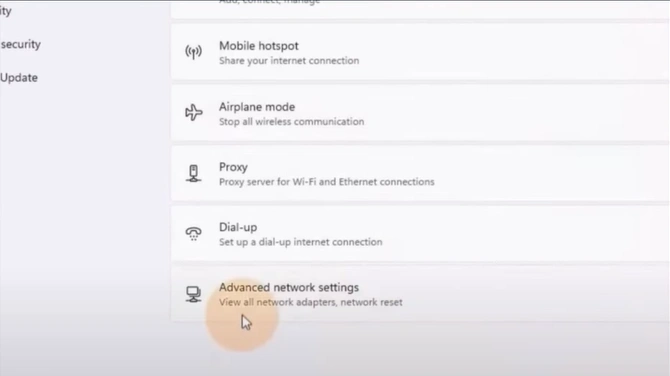
3. Open the “Network and Internet” settings.
4. Go to Advanced network settings.
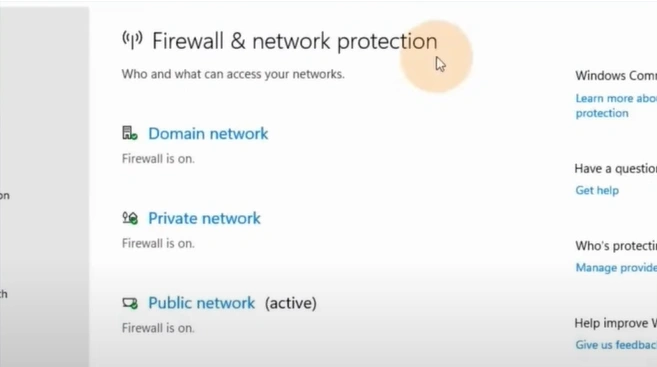
5. Under related settings, click on the Windows Firewall.

6. Check for any firewall software settings that might block the printer from establishing a network connection.
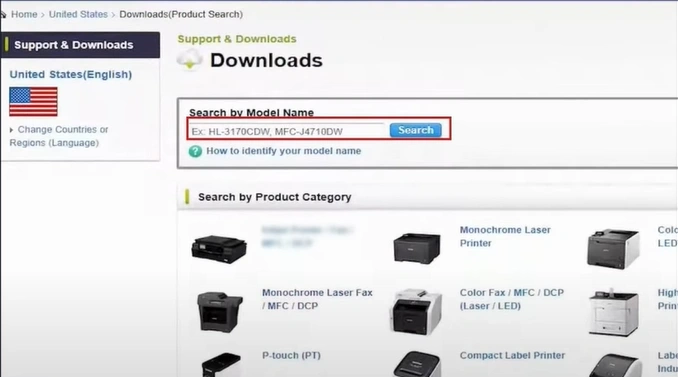
Method 7: Update the Printer Driver
Using an outdated/corrupt printer driver can also be another major reason to face the issue in printing documents. Use the following steps to install the updated driver for your printer and see if it is able to fix the issue.
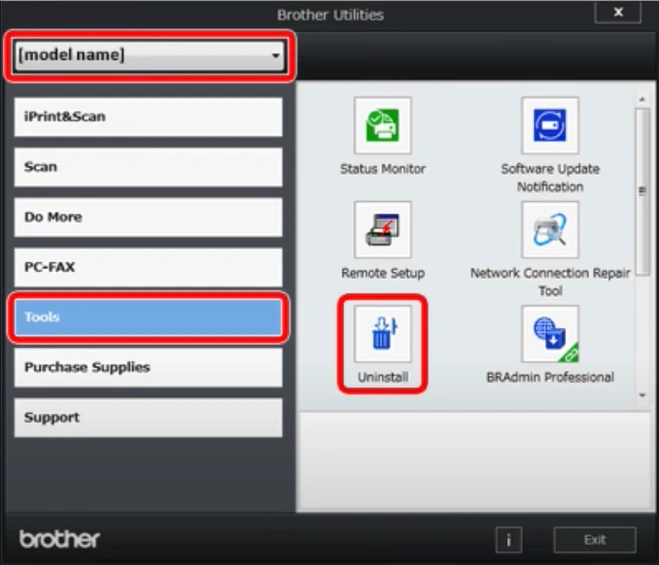
1. Open Brother Utilities on your computer.
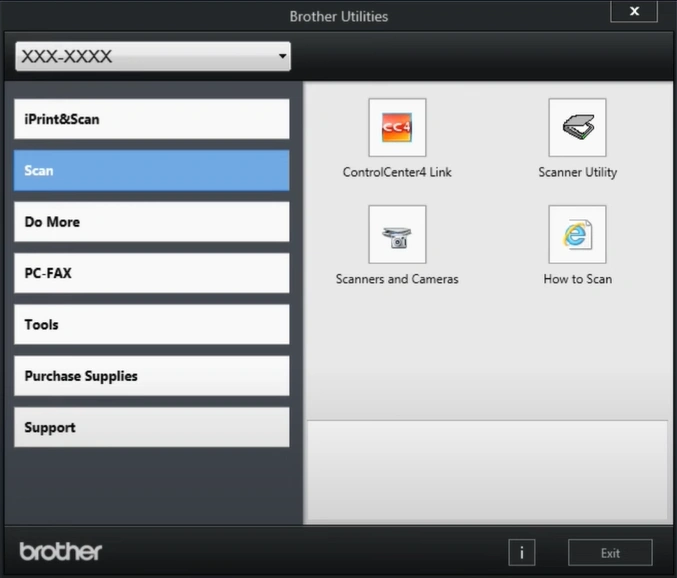
2. Select your model name from the dropdown, open Tools in the left panel, and click on the Uninstall button.
3. Go to the Brother Support official website.
4. Search for MFC-J1010DW and click on the search button.
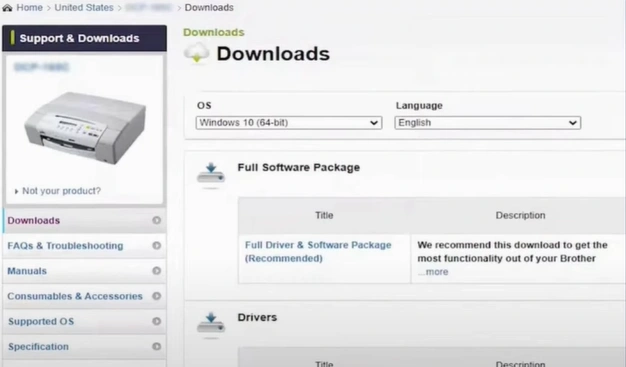
5. Check the operating system.
_1749027158.webp)
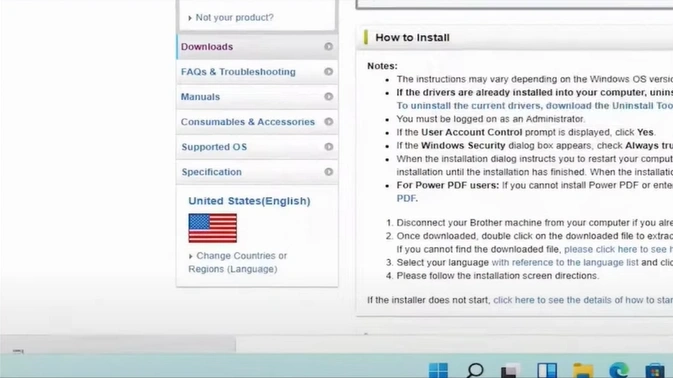
6. Click on Full Driver and Software Package, then click on “Agree to the EULA and Download.”
7. Double-click on the file once downloaded, then install the updated driver.
8. Now, you should try to print a document to see if your printer is working perfectly.
In Conclusion
We hope your Brother printer issue is fixed after using these 7 solutions and printing documents perfectly. Make sure to use the methods correctly and repeat them if necessary. Also, learning about the key cause of the issue and using the specific solutions accordingly can remove the problem quickly. Moreover, it would be best for you to get your hands on more solutions and guides to troubleshoot the issue efficiently.

