How to Add Xerox Printer to a Mac?
Xerox printers are versatile machines with multiple OS device connectivity support. You can connect these printers to a computer or smartphone device wirelessly or using a USB cable. For many people, connecting the Xerox printer to the Mac seems like child’s play, and for others, it could be challenging. Moreover, there are chances of facing some issues, such as connectivity issues, driver problems, following wrong procedures, and others. In this case, it is best to learn the correct connection method beforehand.
Therefore, this write-up shares a deep understanding of well-tailored methods for seamlessly adding a Xerox printer to a Mac. Let's start!
Method 1: During the Driver Installation
If the following guide allows you to add your Xerox printer to your Mac during the driver installation. Here learn about the comprehensive guide.
1. First and foremost, visit the official Xerox website. And download the appropriate Xerox driver for your printer model.

2. Next, click on the downloaded file to open the executable package.
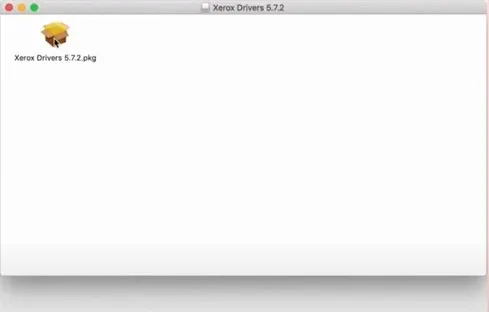
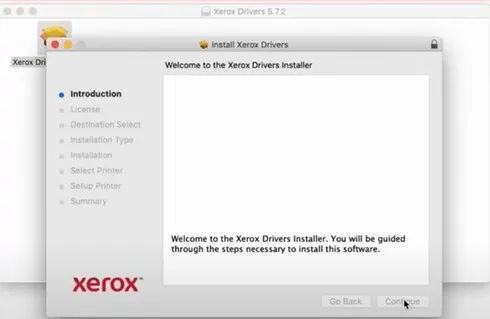
3. And then, double-click on the Xerox Driver box and click on Continue in the prompt.
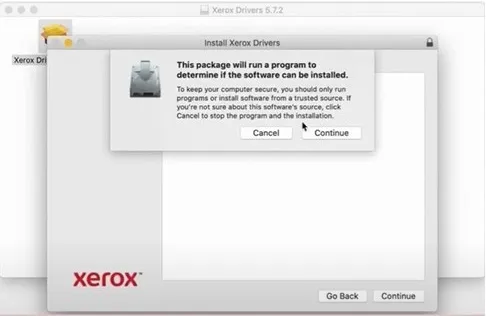
4. Now, in the instructions, click on Continue again in the Licence Agreement, then click on Agee in the pop-up.
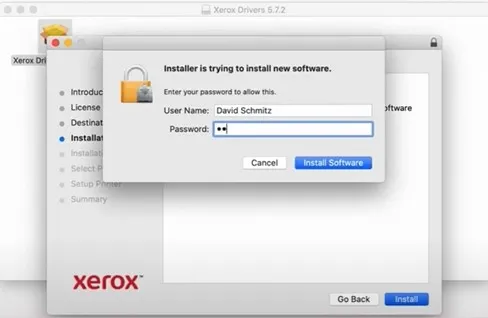
5. Click on the Install option to proceed, enter the correct password when prompted, and click on the Install Software option.
Also Read:- How To Fix Xerox Printer Offline Issue In Windows 10 and 11?
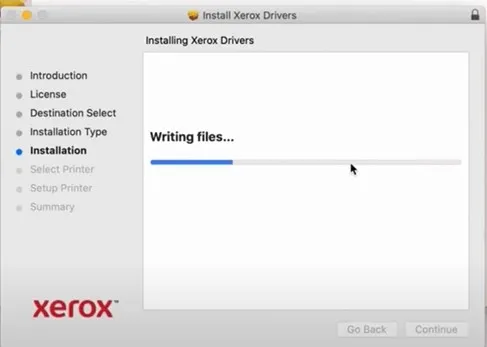
6. After that, wait for your system to install the drivers, which can take a couple of seconds.
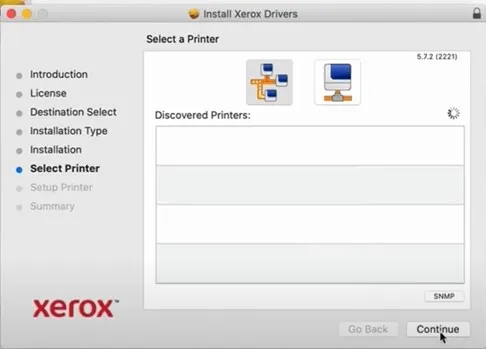
7. When the ‘select a printer’ page comes on the screen, click on Continue and Continue once again on the pop-up prompt.
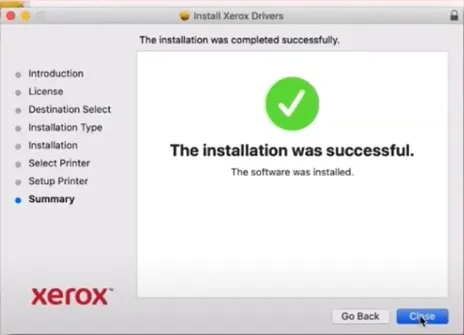
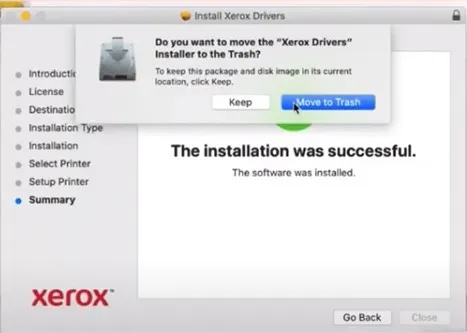
8. Once you get the installation screen successful, click on Close.
9. Now, on the ‘Do you want to move the Xerox Driver Installer to the Trash?’ prompt, you can either choose Keep or Move To Trash as per your choice.
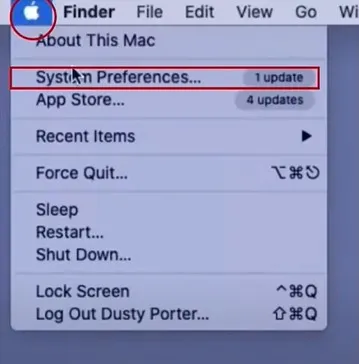
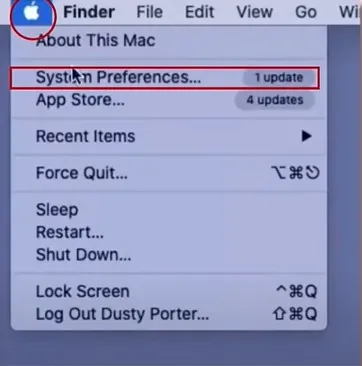
10. Once that is done, click on the Apple icon and go to the System Preferences to add the printer.
11. After that, click on the Printers & Scanners, then click on the plus (+) icon/sign at the lower left side of the screen.

12. Now, move to the IP tab and type in the IP address of the Xerox printer in the address section. It will automatically populate the information.
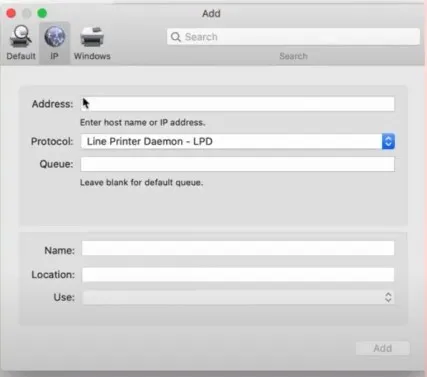
13. Once the Protocol tab shows up on the screen, choose Line Printer Daemon-LPD.
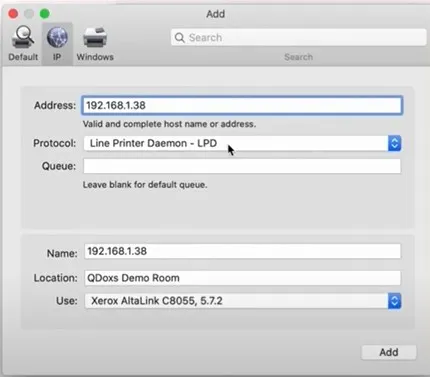
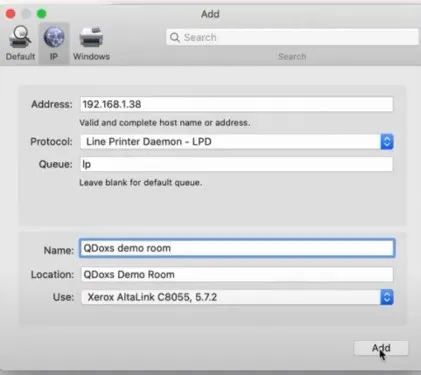
14. In the queue field, type in your IP, then rename the Name field if you like to do so.
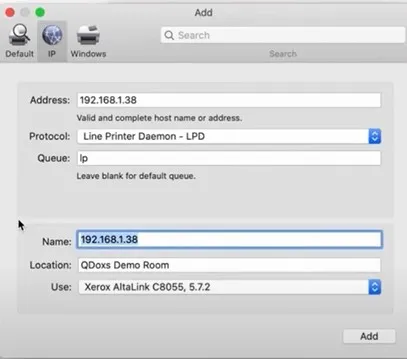
15. Once that’s done, click Add and then Continue to start setting up.
Method 2: Add the Printer Using Bonjour
Here is the step by step procedure that will allow you to complete your device connection process using the Mac Bonjour method.
1. Click on the Apple icon and select System Preferences.
2. Now, in the open System Preferences page, click on the Printers & Scanners option.
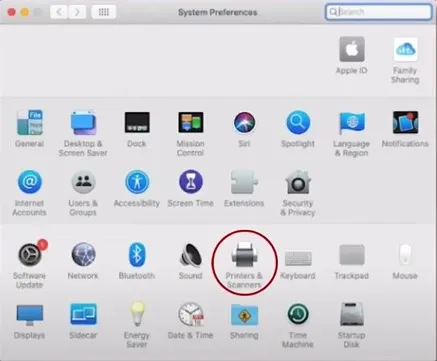
3. Once the printer and scanner page comes on the screen, select the plush (+) sign from the lower left side of the screen.
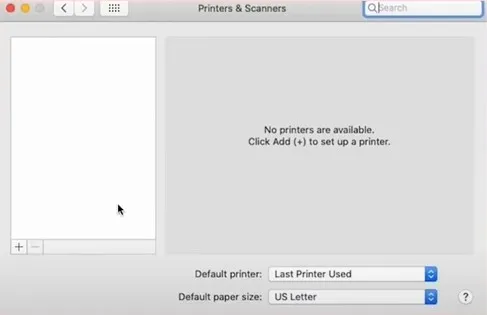
4. If your printer is connected to the same network as the computer, it should be listed here.
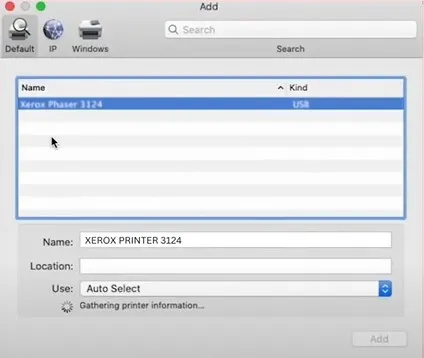
5. Now, choose your printer name from the list and click on Add.
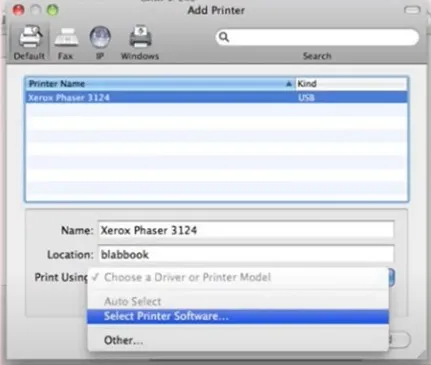
6. The setup process will take a couple of seconds; once done, the printer should be listed in the Printers and Scanners window.
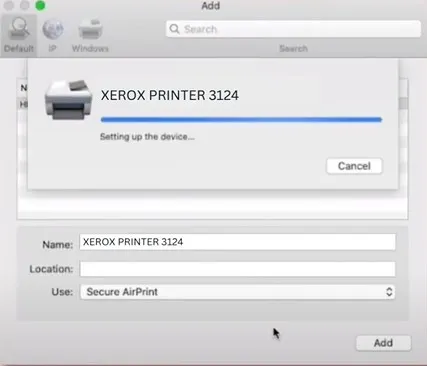
7. Here you go; the printer is ready to use for your printing purposes.
Conclusion
Here, we have shared the two proven methods to connect a Xerox printer to a Mac device. We hope these methods are successful in connecting your printer. However, you can also seek additional help and resources if any problem appears during the procedure. By doing that, you can get instant solutions and complete the machine setup in no time.

