How to Connect Brother Printer to Wi-Fi Without Cable?

Brother printers easily connect to Wi-Fi routers when you follow the correct setup instructions. If you are setting up a brand-new Brother printer wirelessly, there are different methods available. Some require using a USB cable to complete the connection, while others do not. If you prefer to connect without a cable, learning the right method will help. The guide below explains the steps to set up your printer.
Steps to Connect a Brother Printer to Wi-Fi
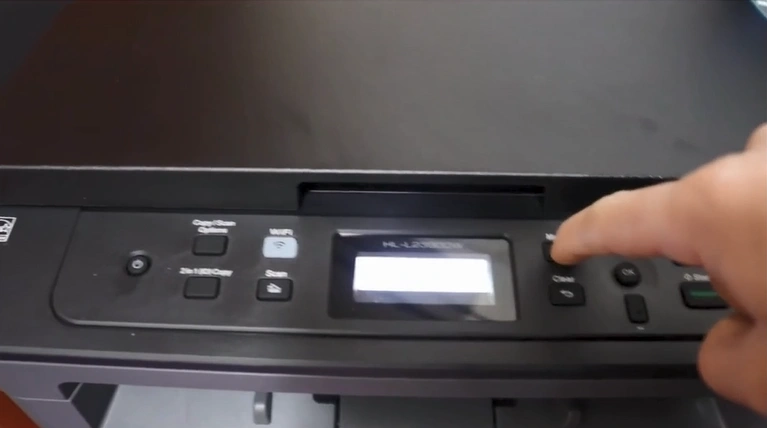
1. Go to the printer’s display panel and click on the Menu option.
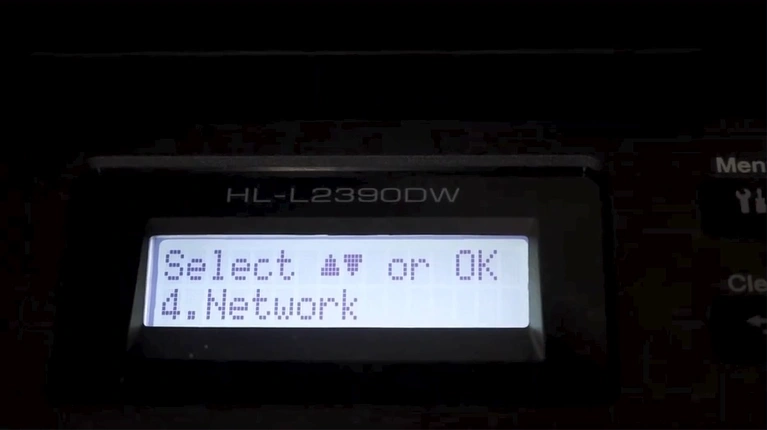
2. Scroll and open Network.
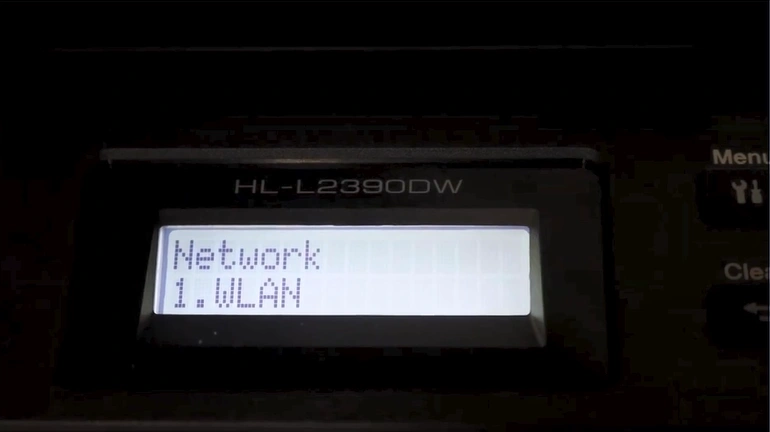
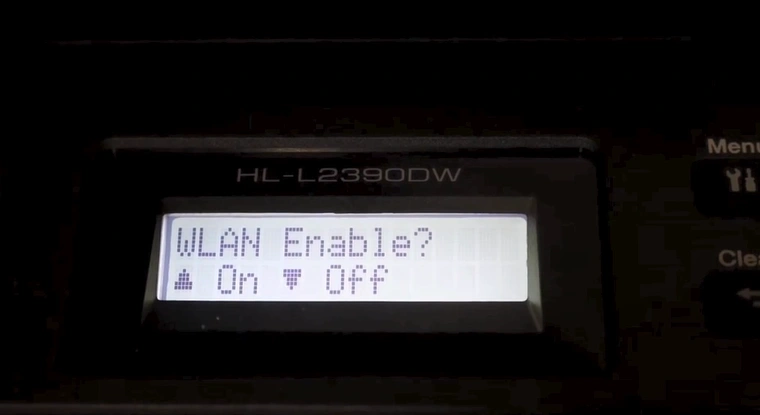
3. Then, select WLAN.
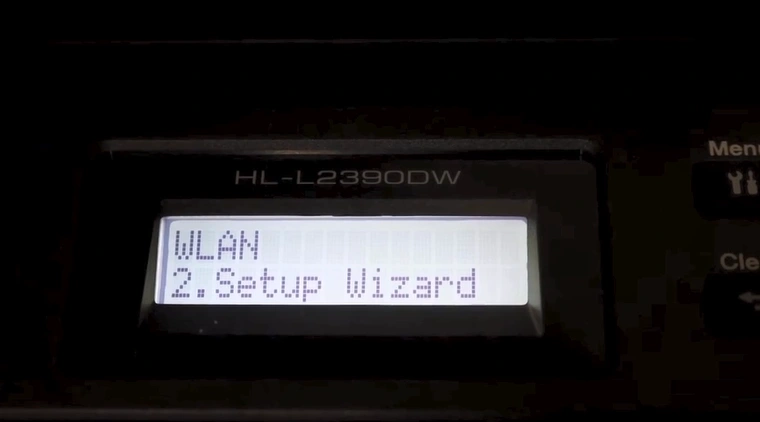
4. After selecting WLAN, choose Setup Wizard.
5. Now, press the upward arrow to turn on WLAN.
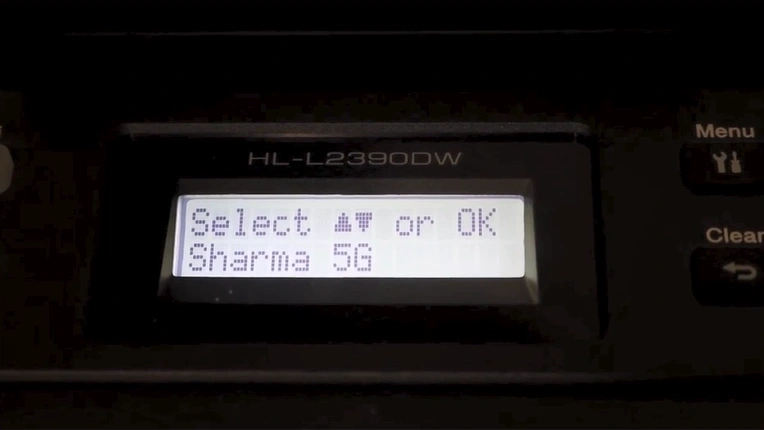
6. Wait for the printer to search for the SSID.
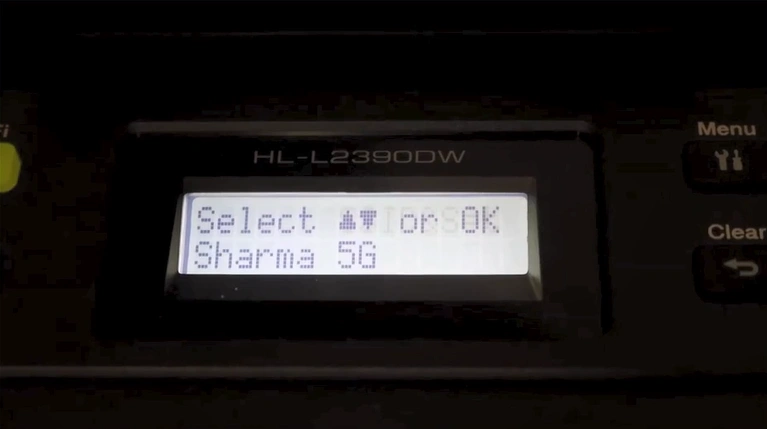
7. Scroll and select your Wi-Fi router.
8. Enter the Wi-Fi password.
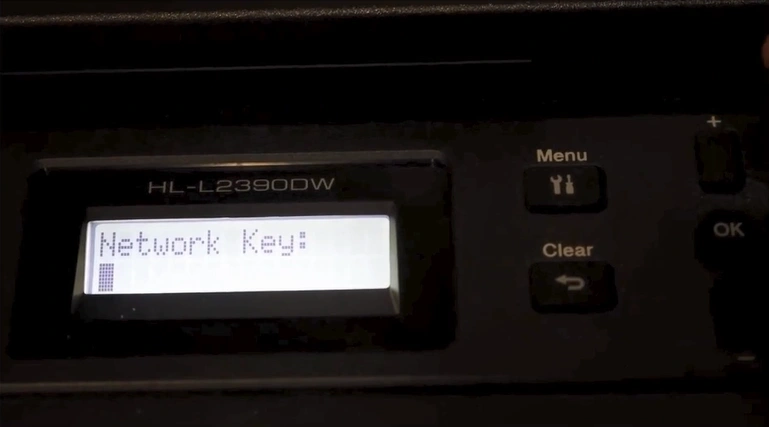
9. After entering the password, click on OK.

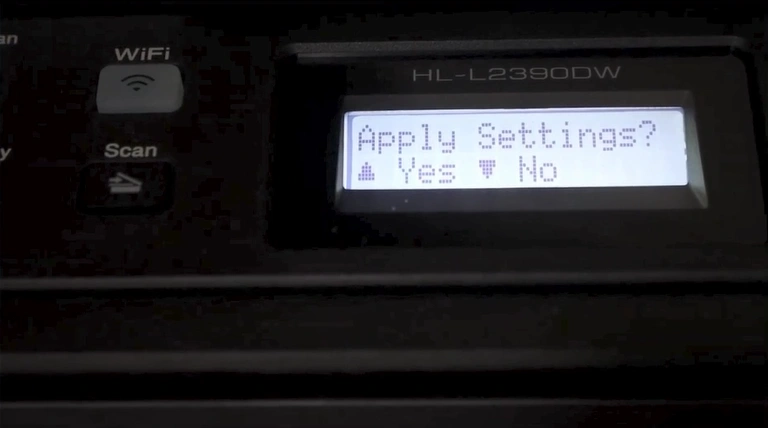
10. Press the upward arrow to confirm the settings.
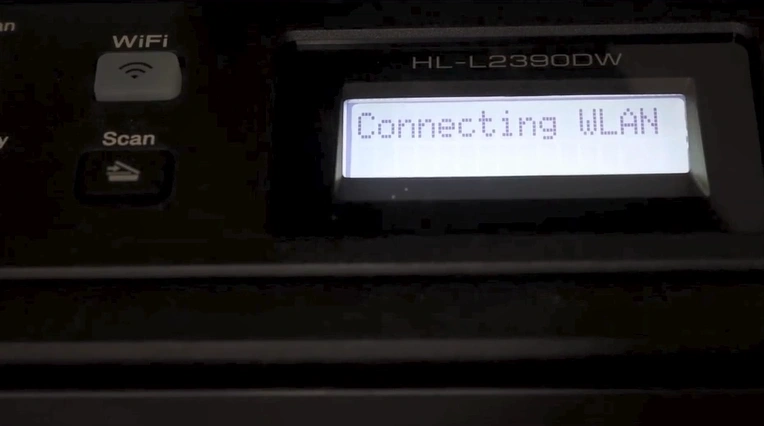
11. Wait for the WLAN connection to finish.
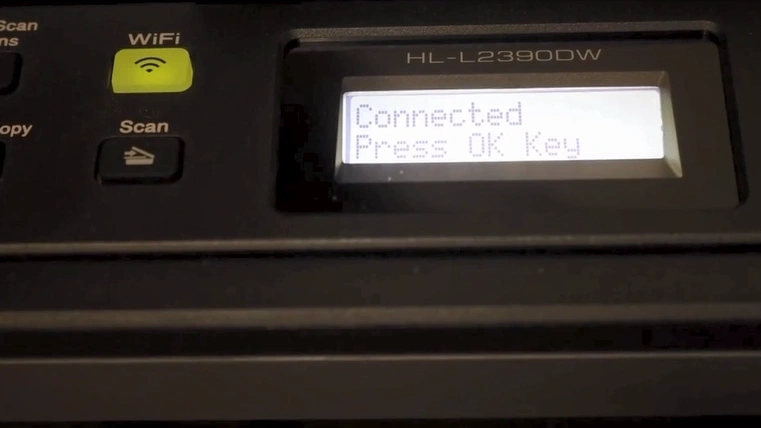
12. Once successfully connected, press the OK button.
Follow these steps carefully to complete your Brother printer setup and start using it. You also need to ensure that your printer is within the range of a Wi-Fi router and follow other requirements to avoid facing any issues.
Related Article

