How we Connect Brother DCP-L2550DW Printer to Wi-Fi?
Wireless printing can be very convenient and useful. You can print from any computer and eliminate restrictions on the same operating system, computing system, or location. In the printer industry, Brother printers are easy to connect to Wi-Fi. Brother printers make it a simple process for the user with the help of their easy wireless printing options. Moreover, with the help of the Brother printer, you can scan, print, or copy from any corner of your office or home.
Are you trying to connect Brother DCP-L2550DW printer to Wi-Fi but facing some challenges in the process? Let's delve into this write-up and learn how to connect Brother DCP-L2550DW printer to Wi-Fi. Continue reading!
Why Brother DCP-L2550DW Printer is not Connecting to Wi-Fi?
There are several reasons the Brother DCP-L2550DW printer is not connecting to Wi-Fi. These reasons are
- Wi-Fi network settings are incorrect
- The Wi-Fi signal is weak
- Outdated firmware or drivers
Methods to Connect Brother DCP-L2550DW Printer to Wi-Fi
Now that you know the reasons for the Brother DCP-L2550DW printer not connecting to Wi-Fi, it's time to delve into the connecting process. We have mentioned the methods below through which you can connect your printer to Wi-Fi.
Method 1: Wi-Fi Direct
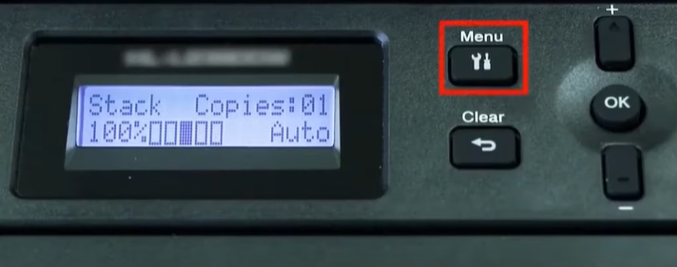
Step 1: Press the menu button on the printer's control panel.
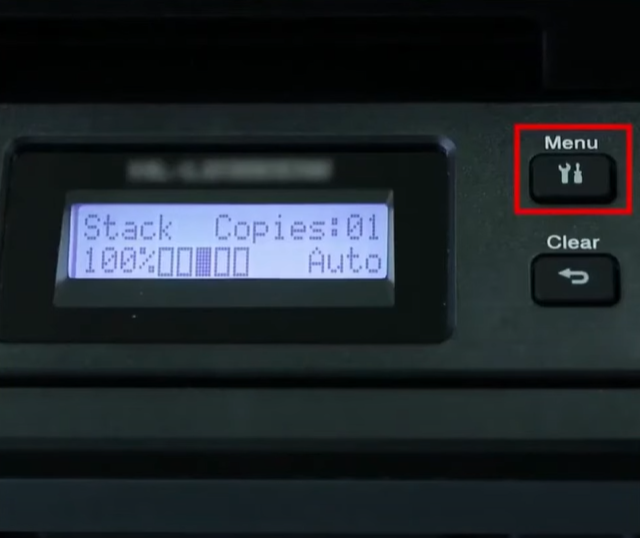
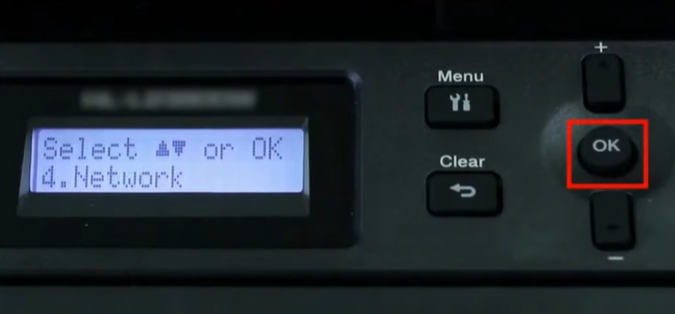
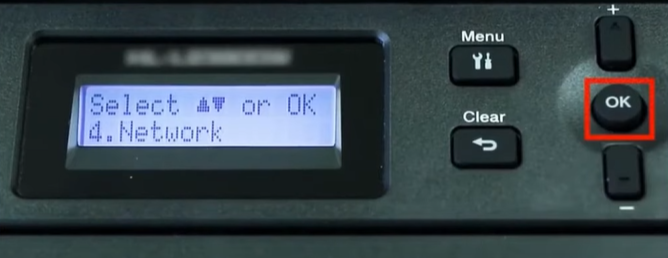
Step 2: Press the down arrow button until you reach the network option, and press OK.
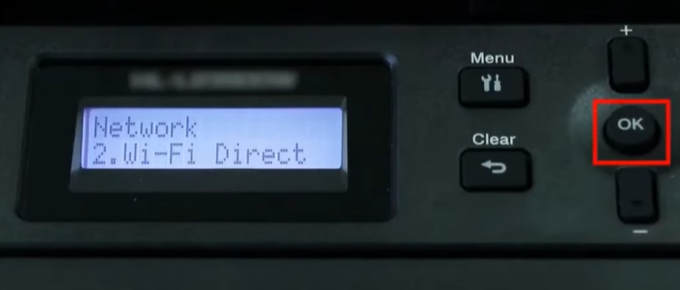
Step 3: Using the down arrow again, select Wi-Fi Direct and press OK.
Step 4: Next, select manual and press OK.
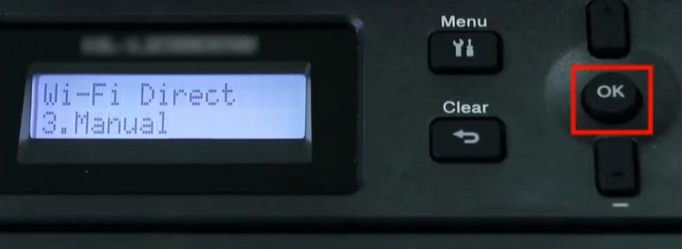
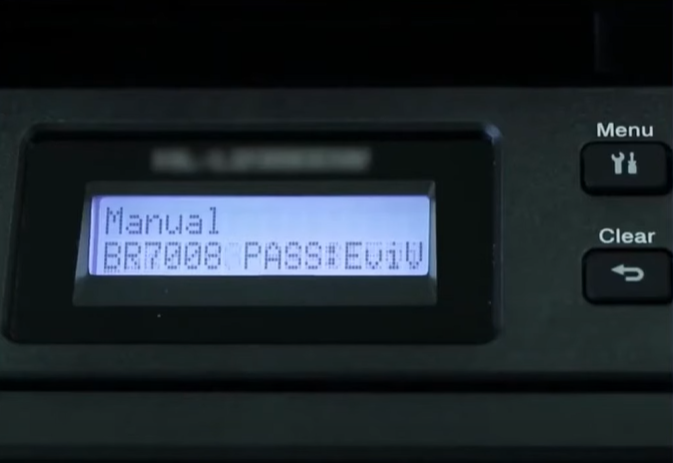
Step 5: The network name and Wi-Fi direct password will display for two minutes on your printer.
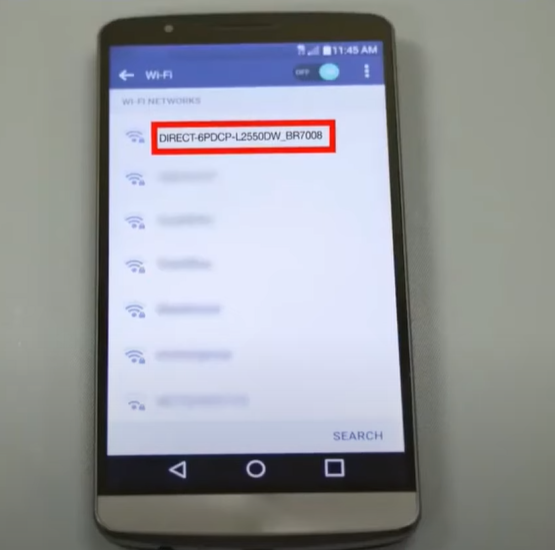
Step 6: On your mobile device, go to Wi-Fi settings, and under Wi-Fi networks, select the network name starting with direct.
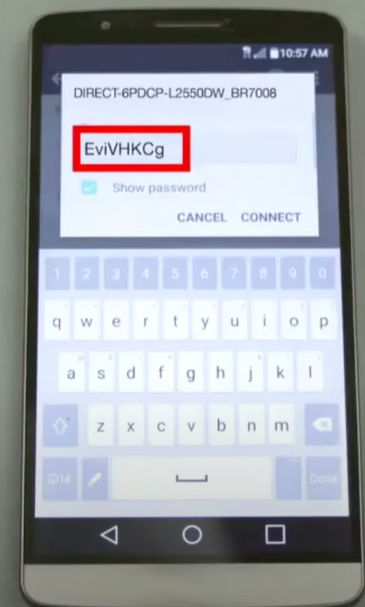
Step 7: Enter your Wi-Fi direct password and click on connect.
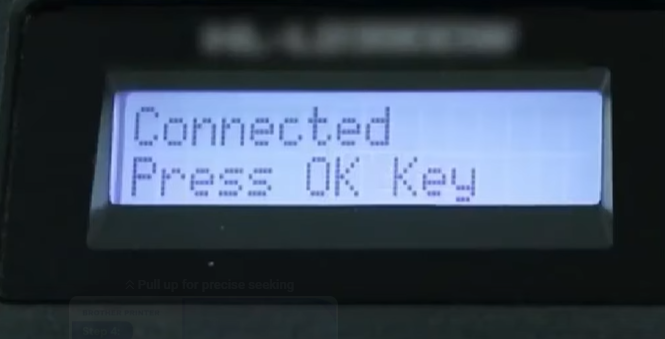
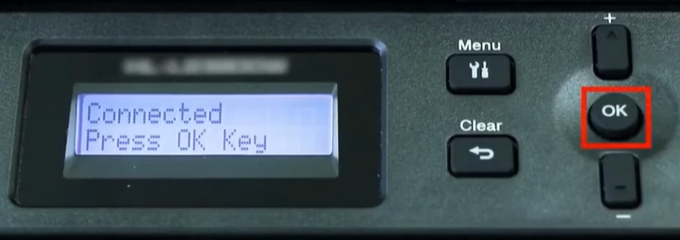
Step 8: Once the connection is successful, you will get a connected message on the printer screen, press OK to exit.
Method 2: Using The Control Panel of The Printer
Step 1: Press the menu button on your printer's control panel.
Step 2: Using the down key, go to the network option and press OK.
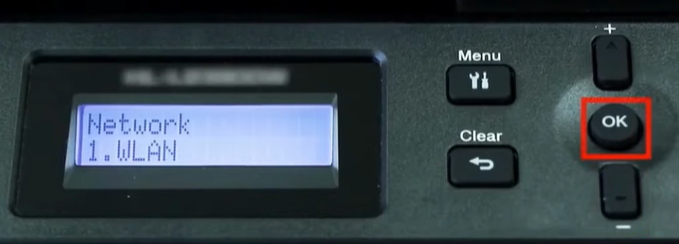
Step 3: Next, select WLAN and press OK.
Step 4: Using the down key, go to the setup wizard and press OK.
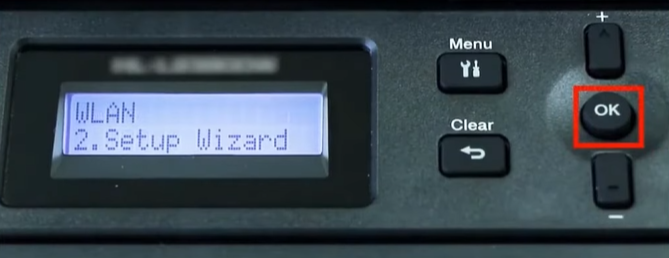
Step 5: Your printer will search for the SSID/network name.

Step 6: Use the up and down arrow keys to select your SSID/network name, and press OK.
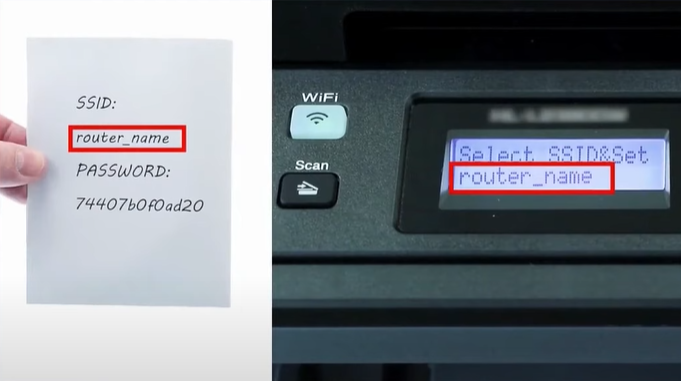
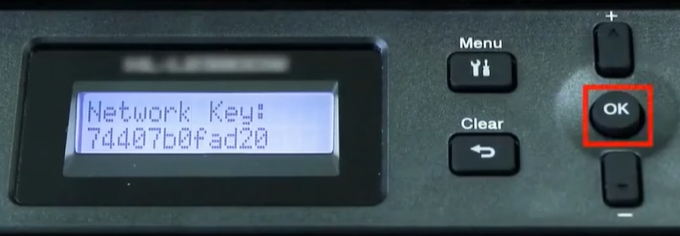
Step 7: Using the arrow keys, enter your network key and press OK.
Step 8: When prompted, press the up arrow button to apply settings.
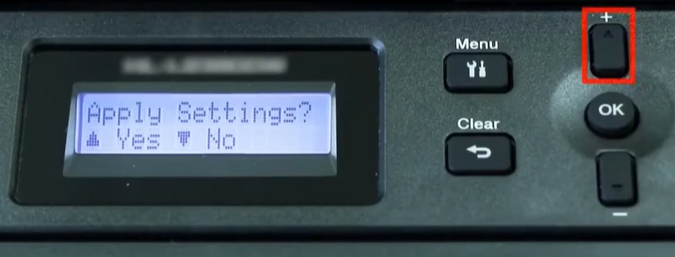
Step 9: Wait for the printer to connect to your router.

Step 10: Once the WLAN connection is successful, you will see a connected message on the printer screen. Press OK.
Conclusion
Having a Brother printer connected to Wi-Fi makes it easy for the user to print documents anywhere, anytime, from any device. Moreover, it is also a simple process to connect your Brother printer to Wi-Fi. Hopefully, with the help of the above steps, you were able to connect Brother DCP-L2550DW printer to Wi-Fi.
If not, and you are still having issues connecting your printer to Wi-Fi, you must get help from a professional printer expert.

