How to Connect Dell Printer to Wi-Fi?

Before starting to use your Dell printer, it is necessary to complete the connection process to a network or Wi-Fi. Dell printers come with both wired and wireless connectivity options, and the process is a piece of cake for those who already know the process. However, for some users, it could be challenging as they can face some issues. Worry not if you are also not sure about the connection process; we have got your back. The following write-up consists of the 3 easy-to-follow guides to establish the connection between Dell and the Wi-Fi network effortlessly. Let's begin learning about these methods!
Method 1: Connect Dell Printer to Wi-Fi Via Control Panel
You can connect your Dell printer to Wi-Fi using the control panel. These are the steps you need to follow for that.
1. Firstly, turn on your printer device and then select Systems.
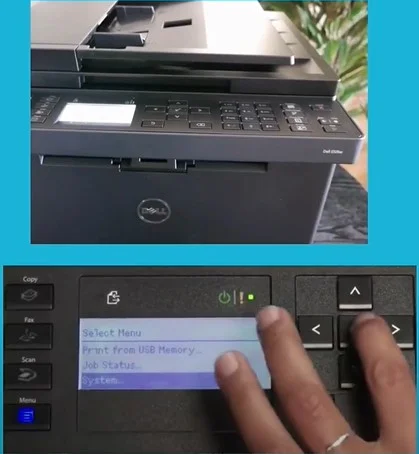
2. Then, you are required to choose the Admin Menu option.
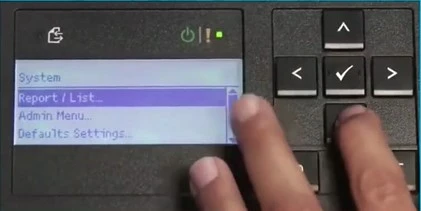
3. After that, locate the Network option.
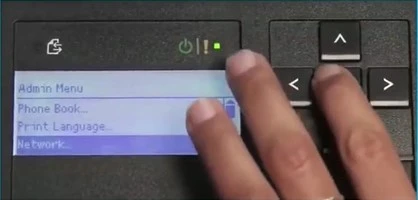
4. Next, select the wireless setup Wizard option.
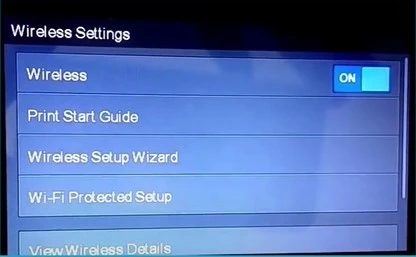
5. Now, from the list of wireless networks, choose your network name.
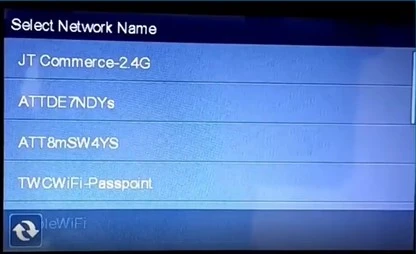
6. Once you select your correct network name, you need to enter the security key and tap on the OK option.

7. After that, a confirmation will show up on the screen.
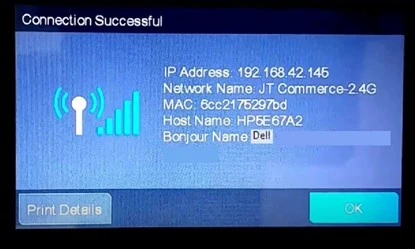
8. Now, you can try to perform a print document to see if the Dell printer is working properly.
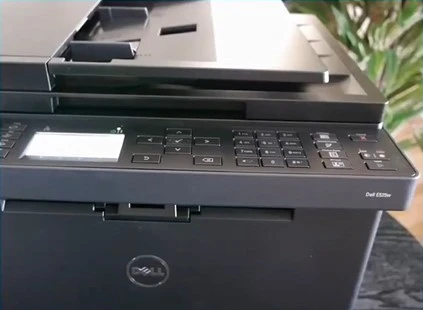
Method 2: Connect Dell Printer To Wi-Fi Via WPS
You can also use the WPS method to connect your Dell printer to Wi-Fi. Complete the process by following the below procedure.
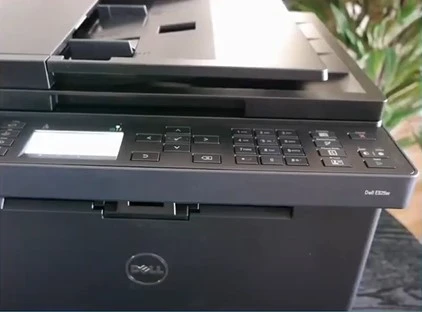
1. First and foremost, turn on your Dell printer.
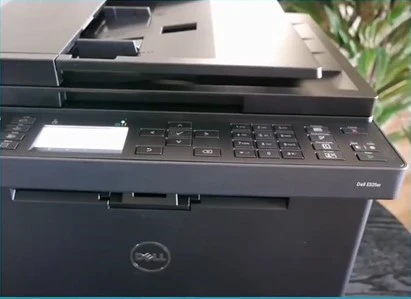
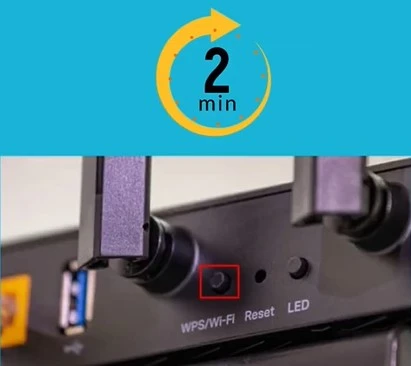
2. After that, press and hold the WPS button until the WPS message appears on the screen.

3. Now, press and hold your WPS button on the router within 2 minutes.
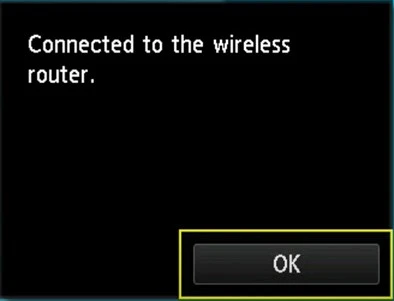
4. Wait for the successful connection message to appear on the screen.
5. Print a test copy to confirm the connection process is complete.
6. If not, then move to the next method.
Method 3: Using a Wi-Fi Connection To Connect Dell Printer Wirelessly
Follow-up steps will help you connect your Dell printer to Wi-Fi wirelessly.
1. Initially, you need to connect your computer device to a computer network.
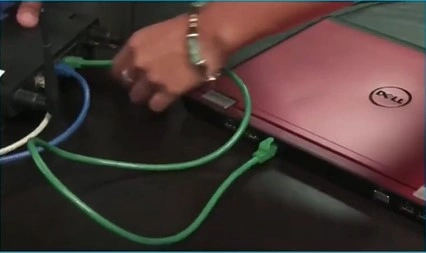
2. After that, connect the Dell printer to the same internet network.
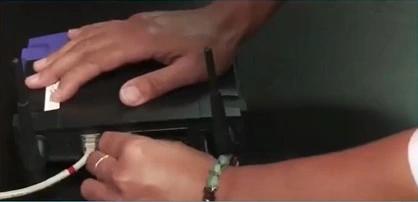
3. To do this, press and hold the Wi-Fi key on the printer.

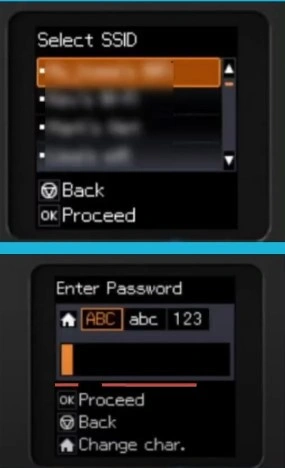
4. Next, select the SSID name, enter the password, and press the OK button.
Also Read:- How To Connect A Dell Printer To WiFi For Wireless Printing?
5. Now, you need to add your printer to the computer.

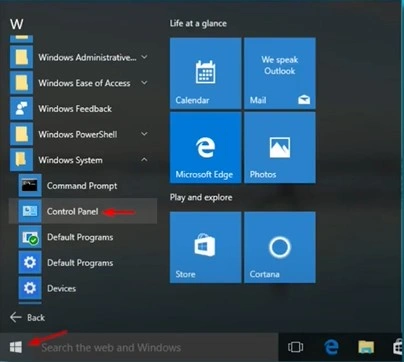
6. To do so, you are required to navigate to the Control Panel of your computer device by clicking on the Start menu.
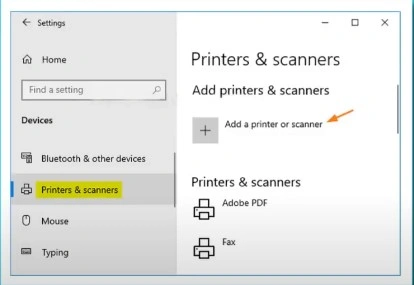
7. Go to Devices and Printers and choose Printers & Scanners.
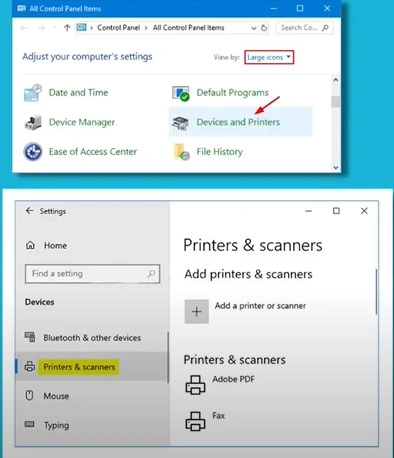
8. Now, from the right panel, click on Add a printer or scanner option.
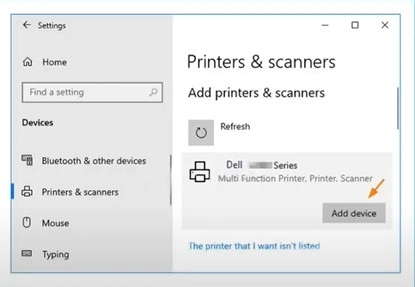
9. Moreover, you need to locate your printer from the list and click on the Add Device option.
10. At last, print a test page to check if the Dell printer connection process is complete or not.
Conclusion
A plethora of reasons can contribute to having issues with your Dell printer's Wi-Fi setup. Some key causes could be the printer not being in connection range, firewall protection, outdated driver, following the wrong procedure, and many more. To avoid facing any shorts of problems, use our simple methods one by one to check which one is successful in establishing the connection. It is also prudent to reach out for further help if you are having a problem connecting the Dell printer to your desired Wi-Fi.

