How to Fix 'HP Officejet Pro 6968 Not Printing' Issue?
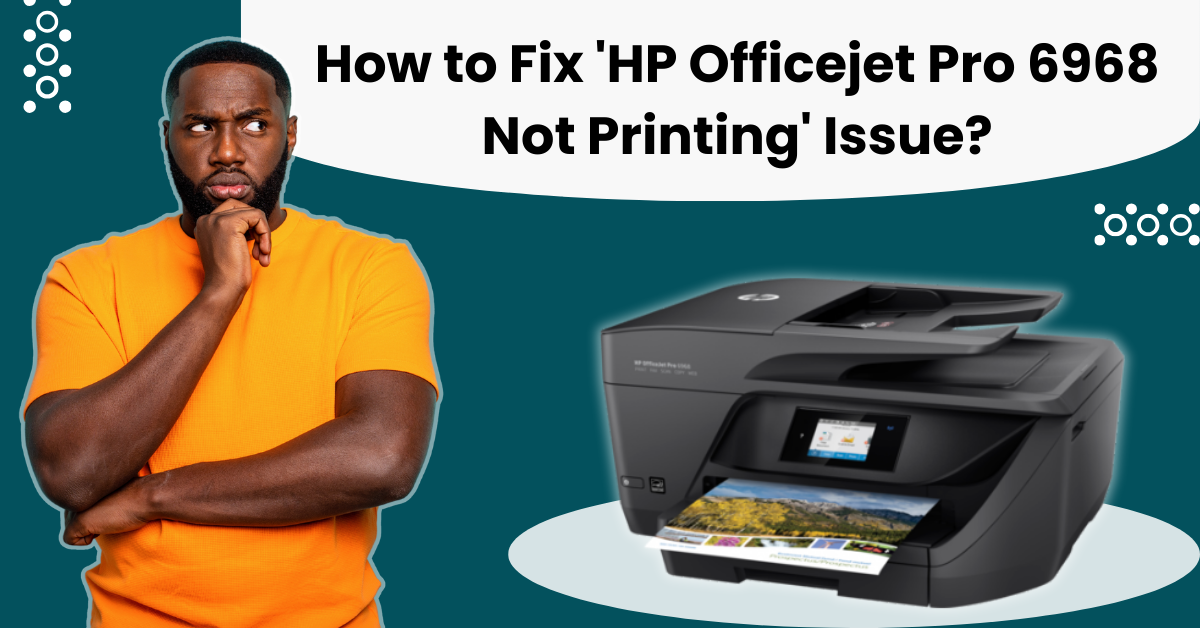
The HP Officejet Pro 6968 is a compact printer that can fax as well. The printer is equipped with two-sided duplex printing, so you get a fast printing experience. The compact printer is designed to combat personal and official printing needs. Also, the printer's capability to save paper made it a household favorite.
While the printer is known for its printing capabilities, some users have also faced the printing not printing issue. Is your HP Officeject Pro 6968 not printing? Find a detailed guide on steps to solve the issue. However, let's first look at what may cause the issue for better understanding.
What Can Be The Reasons For The 'HP Officejet Pro 6968 Not Printing' Issue?
There may be certain problems that may occur with your HP Officejet Pro 6968 with time. Here are some potential reasons that lead to this problem:
Printer Queue
HP printers let the users queue tasks. If the user has loads of jobs in their print queue and the printer is overwhelmed, it won't produce any print.
Software Issues
HP printer drivers generally result in issues for the user. The issues can be due to improperly installed or outdated printer drivers. Whether connected or not, the printer will not print if there is a shortage of paper or ink.
Improperly Connected Device
Regardless of the right software setup, there can be problems with your printer. Your HP printer might cause printing errors even if the USB port or cable you removed from the drawer seems to be in position.
How To Troubleshoot The 'HP Officejet Pro 6968 Not Printing' Error?
When your HP Officejet Pro 6968 is not printing, it is time to explore the right troubleshooting methods to fix the issue. A few of them are explained below:
Method 1: Clean Print Head
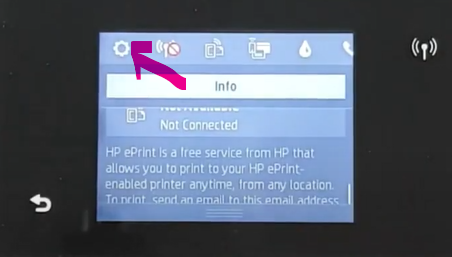
- Step 1: Scroll down the top bar and click on Settings.
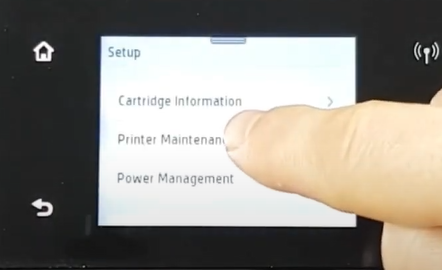
- Step 2: Next, select Printer Maintenance and then Clean Printhead
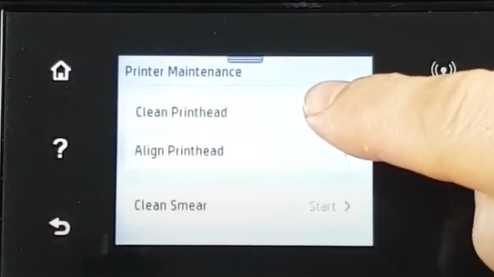
- Step 3: Click on Continue to proceed with the printhead cleaning process
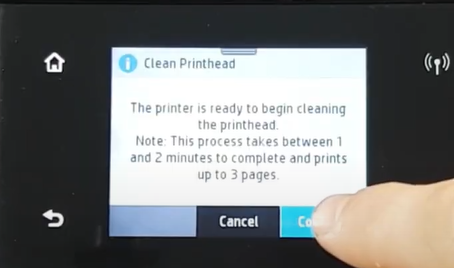
- Step 4: The printer will print a page automatically
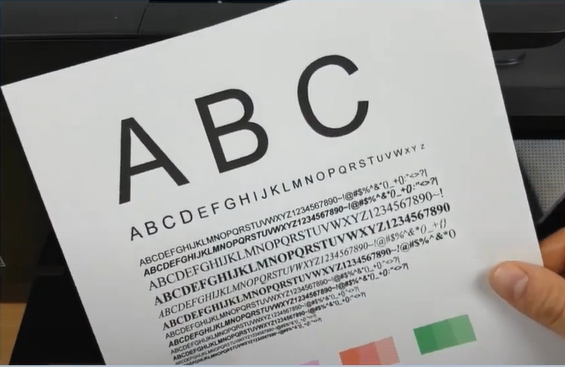
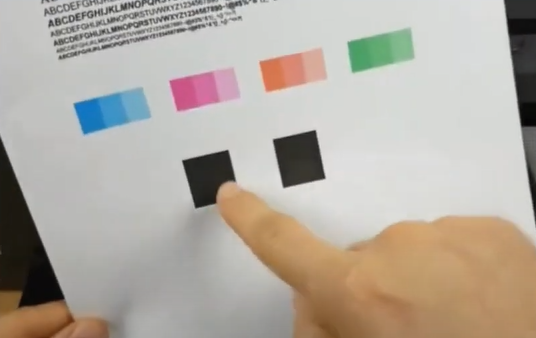
- Step 5: Check the printed test page, then click on Clean Again or Done, depending on the print quality.
Method 2: Hard Reset The Printer, Router & Computer
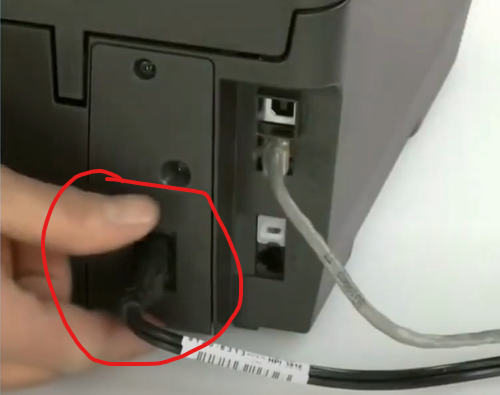
- Step 1: Turn off the printer and disconnect the power cable from the printer.
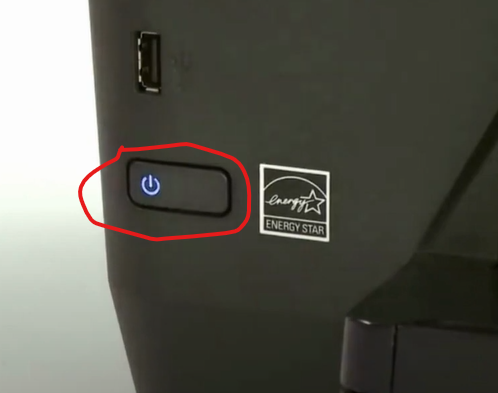
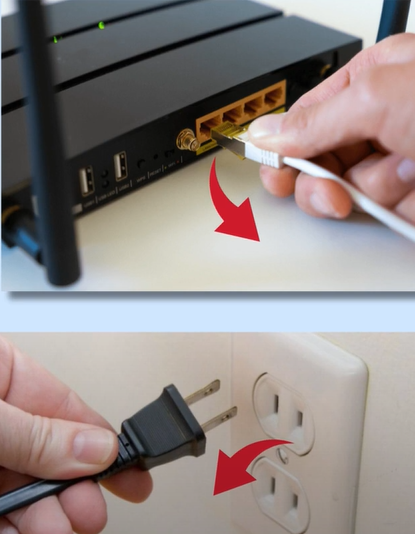
- Step 2: Disconnect the router from the power source
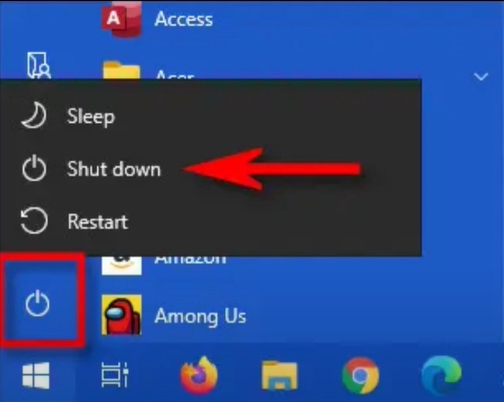
- Step 3: Next, turn off the computer.
- Step 4: Wait for 30 seconds.
- Step 5: Reconnect the router to the power source and wait till it is ready
- Step 6: Turn the computer back on.
- Step 7: Now, reconnect the power cord to the printer and turn it back on.
Method 3: Clean and Install The Printer Driver
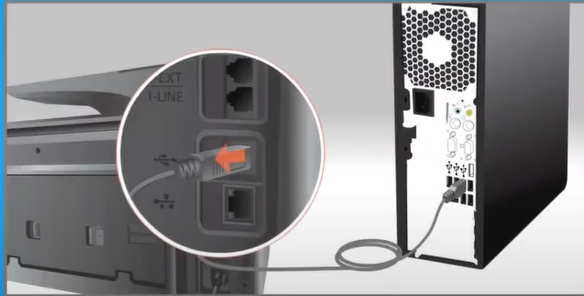
- Step 1: If your printer is connected to the computer with a USB cable, disconnect it.
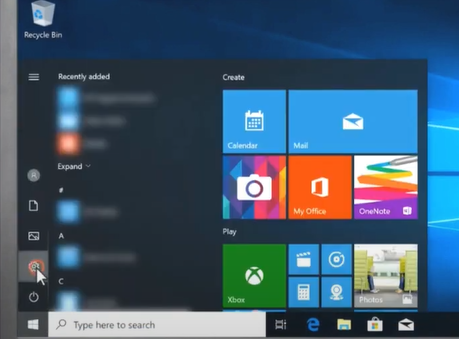
- Step 2: On your computer, click the Windows start button and select Settings.
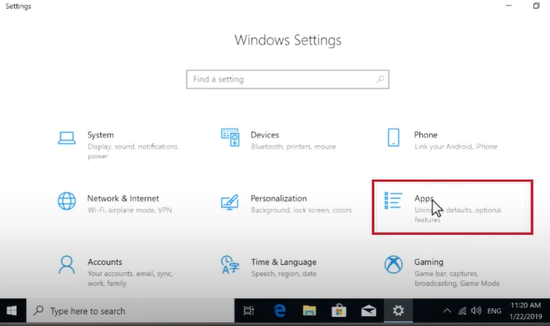
- Step 3: On the settings window, select Apps.
- Step 4: From the list of installed apps, locate and select your HP driver.
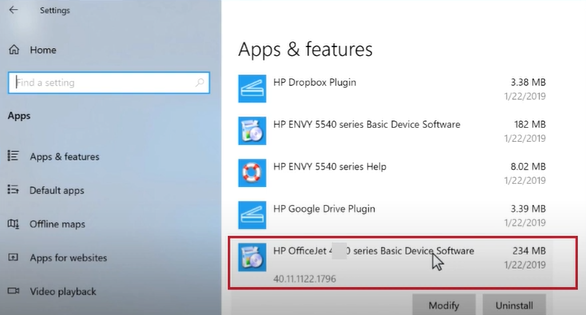
- Step 5: Next, click on Uninstall and then Uninstall again to proceed.
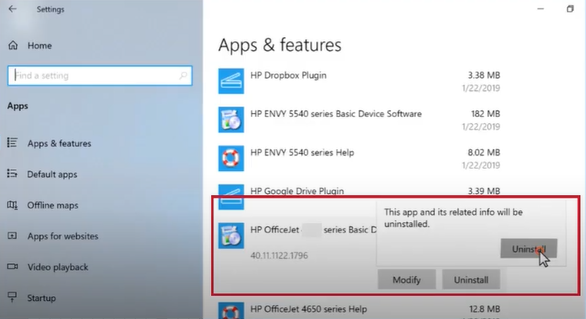
- Step 6: If prompted, select Yes to confirm the removal process.
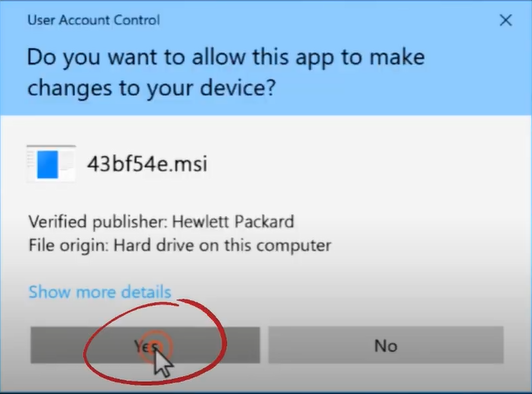
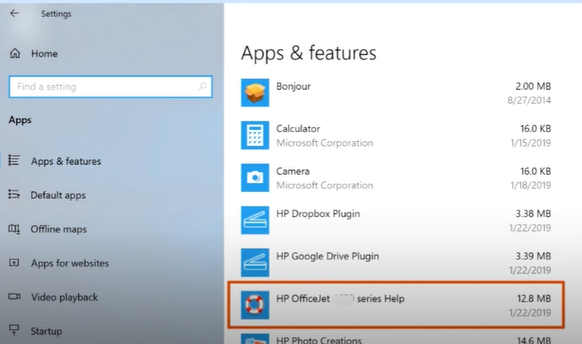
- Step 7: Return to the Apps & Features list and repeat the process for any other entries with your printer name.
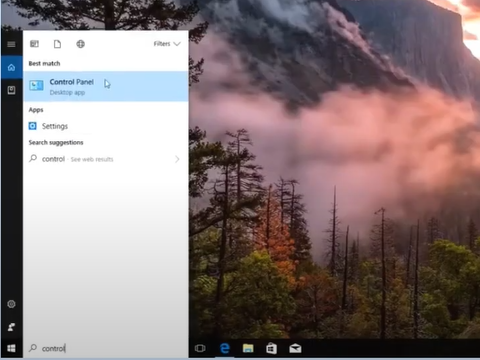
- Step 8: Close the window, click on the Window start button, and search the Control Panel.
- Step 9: Open the Control Panel, set the View By to large icons, and click on Devices and Printers.
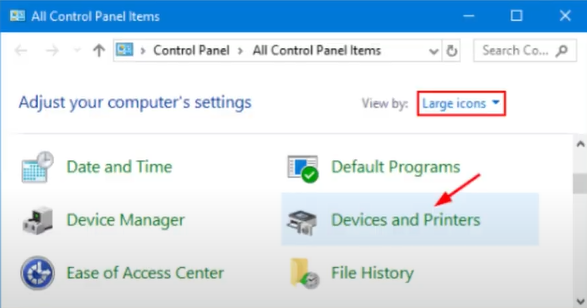
- Step 10: Look for your printer; if it is listed, right-click and select Remove Device.
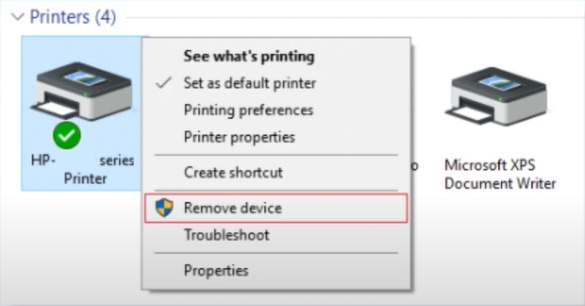
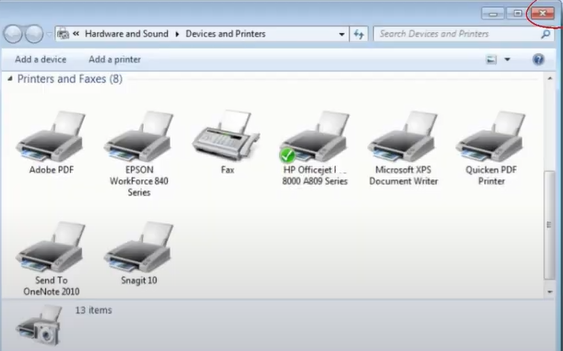
- Step 11: Once done, close the window
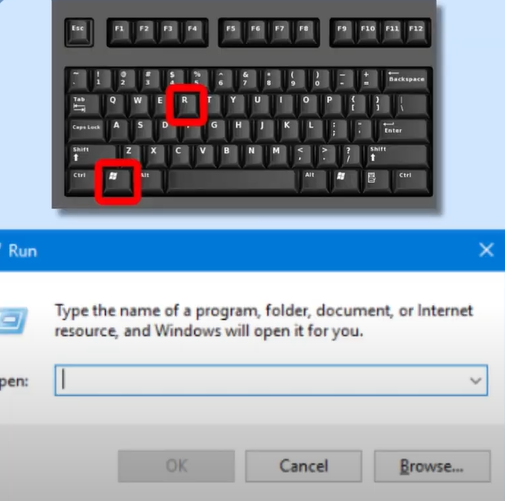
- Step 12: Now, hold down the Windows + R Keys together at the same time to open the Run dialog box.
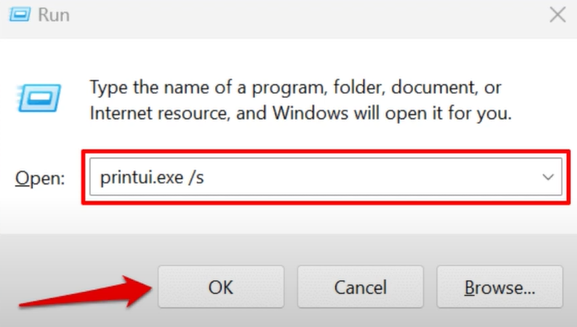
- Step 13: Type printui.exe/s in the field and click OK.
- Step 14: Go to the Drivers tab and look for the HP printer driver.
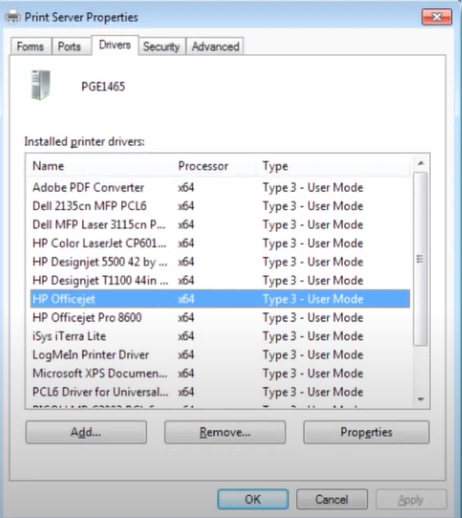
- Step 15: If you find the HP printer driver, select it and click on the Remove button.
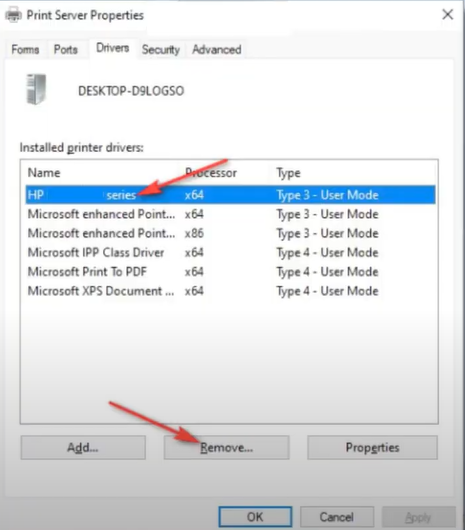
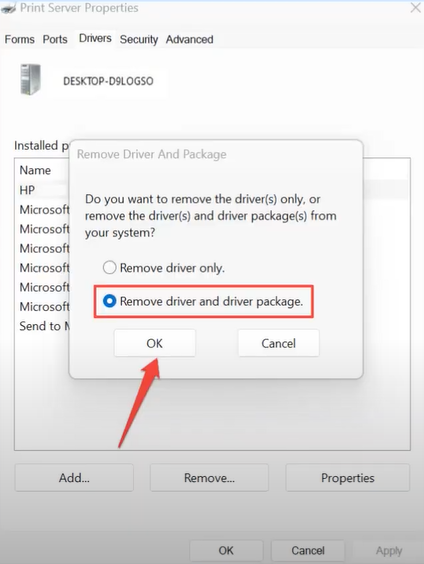
- Step 16: Choose Remove Driver and Package and click OK.
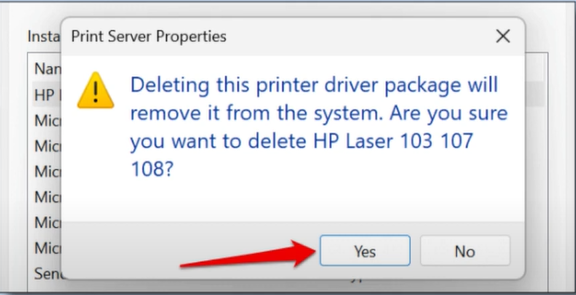
- Step 17: Select Yes on the pop-up to confirm.
- Step 18: Click OK and Apply on the Print Server Properties Window.
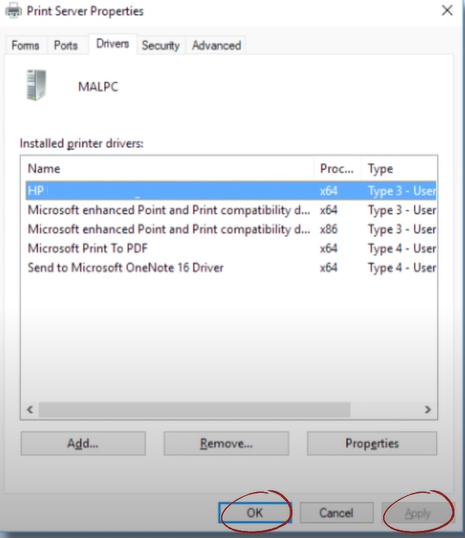
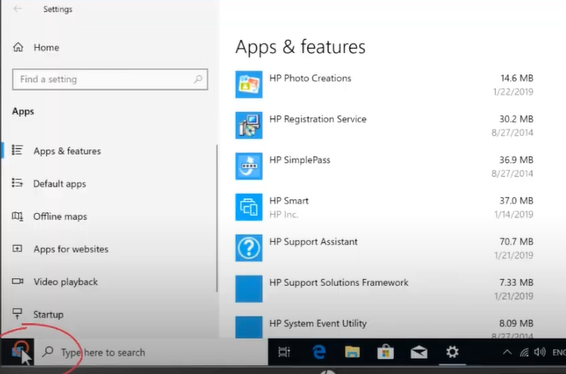
- Step 19: Now, close the window and click the Windows start button.
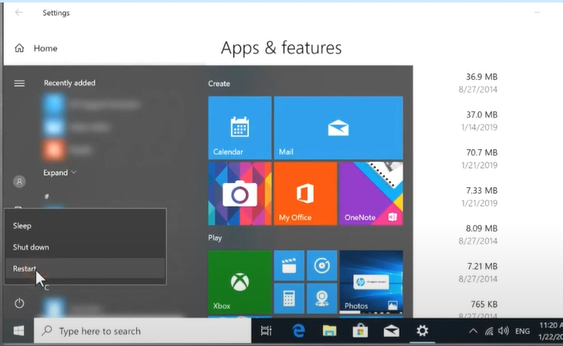
- Step 20: Click on the power button and select Restart.
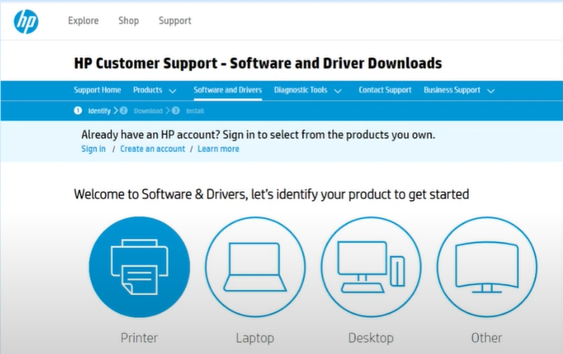
- Step 21: Once the Restart is complete, go to the official HP website, then download and install the latest driver for your printer.
Method 4: Check Ink Level & Replace Empty Ink Cartridges
- Step 1: Scroll down the top bar from the printer display screen.
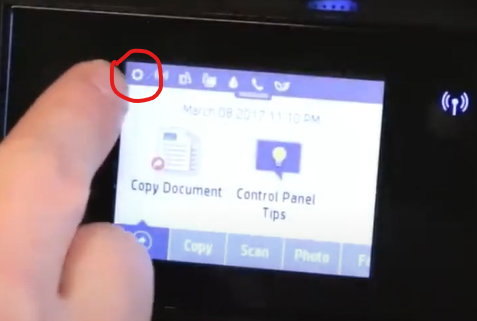
- Step 2: Press the Settings icon and go to Cartridge Information.
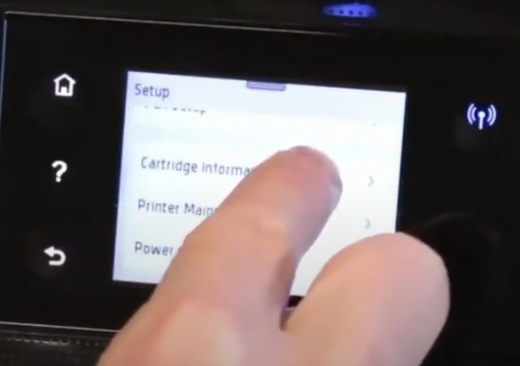
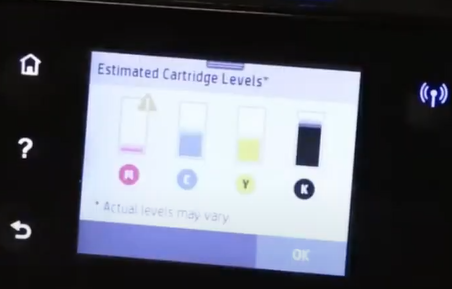
- Step 3: This will display the Estimated Cartridge Levels; check and see if the cartridges require replacement.
- Step 4: Now, lift the scanner unit and wait for the cartridge to come to the center.
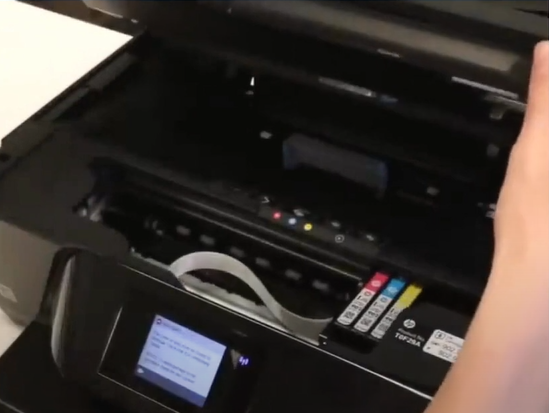
- Step 5: Take out the ink cartridge/s that require replacement.
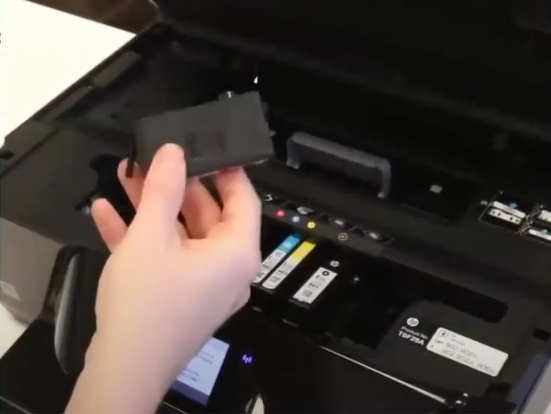
- Step 6: Take the new ink cartridge and remove the orange clip and the protective tape.
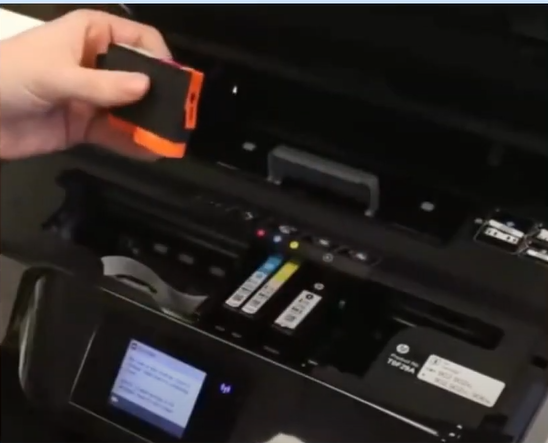
- Step 7: Install the ink cartridge into its slot and gently press down until you hear a click.
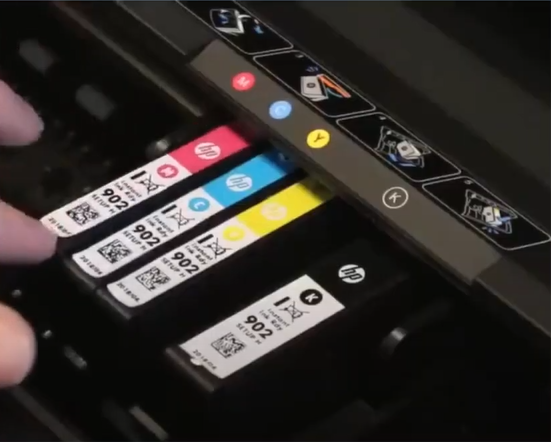
- Step 8: Now, close the machine and wait for it to load.
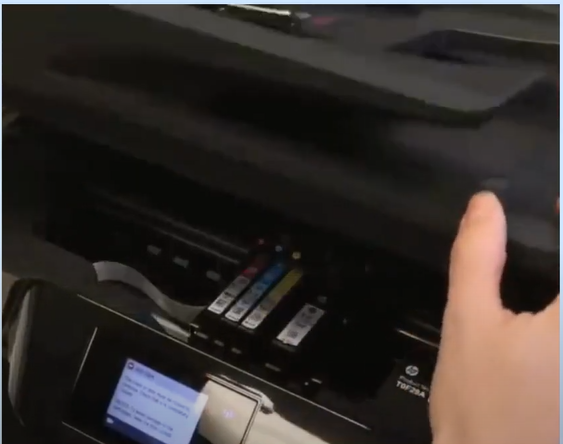
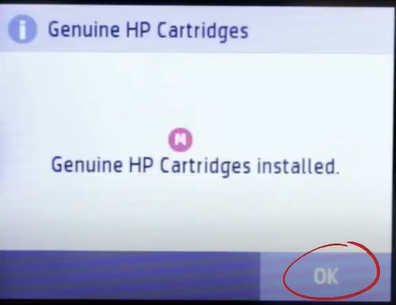
- Step 9: You should get a message once it is done loading; press OK.
Conclusion
Not getting the right prints from your HP Officejet Pro 6968 can be frustrating. This is especially for users with loads of printing work and urgent deadlines. But, with all these solutions mentioned above, you can easily fix the 'HP Officejet Pro 6968 not printing' issue.
Try these methods to have your HP Officejet Pro 6968 back in form. If you are still facing issues with your printer, reach out to Printer Tales for help. Our printer experts are here to help you 24 x 7. For more information, connect at US: + 1-877-468-0297, UK: + 44-800-54-81 50.

