HP OfficeJet Pro 9125e Wireless (WiFi) Setup

Despite having smart connectivity features, your HP OfficeJet Pro 9125e printer may encounter issues during setup. This issue can arise due to several reasons, including technical faults, device incompatibility, incorrect network settings, and others. As a result, it would be worthwhile to learn the procedure beforehand.
Once you understand the procedure properly, it becomes easy to perform the HP OfficeJet Pro 9125e wireless Setup. So, keep reading this tutorial until the end to fully understand the whole process.
Steps to Set Up HP OfficeJet Pro 9125e on WiFi
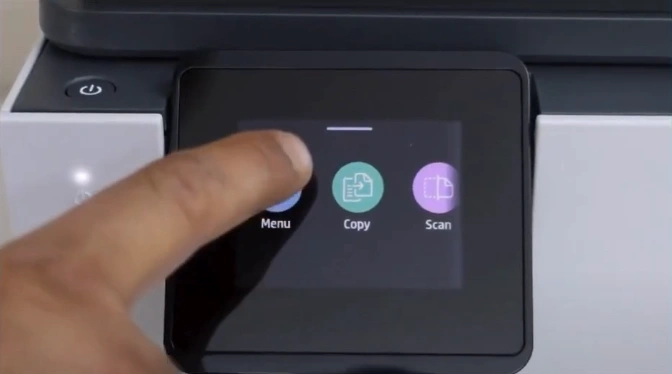
1. On your HP printer, tap on the Menu icon.
2. Scroll down to Settings, then tap on it.
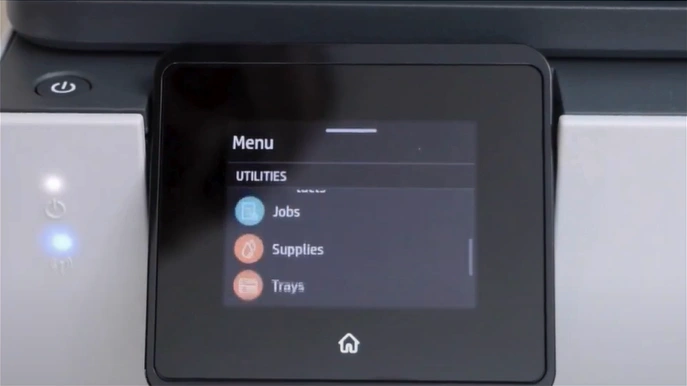
3. Then open the Network Settings.
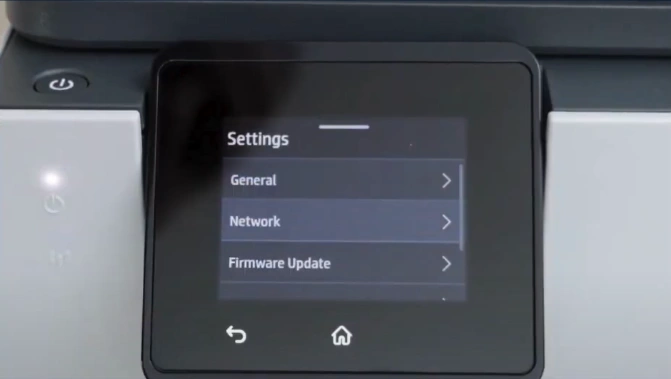
4. Select the Wi-Fi option.
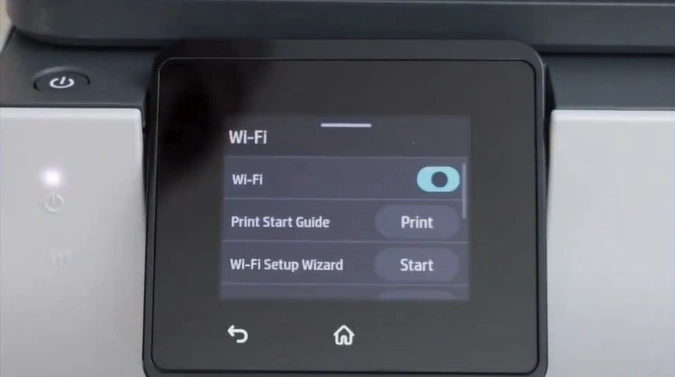
5. Find the Wi-Fi Setup Wizard option and tap on Start.

6. Wait for the printer to search for available Wi-Fi routers.
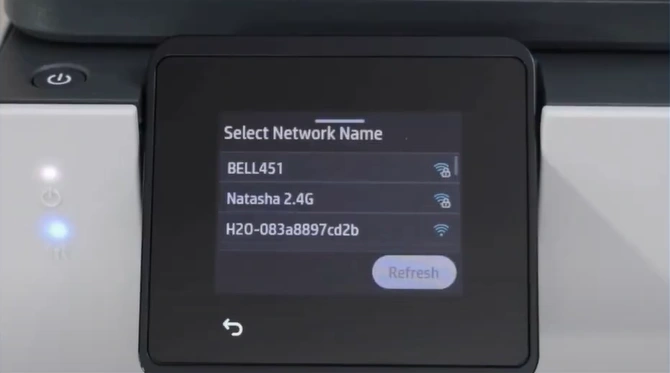
7. After the search, find and tap on your Wi-Fi name.
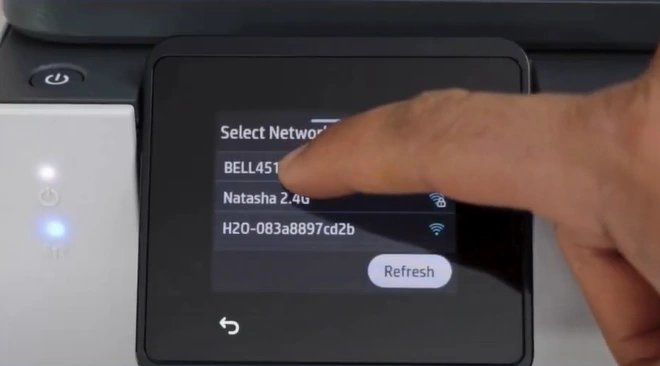
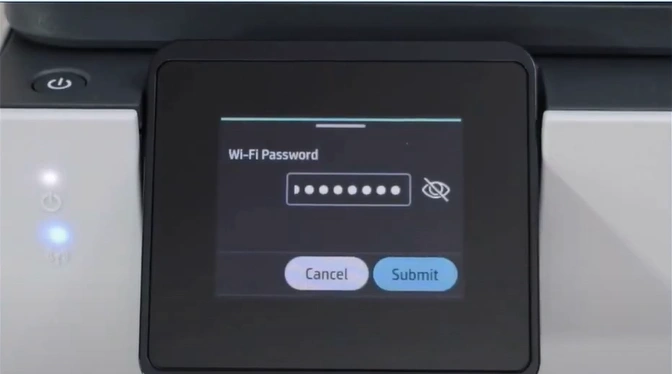
8. In the Wi-Fi Protected Setup, tap Next to enter the password.

9. Now, you should tap on the password field to enter the password.
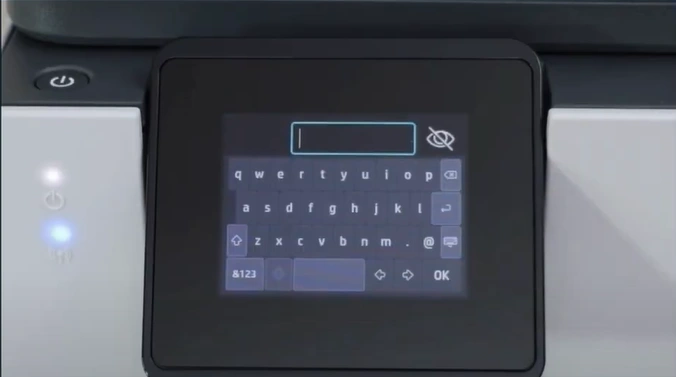
10. After entering the password, tap on the keypad button.
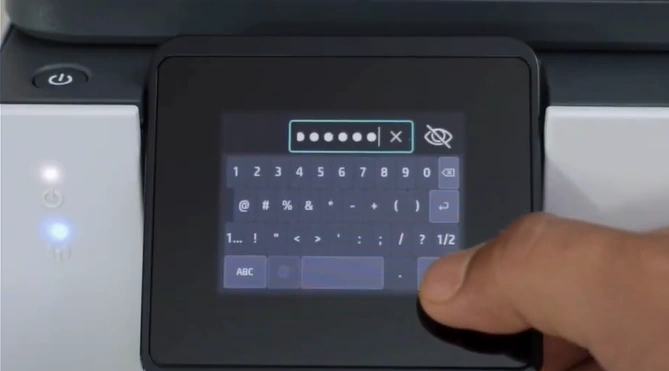
11. Next, tap on the Submit button.
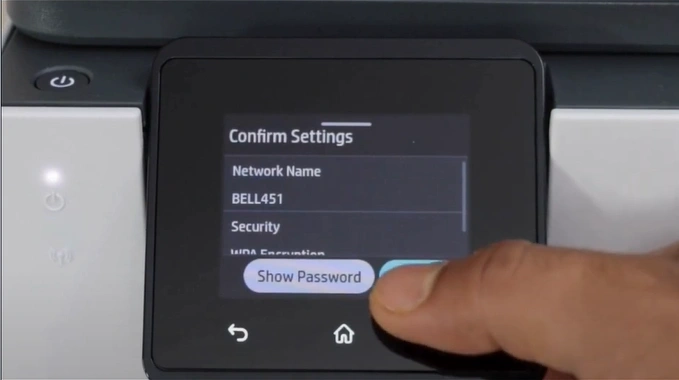
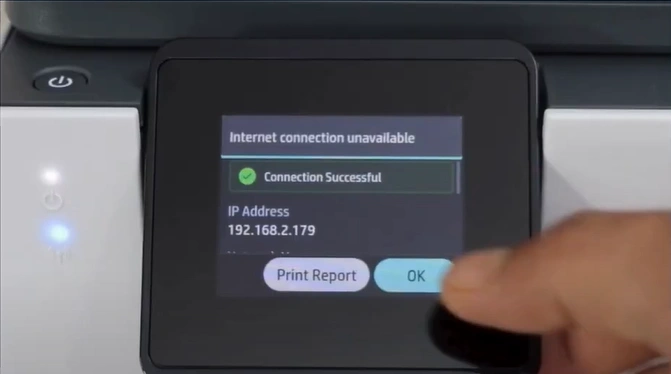
12. In the Confirm Settings page, tap OK.
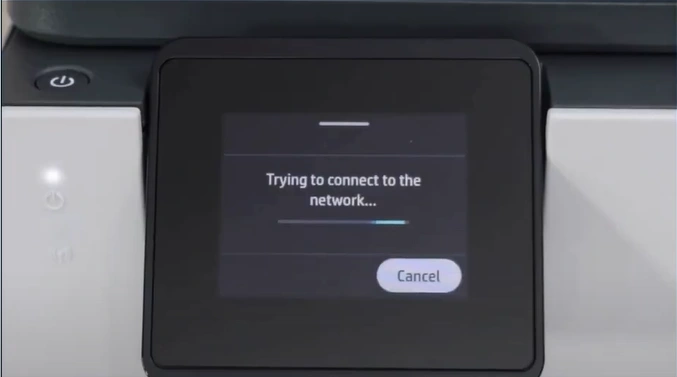
13. Now, wait for the printer to connect.
14. Once connected, it will show that the connection is successful.
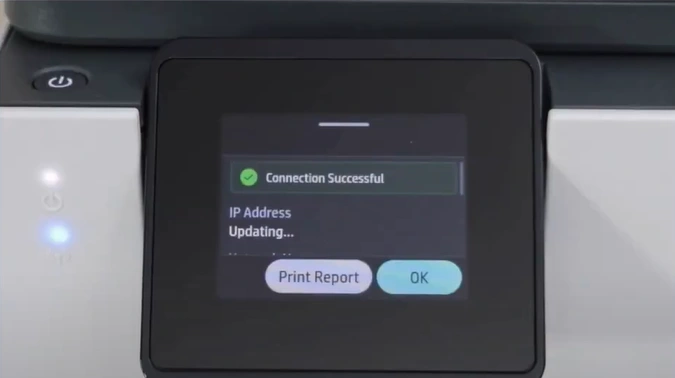
15. Tap OK, then press the Home button.
16. After that, you will see the Wi-Fi light flashing blue on the left side of the printer, which shows that it has been connected.
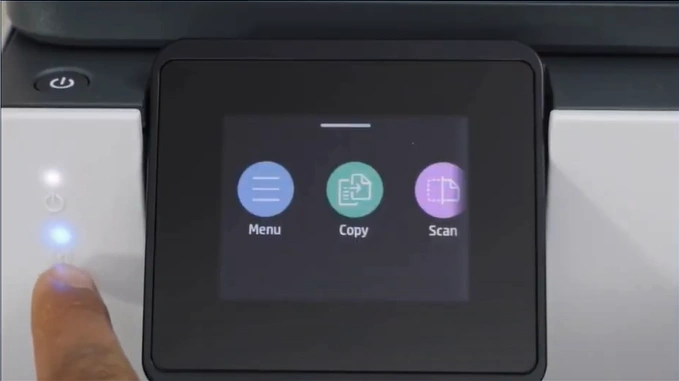
17. Finally, you can start using your printer.
Also Read:- How to Fix HP Officejet Pro 8600 Printer Failure Errorr?
Final Words
With these step-by-step instructions, you can complete the Wi-Fi setup of your HP OfficeJet Pro 9125e. After the successful connection, you can move on to setting up the machine on a PC or mobile phone. Moreover, you might face some problems during the connection. As a result, if the connection process is not complete yet, then it would be best to look for more guides and resources.

