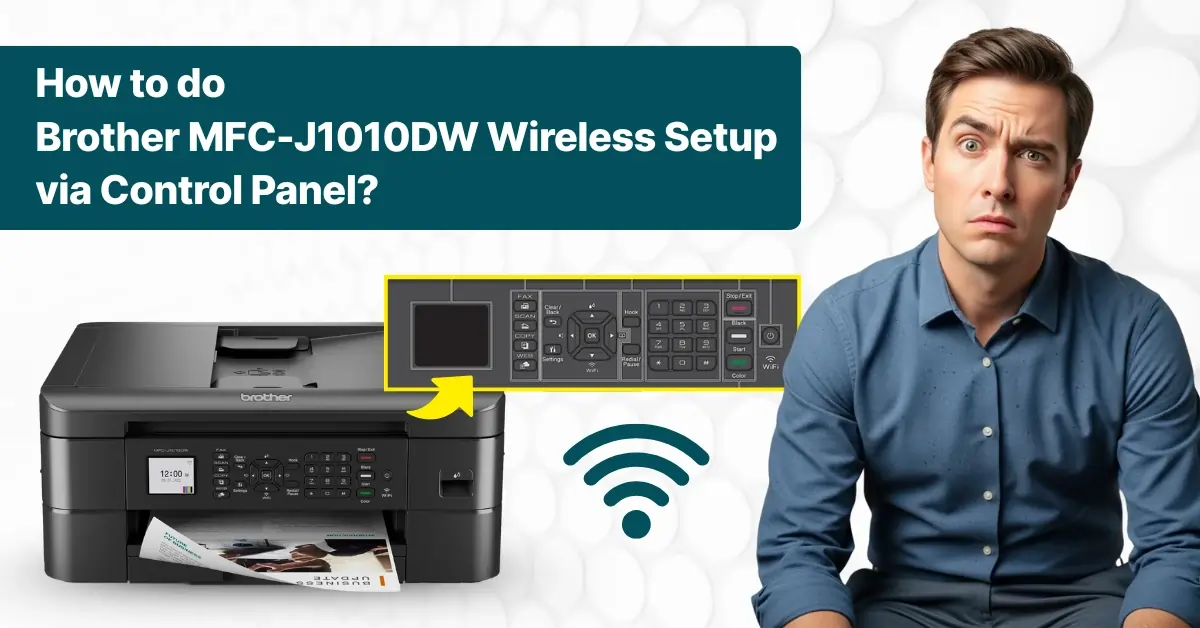
How to do Brother MFC-J1010DW Wireless Setup via Control Panel?
The Brother MFC-J1010DW printer features numerous capabilities and advanced connectivity technology. Wi-Fi connectivity enables you to connect your printer to a wireless network using your smartphone or mobile device, allowing you to utilize its features and functions. The setup process is straightforward, although it may seem complex to some.
Plus, it can show some problems if you are setting up the system for the first time. Take the help of the tutorial below to complete the wireless setup of your Brother printer via the control panel without facing any issues.
Steps to Set Up Brother MFC-J1010DW Wirelessly
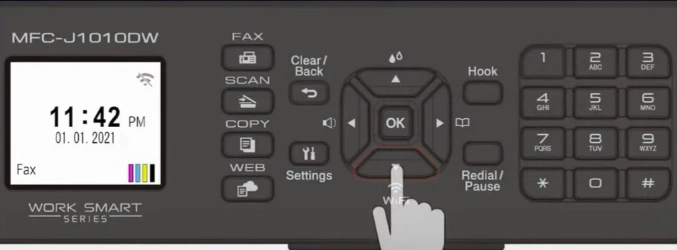
1. While your Epson printer is on, press the Wi-Fi button.
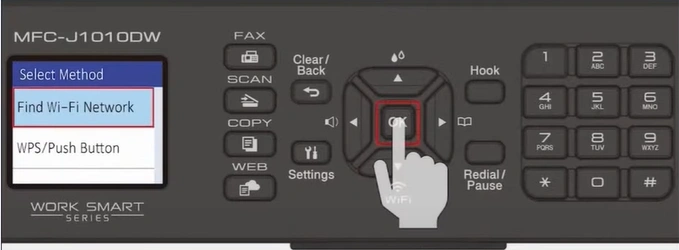
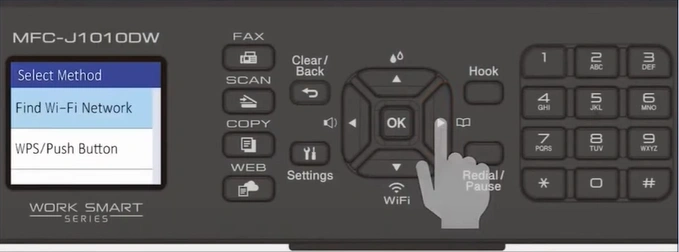
2. Select the “Find Wi-Fi Network” option and press OK.
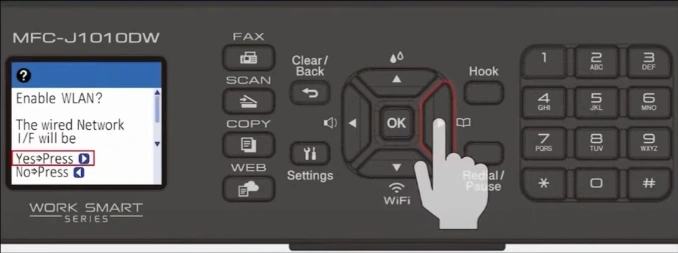
3. Press the right arrow button to enable WLAN.
4. Select your SSID/Network name, then press OK.
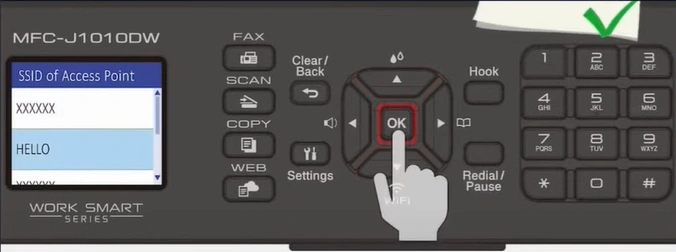
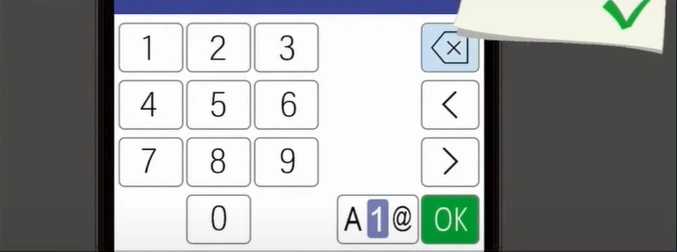
5. Enter your network key password and select OK.
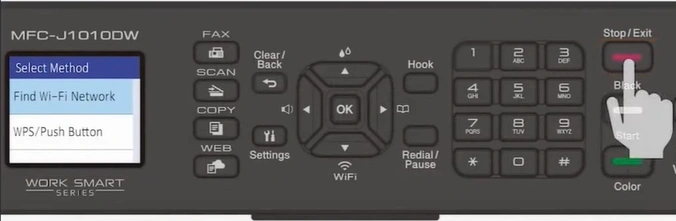
6. After the WLAN is successfully connected, press the right arrow.
7. Press the Exit/Stop key to return to the home screen.
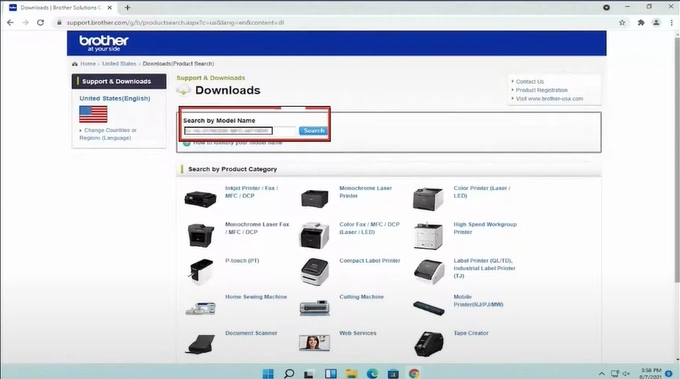
8. Now, open your web/internet browser and visit the Brother support official website.
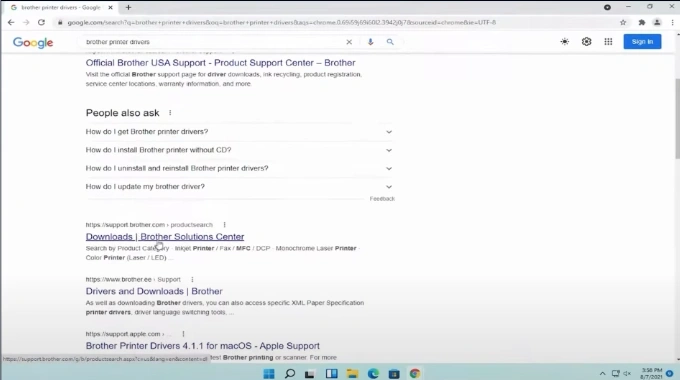
9. Enter “Brother MFC-J1010DW” in the search box and click on Search.
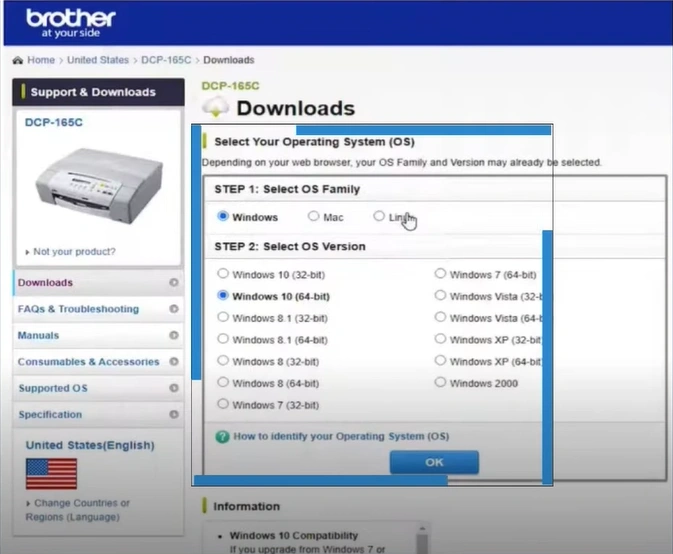
10. Select your operating system and then click on the OK option.
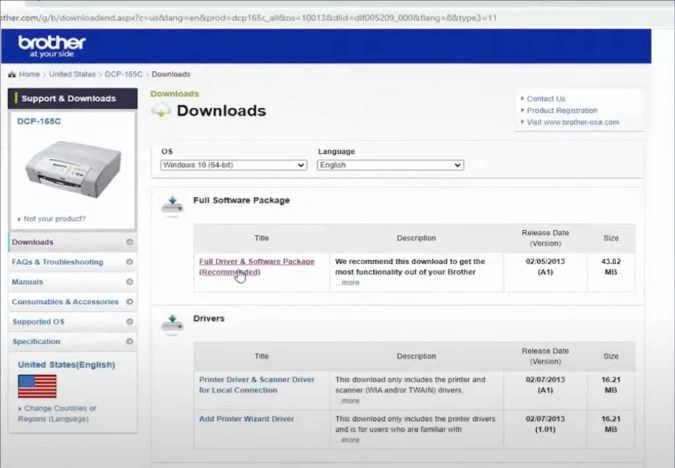
11. Click on “Full Driver and Software Package,” then click on “Agree to the EULA and Download.”
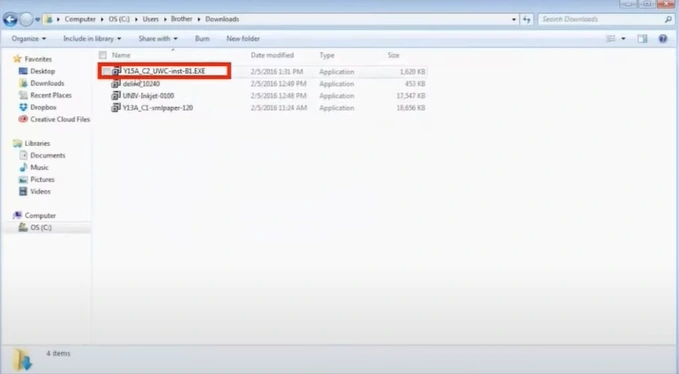
12. Open your downloaded file to install the driver.
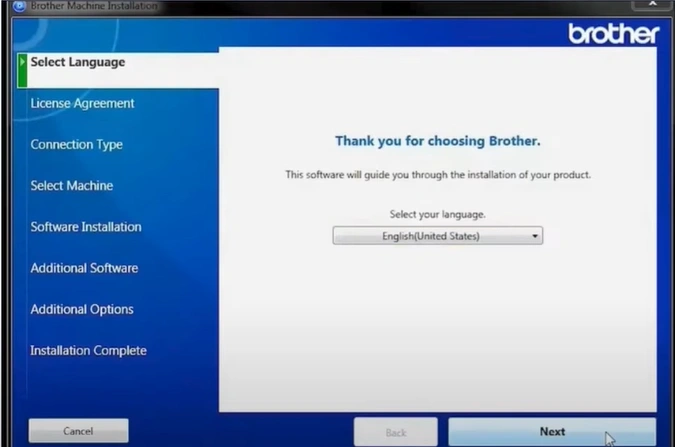
13. Choose your preferred language from the drop-down and click on Next.
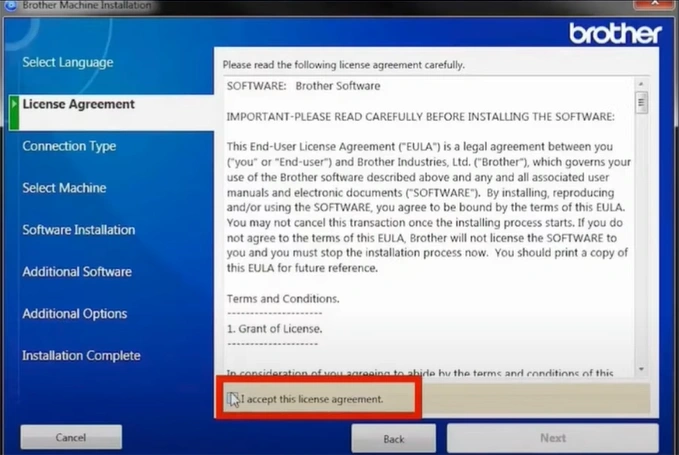
14. Review the license agreement, tick the I Accept checkbox, and click Next.
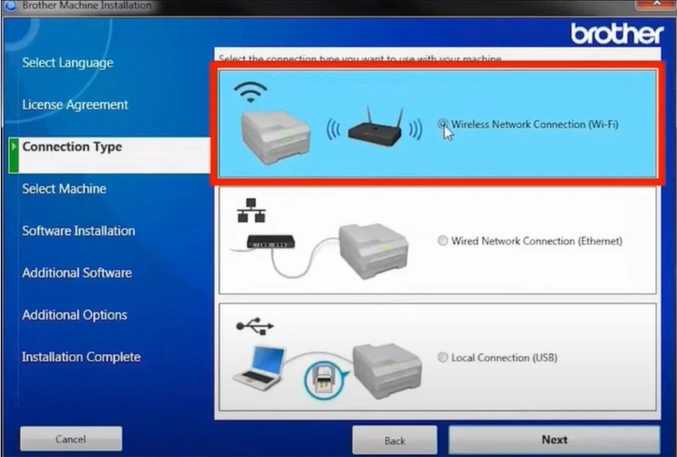
15. You need to select the “Wireless Network Connection” option and click on Next.
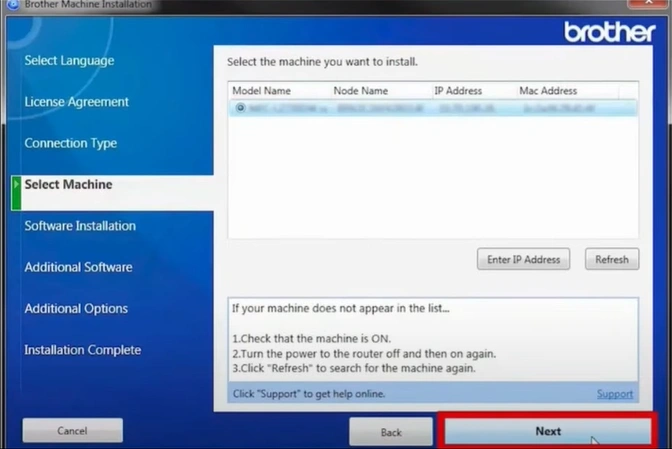
16. Choose the printer model name and click on Next.
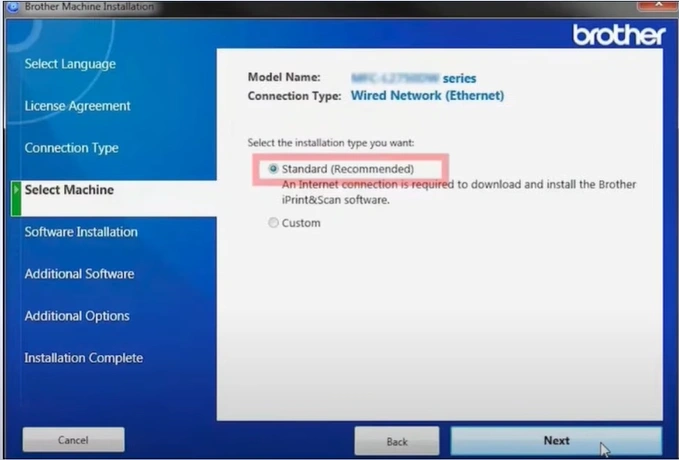
17. In the Installation Type, choose the standard option and click Next.
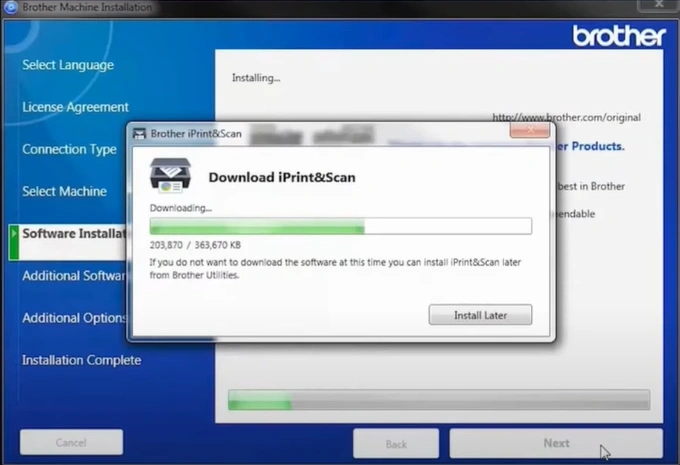
18. The iPrint & Scan will also automatically download during installation. If you wish to install it later, click on the “Install later” button.
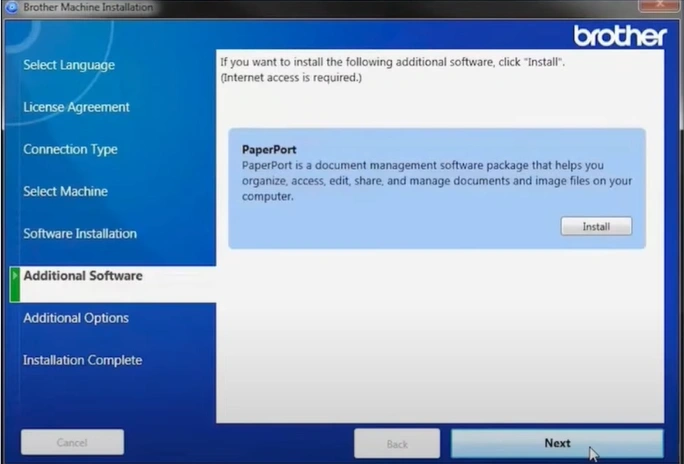
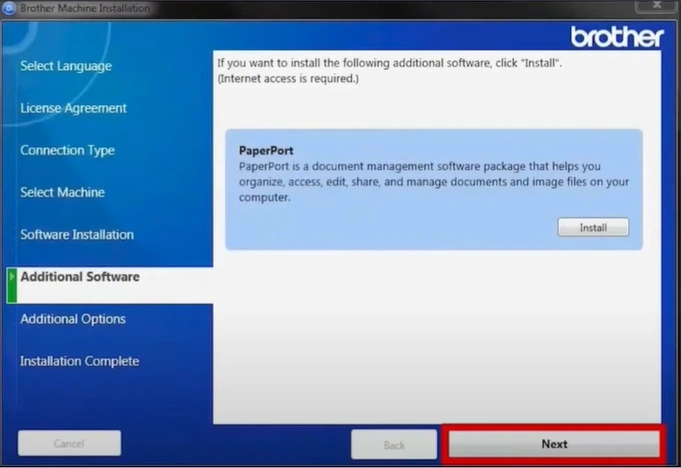
19. After installation, it will be prompted to install the paper port or proceed to the next step.
20. After installing the paper port, click on Next.
21. Click Next again, then press the Finish button.
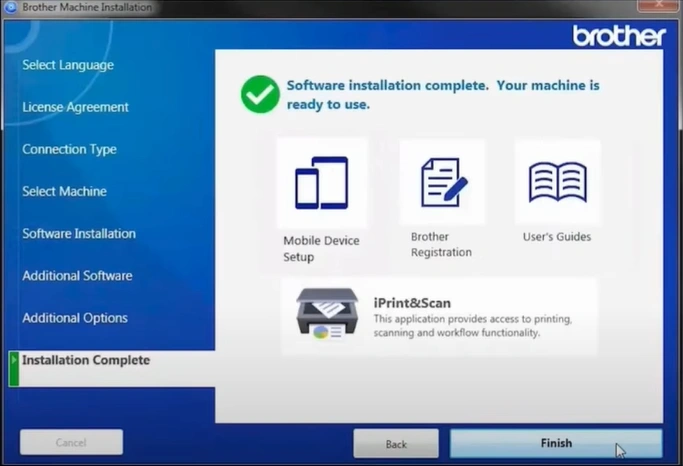
22. Now, the wireless setup process will be complete.
Wrap Up
With the help of this comprehensive method, you can easily complete the Brother MFC-J1010DW wireless setup with the help of its control panel. You should follow all the steps carefully to establish a successful connection and start using your machine. Apart from that, it would be best to get further help and assistance if you are having any problems during the connection.

