Canon TR4720 WiFi Setup: Connect Your Printer in Under 3 Minutes
The Canon PIXMA TR4720 is a compact all-in-one designed for home use, and its wireless setup is genuinely straightforward — once you know which of the three methods fits your setup. Most people who struggle have simply started with the wrong method for their router or device.
This guide covers all three paths, explains why each one exists (not just how to click through it), and includes the troubleshooting fixes that Canon's own documentation leaves out.
Before You Start
Running through these four points takes less than a minute and prevents 80% of failed setups.
Critical: Your WiFi network must be 2.4 GHz. The TR4720 does not support 5 GHz bands. If your router broadcasts both bands under the same name, temporarily connect your phone to the 2.4 GHz band to confirm which is which. Your printer and the device you're printing from must also be on the same WiFi network.
Checklist:
Power on the printer and wait for the home screen to fully load (~15 seconds). The WiFi lamp should be off or blinking — not solid green yet.
Locate your WiFi password — usually on a sticker on your router, or via the admin panel at 192.168.1.1.
Confirm 2.4 GHz availability — check your phone's WiFi settings. If your router uses a combined SSID, use your router app to split the bands temporarily.
Place the printer within 15 feet of your router for initial setup only. Signal walls and interference cause the majority of timeout errors during pairing. You can move it after.
Which Method Is Right for You?
Method 1: WPS (~90 sec)
- Best for: Fastest setup, no phone or computer needed
- Requires: A router with a WPS button
Method 2: Canon PRINT App (~2 min)
- Best for: Smartphone users who want a guided setup
- Requires: iOS or Android phone
Method 3: Manual Wizard (~3 min)
- Best for: Any router, maximum control
- Requires: Your WiFi password
Method 1: WPS Button (Fastest — No Computer Needed)
WPS (Wi-Fi Protected Setup) lets two devices handshake over WiFi without entering a password. You trigger it simultaneously on the printer and router. The whole process takes 60–90 seconds.
Check for WPS support first: Look for a button labelled WPS on your router — it may also show a symbol resembling two curved arrows. ISP-supplied routers (BT Hub, Sky Hub, Virgin Hub) often disable WPS by default. If yours doesn't have the button, use Method 2 or 3.
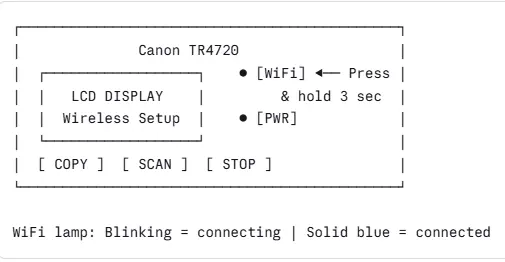
Control Panel Reference
Steps
Step 1 — Start WPS mode on the TR4720
Press and hold the WiFi button (the button with the WiFi symbol on the right side of the control panel) for about 3 seconds until the WiFi lamp starts blinking rapidly and the LCD shows "Wireless LAN setup in progress." Release the button.
You now have a 2-minute window to complete the next step.
Step 2 — Press WPS on your router
Find and press the WPS button on your router. Hold it for 2–3 seconds until its WPS indicator blinks. Router WPS buttons are usually on the side or back, sometimes recessed.
Step 3 — Wait for the connection confirmation
The printer's WiFi lamp will blink for up to 2 minutes while it negotiates. When the lamp turns solid blue, the connection is established. The LCD will briefly show the network name.
Step 4 — Print a network config page to verify
Hold down the Stop button for 5 seconds. The printer outputs a page listing your connected SSID, IP address, and signal strength. Confirm the SSID matches your home network.
Tip: If the WiFi lamp blinks 3 times then turns off, the WPS attempt timed out. This usually means you waited longer than 2 minutes between steps — try again, moving faster on Step 2.
Method 2: Canon PRINT App (Best for Smartphones)
The Canon PRINT Inkjet/SELPHY app (iOS & Android) is the smoothest path if you want to print directly from your phone and prefer a guided visual setup. The app handles both the WiFi configuration and driver installation in one flow.
Steps
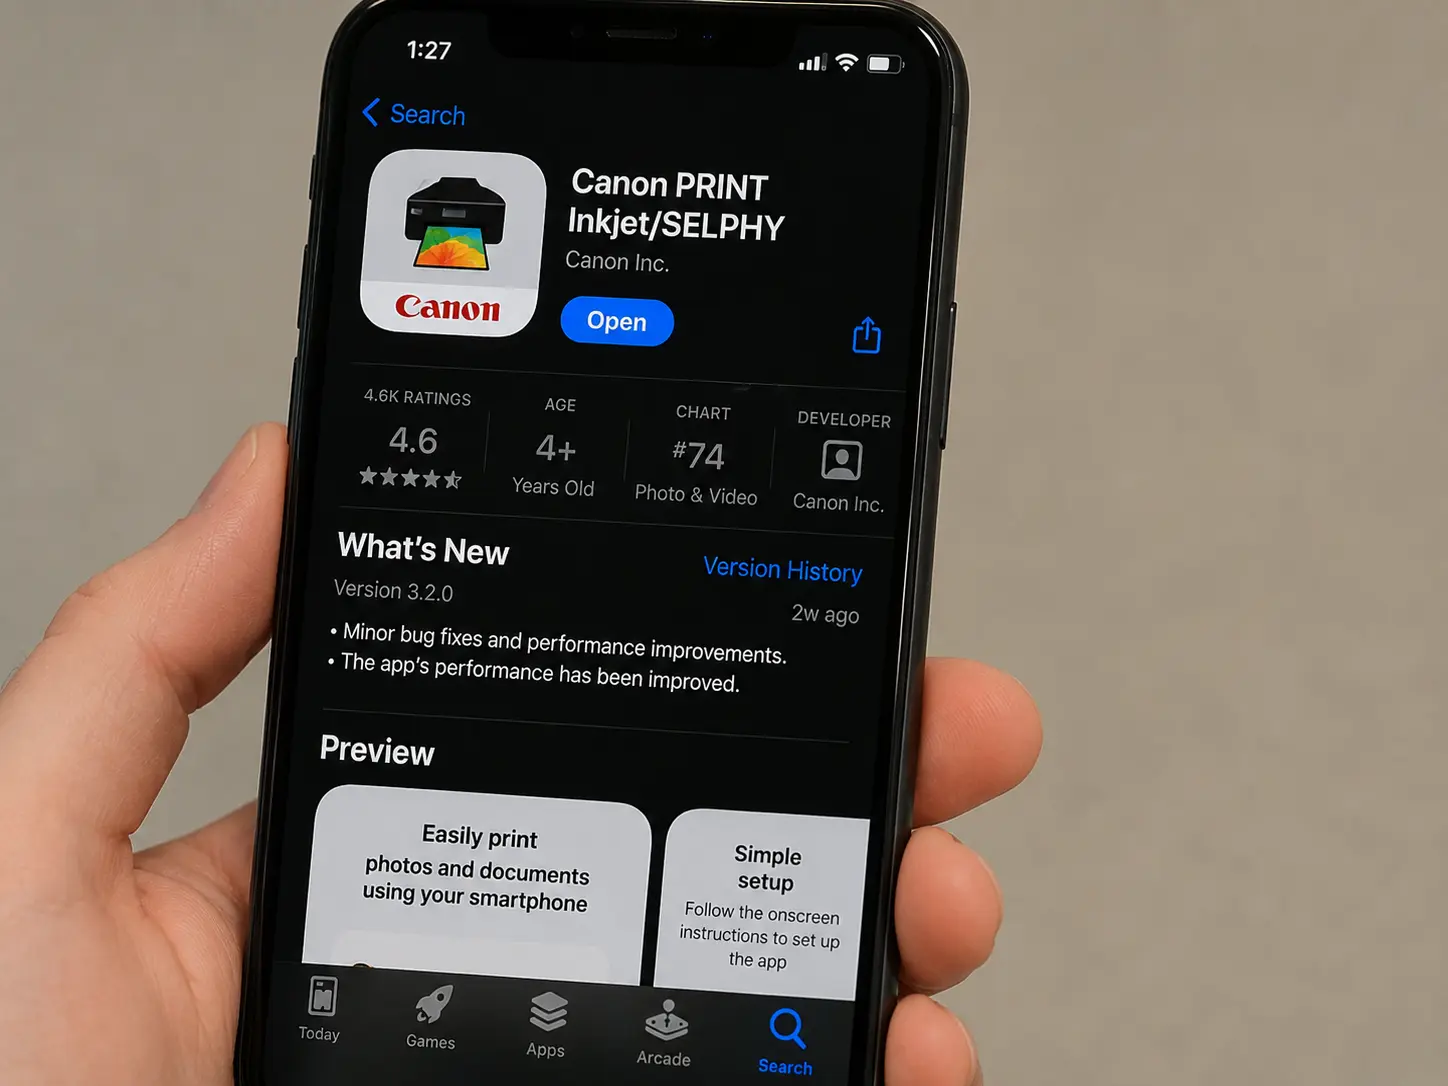
Step 1 — Download Canon PRINT Inkjet/SELPHY
Install the free app from the App Store or Google Play. Search "Canon PRINT Inkjet." The icon is a red Canon logo — don't confuse it with "Canon Print Service," which is a different app.
Step 2 — Connect your phone to the 2.4 GHz network first
Before opening the app, go to your phone's WiFi settings and confirm you're connected to your 2.4 GHz home network (not 5 GHz, not mobile data).
Step 3 — Open the app and tap "Set Up"
Select "Set Up Printer's Wi-Fi Connection" from the main menu. The app will search for nearby Canon printers. The TR4720 should appear within 30 seconds — if it doesn't, ensure Bluetooth is enabled on your phone (the app uses Bluetooth to locate the printer initially).
iOS 14+ users: Grant the app "Local Network" permission when prompted. Without it, the printer discovery step will time out every time.
Step 4 — Select your network and enter the password
The app will display your current WiFi network and ask you to confirm the password. Enter it carefully — the field is case-sensitive. Tap "OK."
Step 5 — The app pushes credentials to the printer
The printer's WiFi lamp will blink during transfer (10–30 seconds). Once the lamp goes solid, the app confirms "Connection successful" and prompts you to add the printer. Tap “Add Printer.”
Method 3: Manual Wireless Setup Wizard (Any Router)
Use this method if your router doesn't support WPS, you prefer not to use the app, or you need to connect to a network with a hidden SSID. You navigate the printer's LCD menu to select your network and type in the WiFi password using the on-screen keyboard.
Steps
Step 1 — Enter the WiFi Setup screen
Press the Home button (house icon), then navigate to LAN settings → Wireless LAN Setup and press OK.
Alternatively: press and hold the WiFi button for 3 seconds; when the LCD prompts you to choose WPS or manual, select "Standard setup."
Step 2 — Select your network from the list
The printer will scan and list available networks. Use the arrow keys to highlight your 2.4 GHz network and press OK. If you don't see it, select "Other networks" to enter the SSID manually.
Note: Networks with special characters (&, #, spaces) in their name sometimes display oddly on the LCD but still connect correctly.
Step 3 — Enter your WiFi password
Use the arrow keys and OK button to type each character. Toggle between uppercase/lowercase with the * button. WPA2 passwords are typically 8–63 characters.
Pro tip: Write out your password on paper first, noting which characters are uppercase, before you start typing on the printer keyboard.
Step 4 — Confirm and connect
The printer will show a summary of the SSID and a masked password. Press OK to confirm. The WiFi lamp will blink for 30–60 seconds, then turn solid blue when connected.
After Connecting: Install Drivers
WiFi connection alone doesn't make your computer recognise the printer — you also need the correct driver. Canon provides three options:
Option A: Canon Online Installer (Recommended)
- Full driver package (printing + scanning)
- Automatic printer detection over WiFi
- Installs Canon IJ Scan Utility
- Download: canon.com/ijsetup → enter
TR4720
Option B: Windows Built-in Driver
- Basic print-only functionality (no scanning)
- Works via Add Printer → Search network
- Good for a quick temporary setup
Option C: AirPrint / Mopria (Mac / Android)
- No driver needed — built into the OS
- Mac: System Settings → Printers & Scanners → Add Printer
- Android: enabled via the Mopria Print Service app
- Print-only (no native scan-to-Mac via this method)
After installing drivers: Print a test page immediately via your OS printer settings. This confirms the computer is communicating with the printer over the network — and is the fastest way to catch an IP address conflict before you actually need to print something.
Troubleshooting Common Issues
Based on the most common TR4720 support cases, here are the issues that account for over 90% of failed setups — with specific fixes, not generic "restart your router" advice.
Quick Reference
WiFi lamp blinks 3× then stops
- Cause: WPS timeout or router WPS disabled
- Fix: Switch to Method 2 or 3
Printer found but can't print
- Cause: Device on a different subnet or VLAN
- Fix: Ensure your phone/PC and printer are on the same WiFi network — check for "Guest network" separation
SSID list empty on printer
- Cause: 5 GHz only signal, hidden SSID, or printer too far from router
- Fix: Move within 10 ft, broadcast SSID temporarily, confirm 2.4 GHz band is active
"Cannot connect to server" in app
- Cause: iOS Local Network permission denied
- Fix: Settings → Privacy → Local Network → enable Canon PRINT
Printer drops WiFi after a few hours
- Cause: IP address lease expiry / DHCP conflict
- Fix: Assign a static IP via DHCP reservation using the printer's MAC address
Connected but computer can't find it
- Cause: Firewall blocking port 9100 or mDNS
- Fix: Temporarily disable Windows Defender Firewall and retry Add Printer
Fix: Printer Shows "Connected" but Won't Print
This almost always means your computer and printer are on different network segments — common in homes with a mesh system or router + extender.
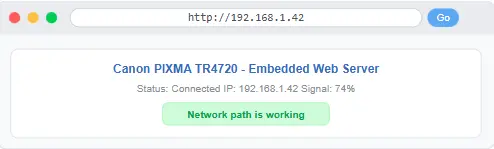
How to confirm: Open a browser and type the printer's IP address (from the config page you printed). If you can see the printer's embedded web server page, the network path is fine — the issue is the driver.
Fix: Reinstall via Canon's online installer and select "Use the same connection" when prompted.
Fix: WiFi Keeps Disconnecting
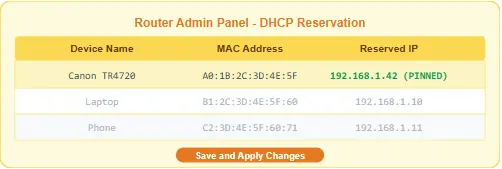
DHCP lease expiry is the culprit when a printer connects fine initially but drops after hours or overnight. Your router reassigns the IP to another device, and the printer's cached config becomes invalid.
Fix: Log into your router's admin panel (usually 192.168.1.1), find the DHCP reservation or "static lease" section, and pin the printer's IP to its MAC address. The MAC address is printed on the network config page — it looks like xx:xx:xx:xx:xx:xx.
Fix: 5 GHz / Band Steering Issues
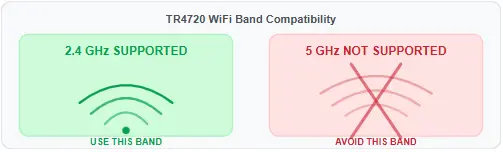
Modern mesh routers (Eero, Google Nest, TP-Link Deco) use band steering to automatically assign devices to either 2.4 or 5 GHz under a single network name. The TR4720 can only use 2.4 GHz, but the router may try to steer it to 5 GHz during setup.
Fix: During initial pairing, log into your router's app and temporarily disable the 5 GHz band (or separate the networks under different names). Once the printer successfully connects to 2.4 GHz, you can re-enable 5 GHz for your other devices.
Fix: Printer Not Found During App Setup
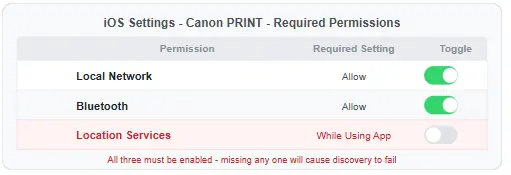
If the Canon
PRINT app can't detect your TR4720, the issue is almost always permissions — not a network problem.
On iOS: Settings → Canon PRINT → enable Local Network AND Bluetooth
On Android: Enable Location Services (required for Bluetooth Low Energy device discovery in Android 6+, even though you're not sharing your location for any other purpose)
Force-quit and relaunch the app after changing permissions.
Still having trouble? Print a network configuration page (hold Stop for 5 seconds) and check the signal strength field. If it's below 30%, the printer is too far from the router — no software fix will resolve this. Move the printer closer to confirm, then consider a WiFi extender or powerline adapter for a permanent solution.
Frequently Asked Questions
Can I use the TR4720 with a 5 GHz WiFi network?
No. The Canon TR4720 only supports 2.4 GHz 802.11b/g/n WiFi. If your router broadcasts a single SSID for both bands, you'll need to temporarily split them or use a 2.4 GHz-only SSID for setup.
Does the TR4720 support WiFi Direct (without a router)?
Yes. Press and hold the WiFi button, then navigate to LAN settings → Wireless Direct on the LCD. The printer creates its own hotspot (named something like DIRECT-xxxx-TR4720). While in Wireless Direct mode, the connected device loses internet access — best for printing on the go.
How do I reset the TR4720's WiFi settings to start fresh?
Press the Home button, navigate to Device settings → LAN settings → Reset LAN settings, and confirm. This resets only the network configuration — not print queue or ink levels. Often the fastest fix when you've changed routers or inherited a configured printer.
My router doesn't have a WPS button. Which method should I use?
Use Method 3 (Manual / Wireless Setup Wizard) — navigate to LAN settings on the printer's LCD, select your network, and enter your WiFi password. This works with any router regardless of WPS support. The Canon PRINT App (Method 2) also works without WPS; it transfers credentials over Bluetooth.
Can multiple devices print to the TR4720 over WiFi?
Yes. Once the printer is connected to your home network, any device on the same network (Windows, Mac, iPhone, Android, tablet) can print to it. You'll need to install the driver or app on each device, but the printer itself only needs to be set up once.
The WiFi lamp is solid but the printer shows "offline" in Windows. Why?
A solid WiFi lamp means the printer is connected to the network — the "offline" status in Windows is a separate issue. Most commonly, Windows is trying to use an outdated IP address. Open Devices and Printers, right-click the TR4720, select Printer Properties → Ports, and verify the IP matches what's on the printer's network config page. If it doesn't match, update it or assign a static IP via DHCP reservation.

