How Do You Connect the Brother Hl 2270dw Printer to Wi-Fi?
Connecting your Brother HL-2270DW printer to Wi-Fi allows you to print from anywhere within your network. There won’t be any fuss about wires or cables. But, there are chances that you may encounter issues like weak Wi-Fi signals, wrong network credentials, or firewall or security software. So, it is wise to know these potential issues beforehand. This way, connecting your Brother HL 2270DW Printer to your Wi-Fi would be simpler.
The process of wifi setup Brother HL-2270DW printer may seem simple. It entails steps that allow you to have a wireless printing experience. Whether you are setting up your printer as a first-timer or reconnecting it to your Wi-Fi, this detailed guide explains the complete process.
Methods to Connect Brother HL 2270DW Printer to Wi-Fi
The following methods may assist you in connecting the Brother HL 2270DW Printer to Wi-Fi. So, let’s check them out:
Method 1: Configure the Wireless Settings
Step 1: Place your Brother printer within close range of your router.
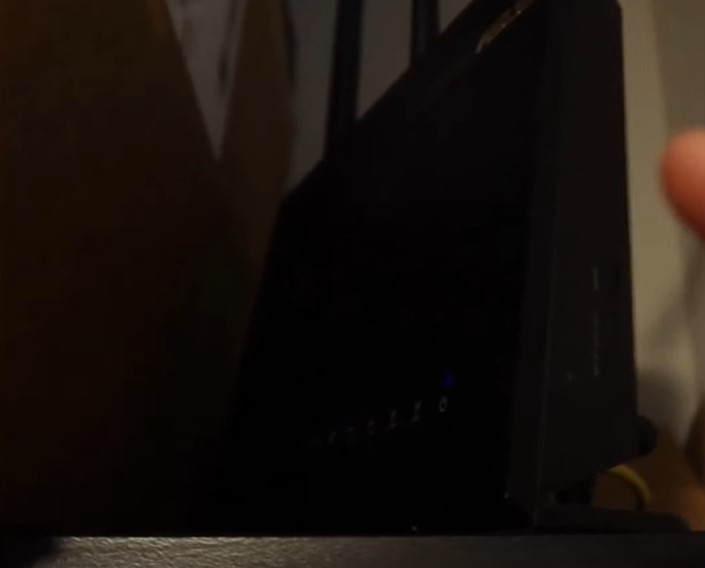
Step 2: Make sure that the printer is turned on.
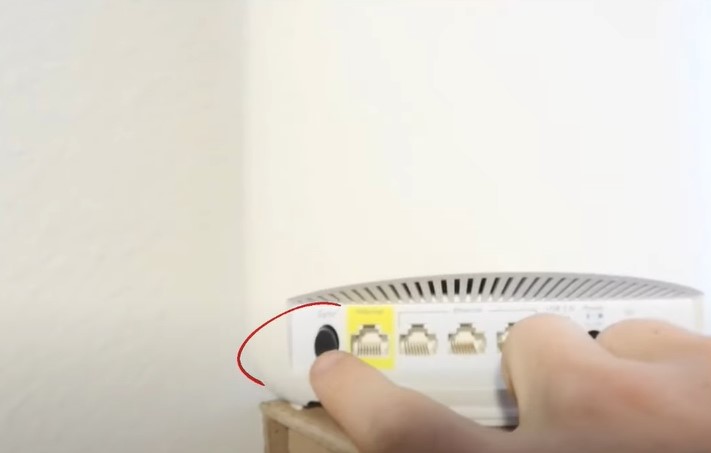
Step 3: Go over to the router, then press and hold the WPS button.
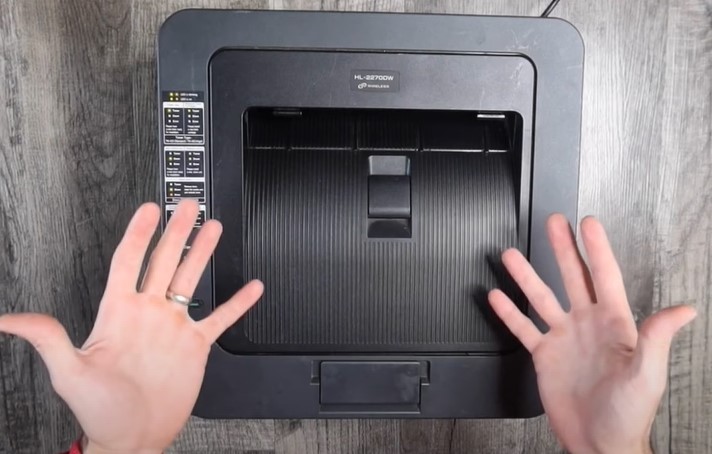
Step 4: Now, go back to your printer and turn it over.
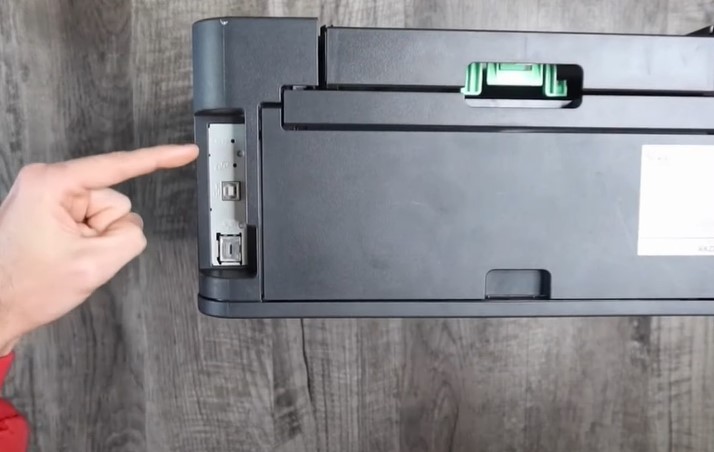
Step 5: Get a pointy object and press the wireless setup button for less than 2 seconds.
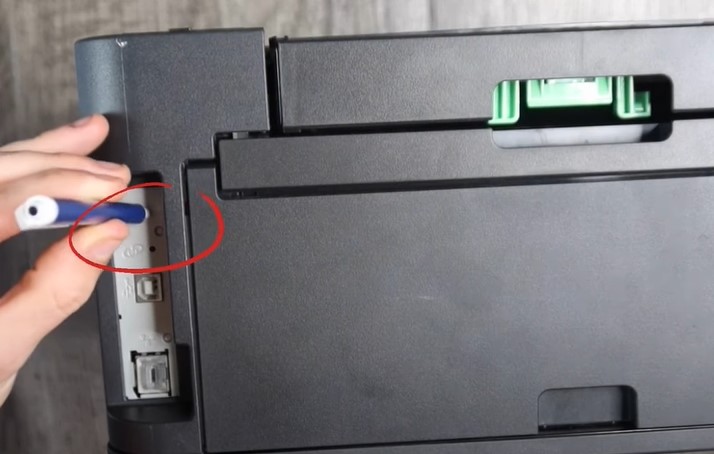
Step 6: The LED light will start blinking on the back and front of the printer, indicating that it’s looking for a Wi-Fi network.
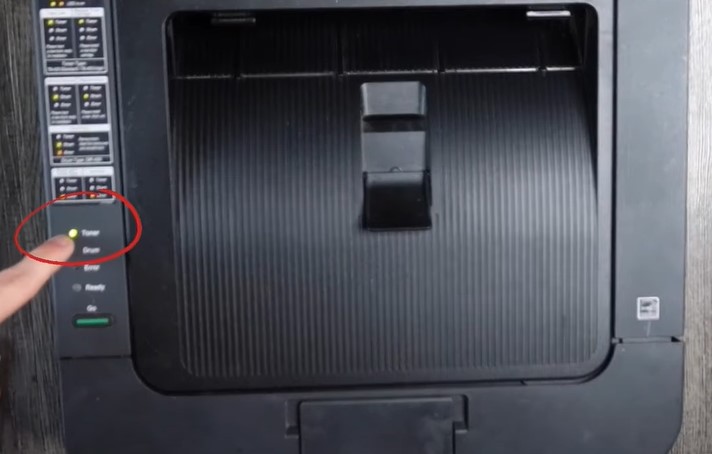
Step 7: Once the drum light starts flashing along with the toner light, the printer is connected to the Wi-Fi router.

Step 8: The printer successfully connects to the Wi-Fi network when the Ready light turns on.

Method 2: Configure During Printer Driver Installation
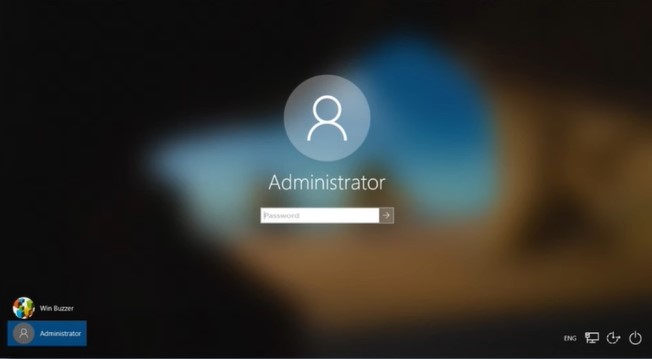
Step 1: Make sure that you are logged in with administrator rights on your computer
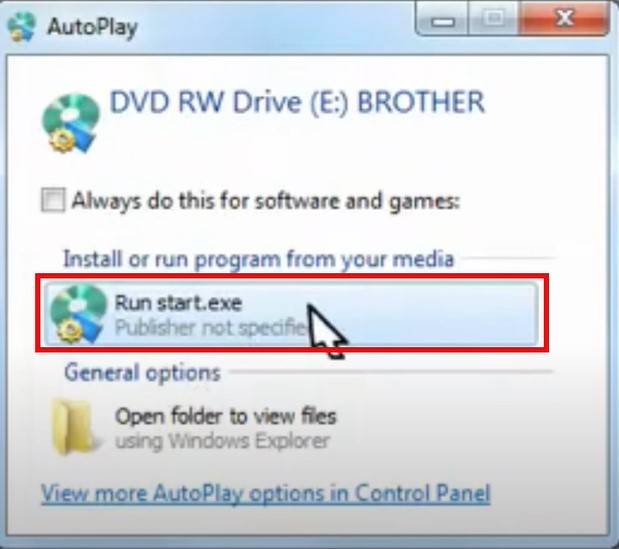
Step 2: Insert the installation CD-ROM into your CD-ROM drive.

Step 3: Click on Run start.exe and then OK.
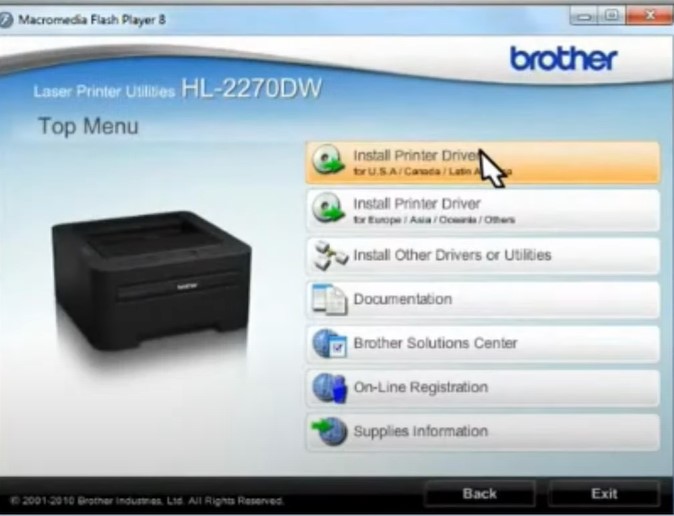
Step 4: Select the model and the language.

Step 5: Next, select Install Printer Driver, and agree to the License Agreement by clicking Yes.
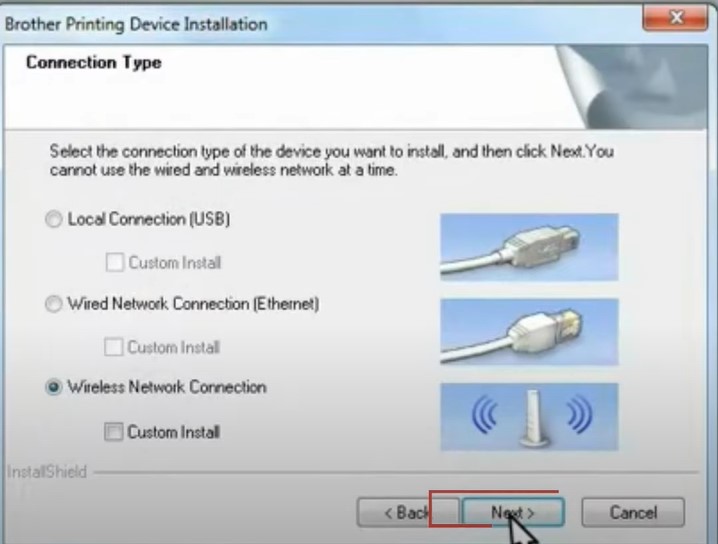
Step 6: In the Connection Type window, select Wireless Network Connection and click Next.
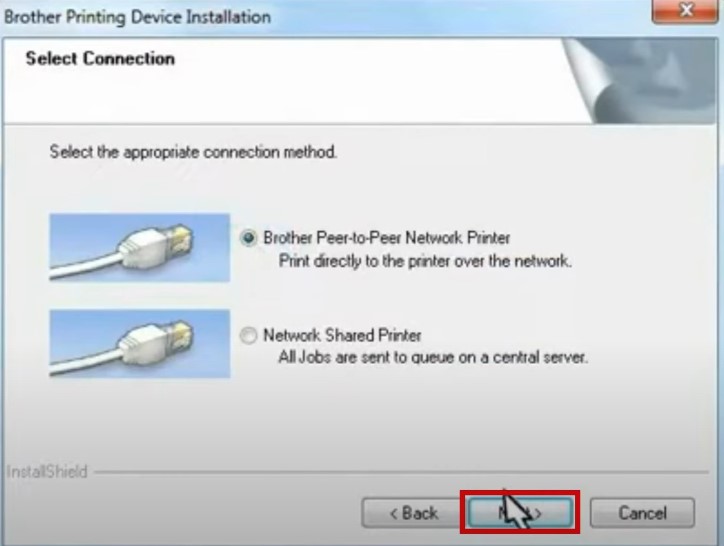
Step 7: Now, select Brother Peer-to-Peer Network Printer and click Next.
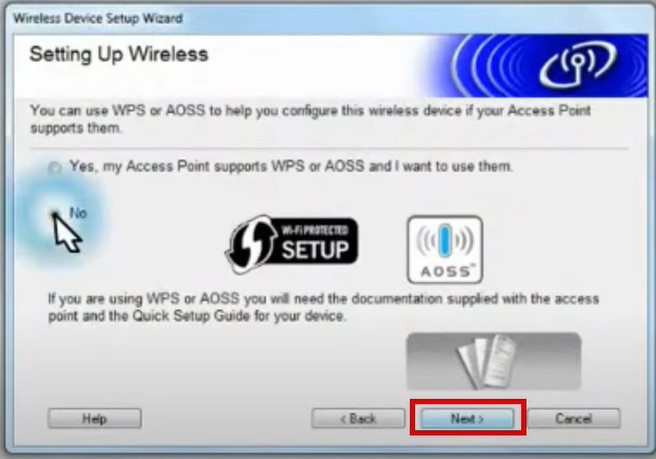
Step 8: At the Wireless Device Setup Wizard Window, select No and click Next.
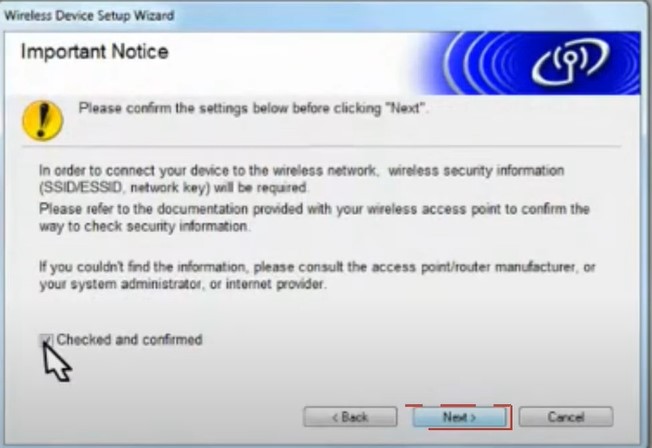
Step 9: Read the Important Notice, check the Checked and Confirmed box, and then click Next.
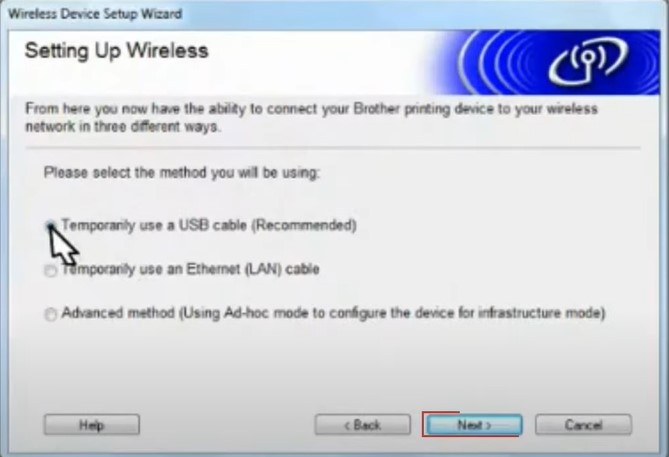
Step 10: In the Setting Up Wireless window, select Temporarily Use a USB Cable and click Next.
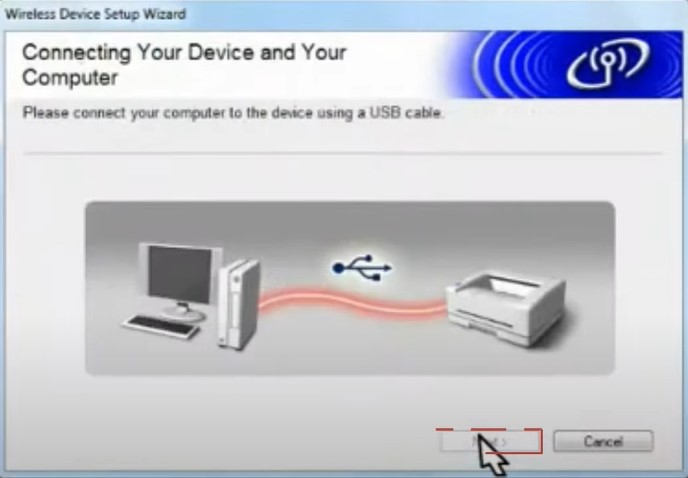
Step 11: When the Connecting Your Device and Your Printer window appears, connect your printer to the computer with a USB cable.
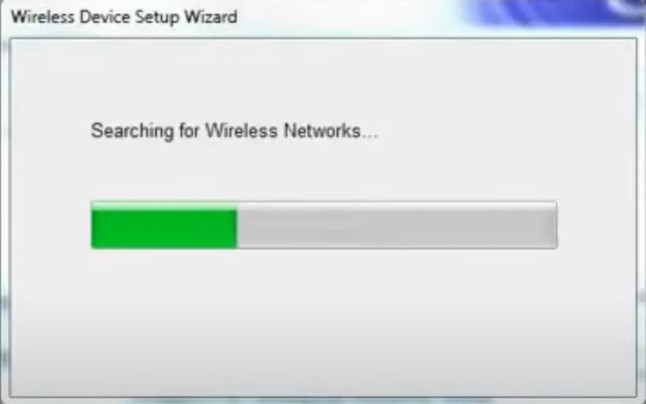
Step 12: Wait while your device searches for the wireless network.
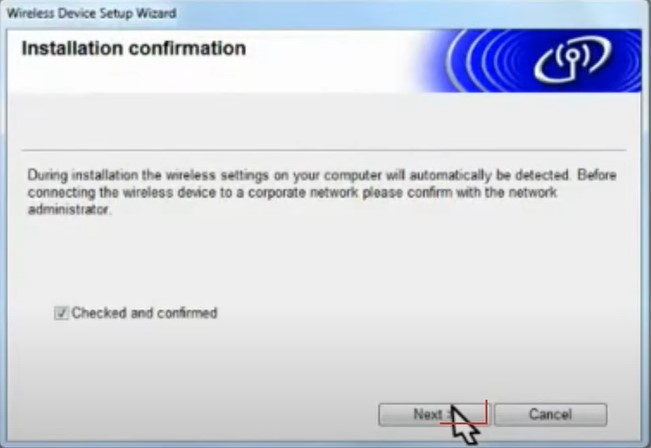
Step 13: At the Installation Confirmation window, check the Checked and Confirmed box and click Next.
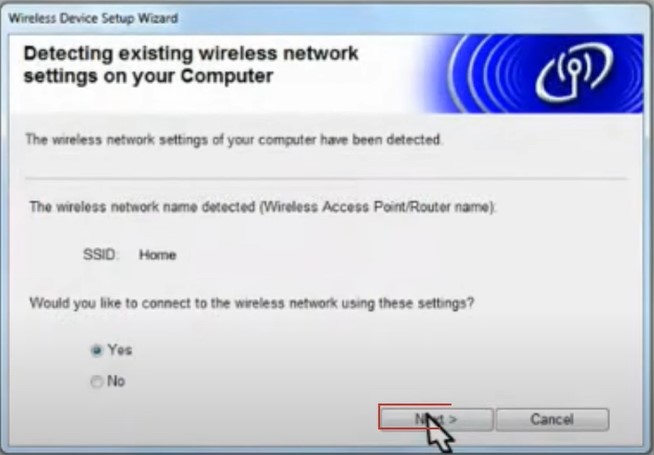
Step 14: In the next window, select Yes and click Next.
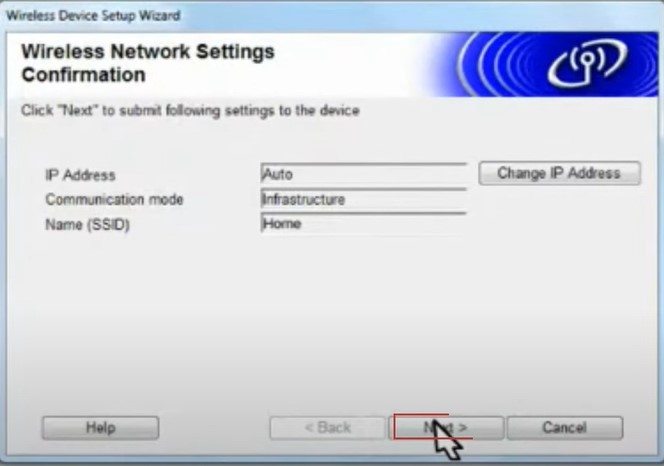
Step 15: Now, confirm your wireless network settings information and click Next.
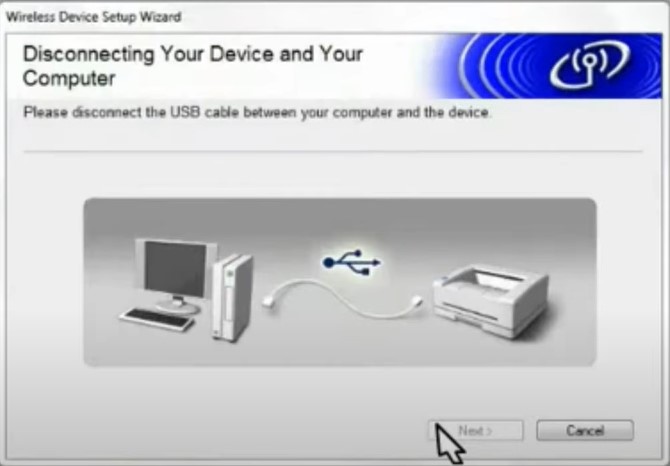
Step 16: Disconnect the USB cable connected to the printer and computer and click Next when you get the Disconnecting Your Device and Your Computer window.
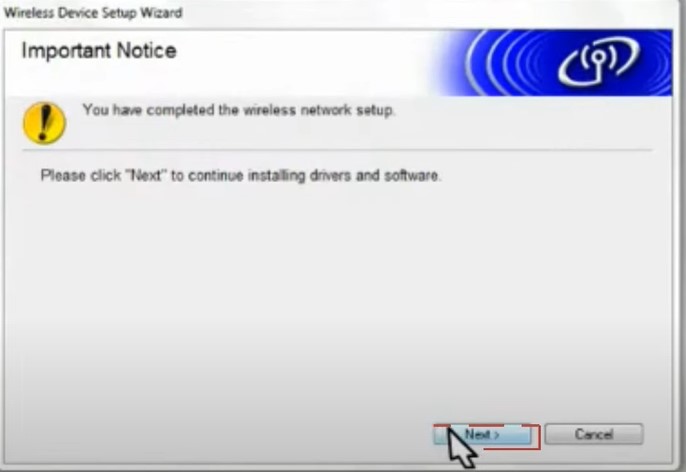
Step 17: Click Next in the Important Notice window to continue.
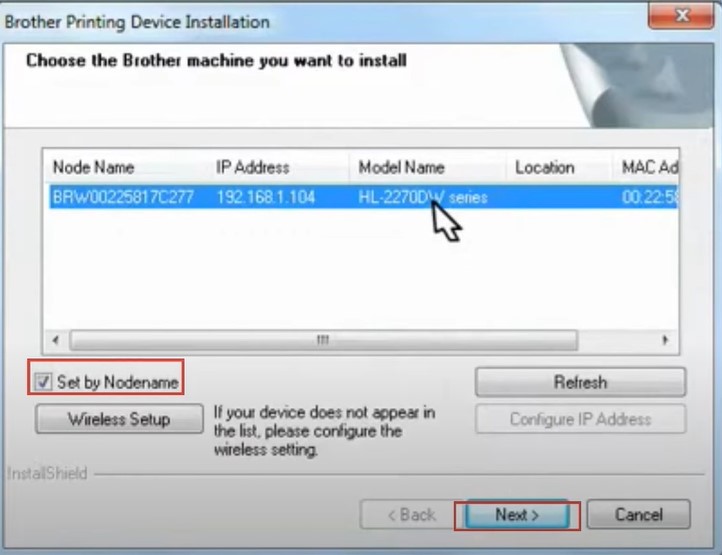
Step 18: Next, select your Brother printer, check the Set by Nodename box, and click Next.
Step 19: Follow the remaining on-screen prompt until you get the Setup Complete window and click on Finish.
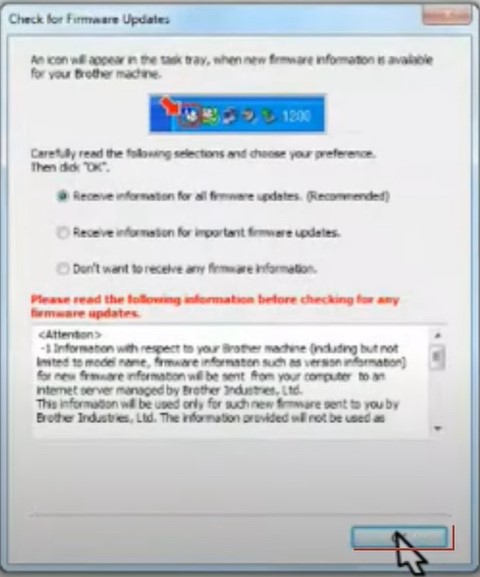
Step 20: Check the recommended option in the Check for Firmware Updates window and click OK.
Conclusion
We hope that the above information may be helpful to you. Try out any of these methods to successfully connect the Brother HL 2270DW Printer to Wi-Fi. Then, you can have the convenience of wireless printing in your office or home.

