Fix the ‘HP Officejet 4650 Not Printing’ Issue
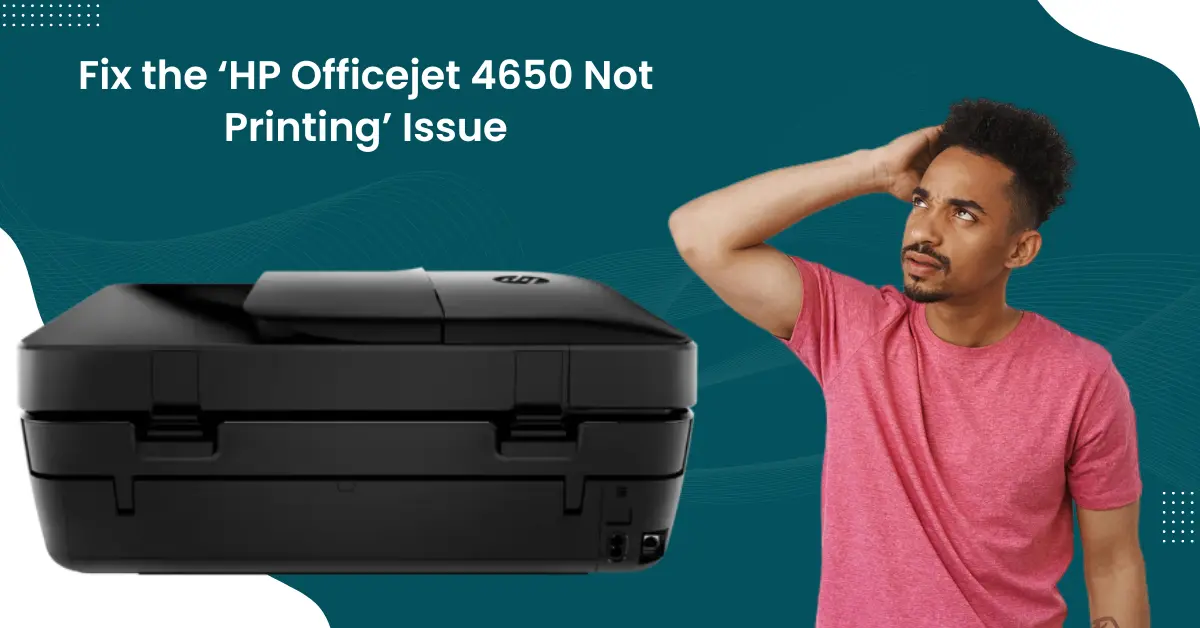
Now and then, you can find your printer in not printing state. But you do not need to stress out because it is one of the common problems printer users canface. Moreover, it is easy to get rid of the issue by using effective troubleshooting methods. Before you learn about the solutions, it is wise to learn about the some major causes of the problem. Using the wrong papers, low ink level, outdated drivers, firmware issues, wrong printer settings, and others could lead to this trouble in your printer.
To fix your HP printer not printing issue, you need to try to figure out the key cause of the issue. Moreover, here you will get a thorough understanding of the multiple easy solutions to fix the ‘HP Officejet 4650 not printing’ issue.
Solution 1: Perform the Clean Install of Printer Driver
If your printer is not printing state then it is best to install the most compatible driver on your device. Follow-ups are the steps you can follow to download and install the latest driver.
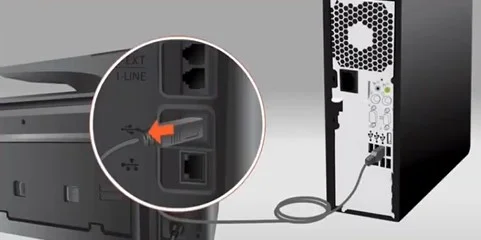
1. Before moving with the further steps make sure to remove the USB cable if your printer is connected to a computer with it.
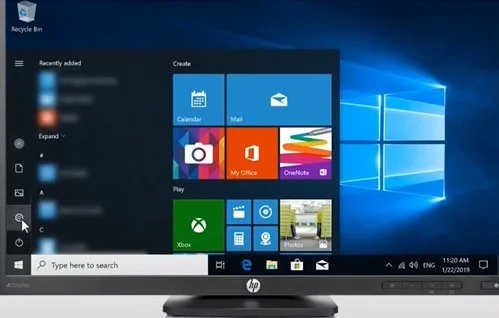
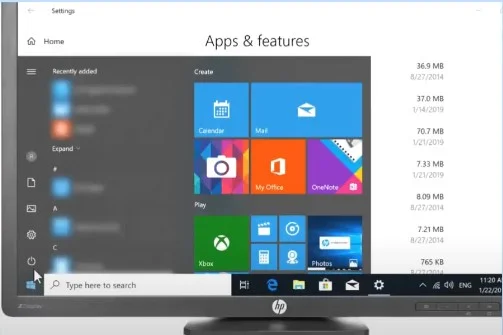
2. Now, on your Windows desktop, click on the Start icon/button and then choose Settings.
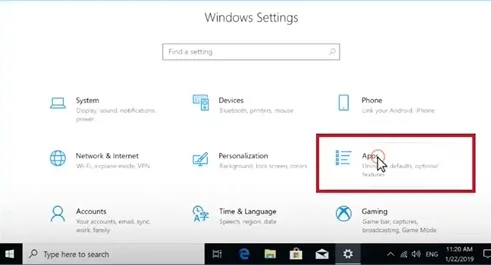
3. Choose the Apps option when the Settings window opens.
4. Now, from the list of available installed apps, locate your HP Officejet 4650 printer driver and click on it.
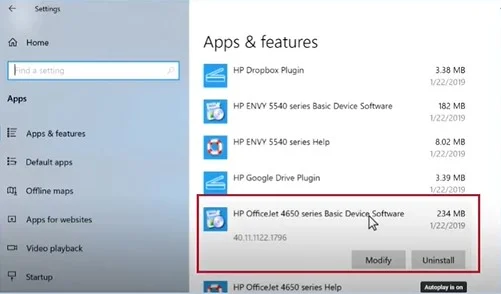
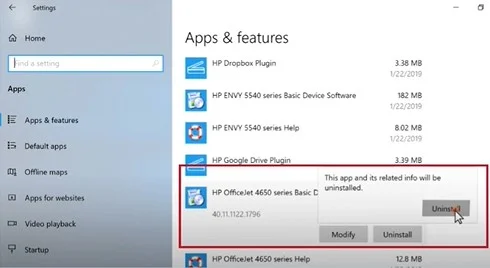
5. Click on the Uninstall option and then choose the Uninstall button once again.
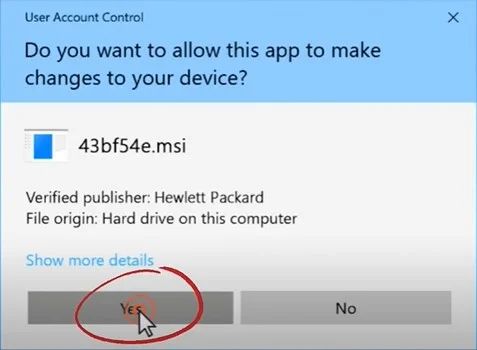
6. When you see a prompt, click on the Yes button to complete the uninstallation confirmation.
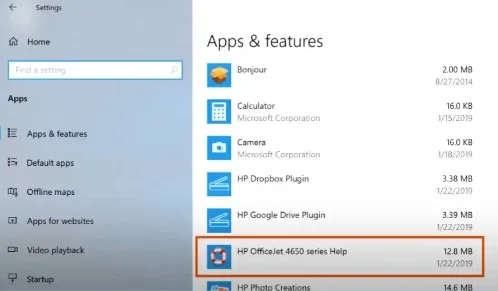
7. Next, return to the Apps & Features list and repeat the process of any other entries with your printer name.
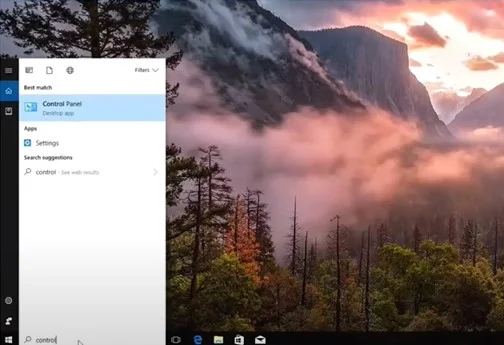
8. After that, close the window, click on the Windows start button, and then search for the Control Panel.
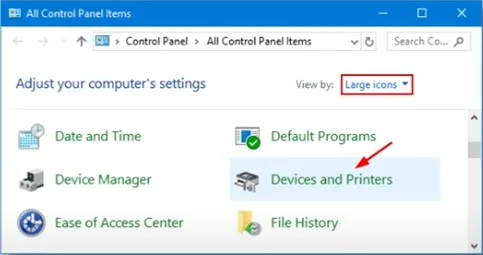
9. Now, head to the Control Panel window, set the View By option to Large Icons, and then select the Devices and Printers option.
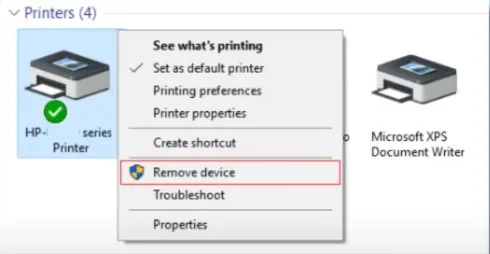
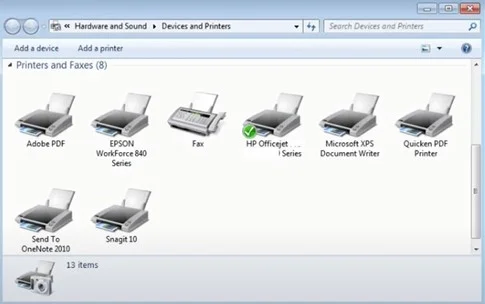
10. Next, you are required to look for your HP printer model name; if you find it listed, right-click on it and select Remove Device.
Also Read:- How to Fix ‘HP Officejet Pro 9010 Offline’ Issue?
11. Once the process is complete, close the current window.
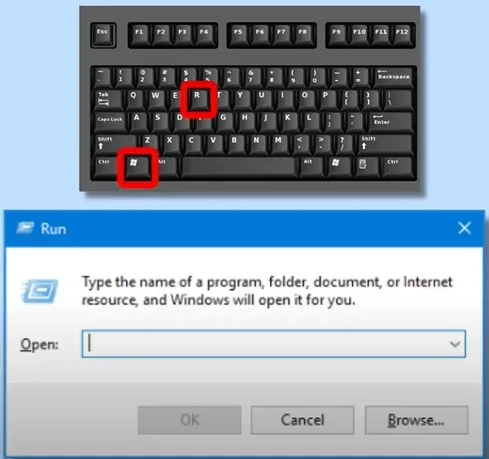
12. Furthermore, hold down the Windows logo and R key together at the same time to open the Run dialog box.
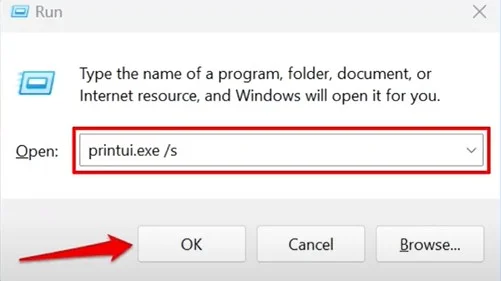
13. Afterward, type printui.exe/s in the search bar and then choose OK or press the Enter button.
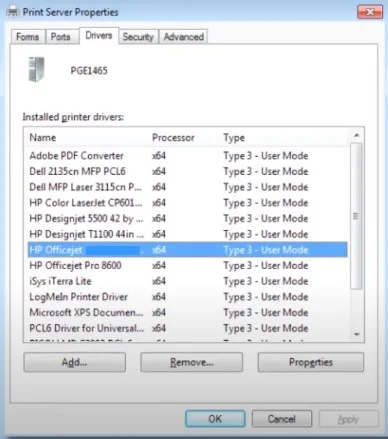
14. Go to the Drivers tab and look for the HP printer driver.
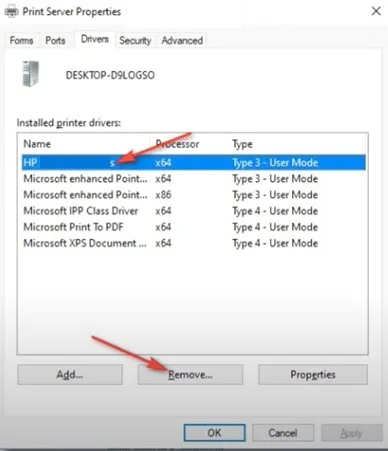
15. If you see your HP printer driver option, click on it and choose Remove.
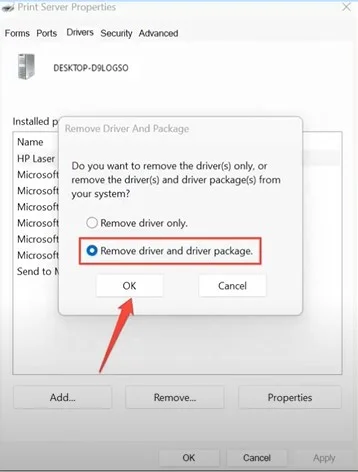
16. On the open prompt, choose the ‘Remove Driver and Package’ radio button and select OK.
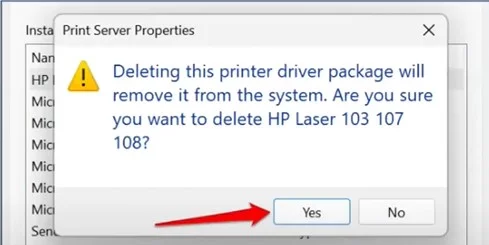
17. Now, click on the Yes option on the pop-up to complete the process.
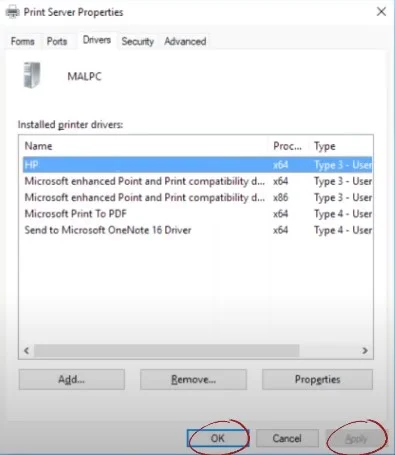
18. Then, click on OK and Apply options on the Printer Server Properties window.
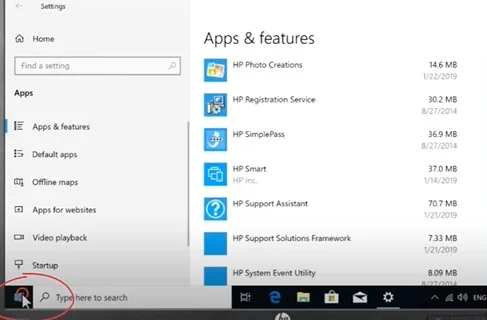
19. Next, close the current window and click on the Windows Start button.
20. Furthermore, click on the power button and choose the Restart option.
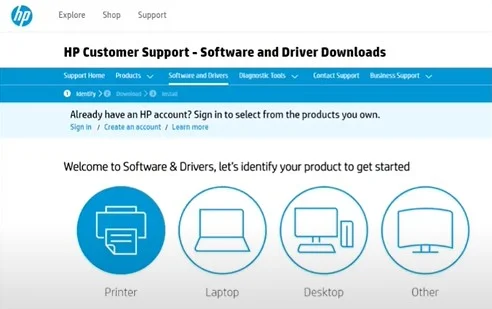
21. When the system restart is complete, browse the official HP website and then download and install the latest compatible printer driver for your HP Officejet 4650 device.
Solution 2: Replace the Faulty Ink Cartridges
The following procedure will allow you to replace the faulty ink cartridges of your HP printer. Follow all the steps carefully.
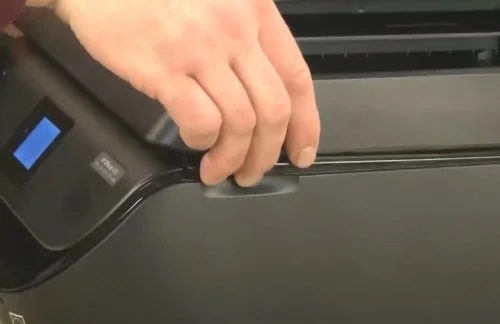
1. First and foremost, open your printer’s front cover and then let the print head slide over.
2. Next, take out the print cartridges from the machine.
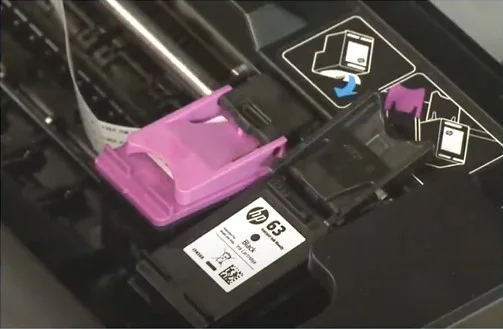
3. Now, you are required to complete the authenticity of the cartridges by browsing the official HP support website.

4. If you are using a faulty ink cartridge, then replace it with a new original HP ink cartridge.
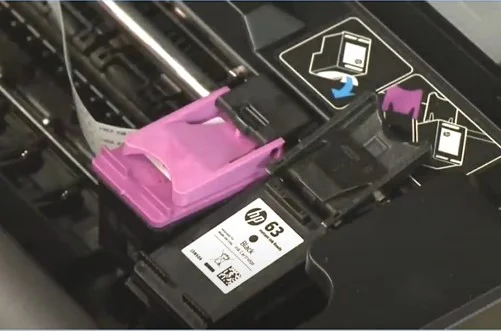
5. When the process is complete, close the ink cartridge access door.
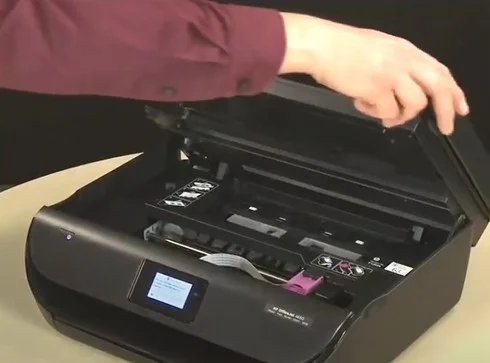
6. If the printer not printing issue still remains, then move to the next step.
Solution 3: Clean the Printer Cartridges
These are the steps you can follow to clean your HP Officejet 4650 printer device.
1. From the printer display panel, click on Setup.
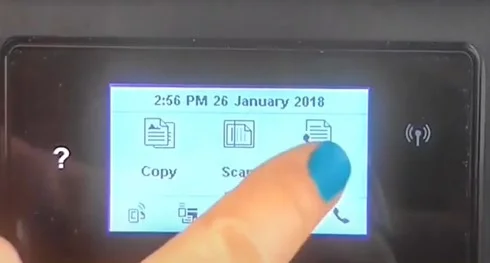
2. Click on the Tools option and then select Clean Cartridges.
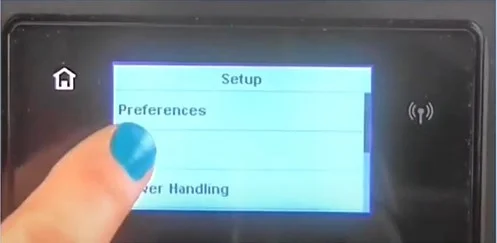
3. After the cleaning process is completed, the printer will print a quality report.
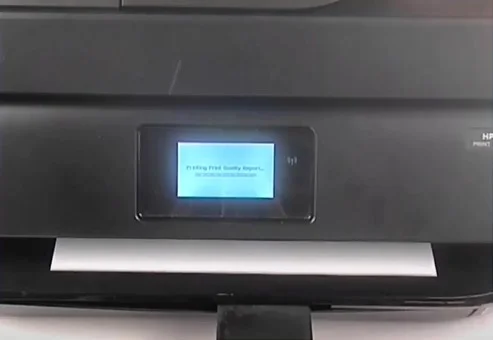
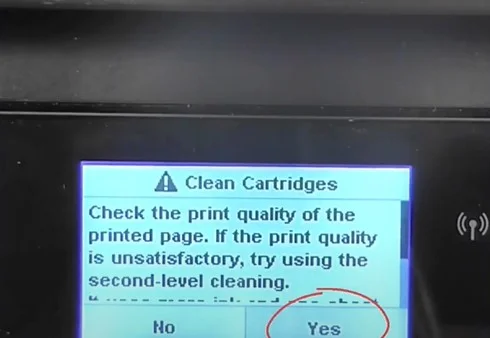
4. Next, check the printed page; if it requires second-level cleaning, press Yes.
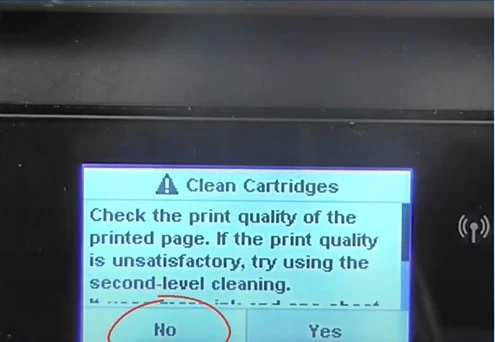
5. If you don’t want to do that, tap on the No option.
6. Afterward, check if your HP Officejet 4650 printer printing issue is resolved or not.
Final Words
We have shared several effective solutions to get your HP printer out of the not printing problem. You take all these steps carefully to quickly fix the issue and start using your printer right away. Apart from that, you must look for more guidance and help if necessary.

