Resolve the 'HP Officejet 5258 Not Printing' Issue
It is not surprising if you find your printer in the not-printing state even though everything seems fine. The printers are prone to some minor problems, and 'HP Officejet 5258 Not Printing' is one of them. The reasons for this issue include low power supply, outdated/missing drivers, incorrect print settings, weak internet connection, and numerous others.
To fix the issue, a plethora of result-oriented quick solutions are available to terminate the problem effortlessly. However, it is easier said than done, especially if you are completely new to the problem. Therefore, to make troubleshooting easier for you, we are going to share several vital solutions with an easy-to-follow guide.
Solution 1: Reinstall Your HP Printer Driver
Most of the time, missing or outdated drivers are the key cause of facing the issue while printing a document in your printer. So, with the help of the below guide, you can reinstall the latest driver for your HP Officejet 5258 printer.
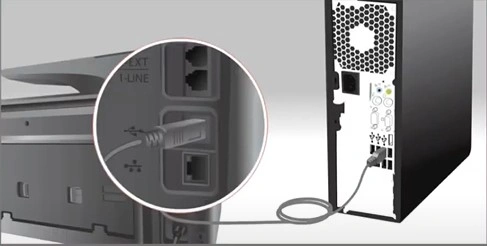
1. If your HP Officejet 5258 printer is connected to the computer using a USB cable, then disconnect it.
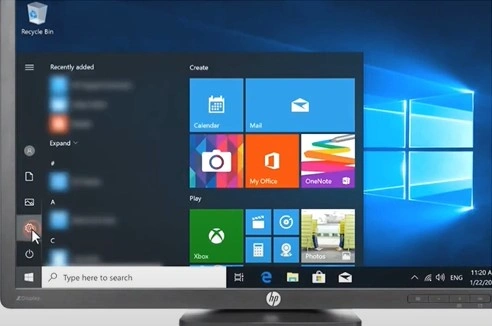
2. On your computer device, click on the Windows Start button and choose Settings.
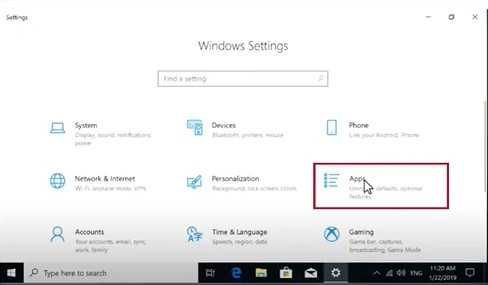
3. And then click on the Settings window and choose the Apps option.
4. Now, from the list of your installed apps, locate and select your HP driver.
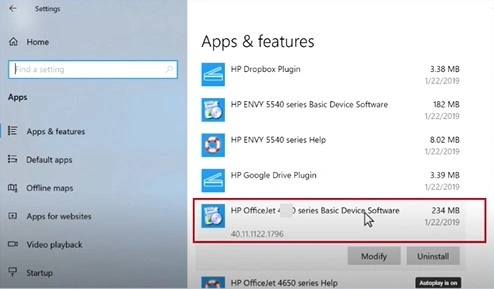
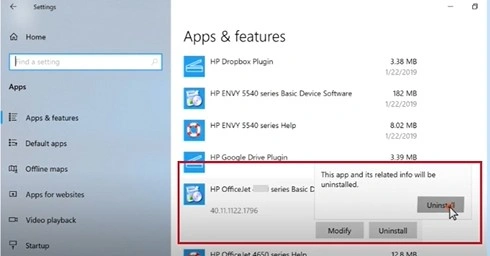
5. Next, you have to choose the Uninstall option and then click on the Uninstall option once again.
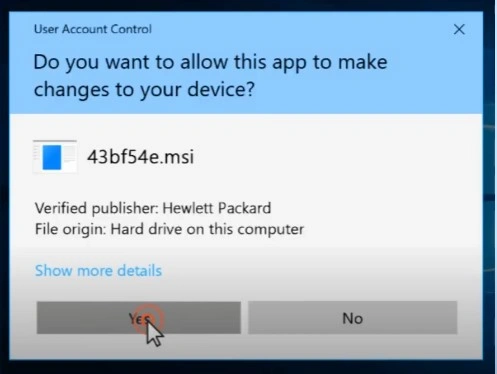
6. If you see a prompt, click on the Yes button to confirm the removal option.
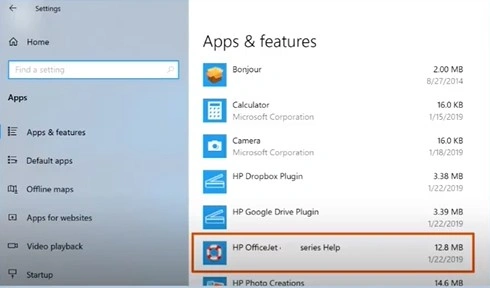
7. After that, you are required to return to the Apps & Features list and repeat the process for any other entries with your printer name.
Also Read:- How to Connect My HP Printer to WiFi Network [Top 3 Methods]
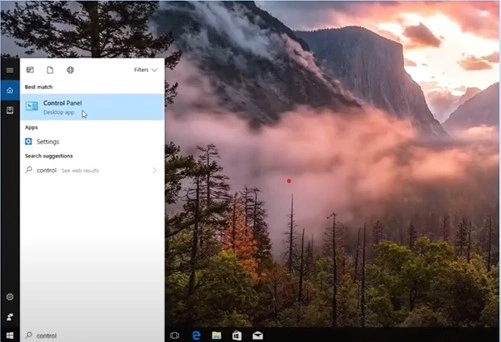
8. Next, click on the cross (X) sign to close the window, and then open the control panel window by going to the Start menu search section.
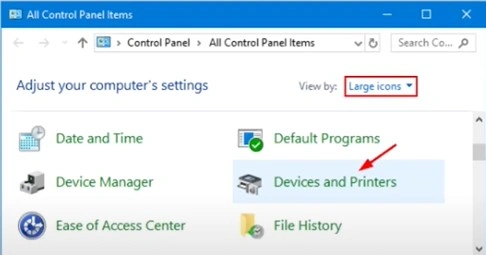
9. Moreover, in the control panel window, you need to choose a large icon for the View by option and then click on the Devices and Printers option.
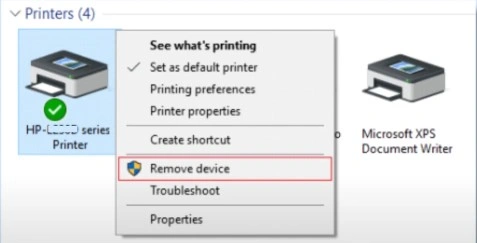
10. Look for your printer; if you see it listed, right-click on it and then choose the Remove Device option.
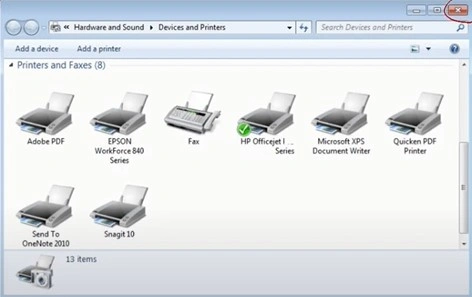
11. Once the above process is complete, close the current window.
12. Now, you need to hold down the Windows and R keys at some time to open the Run dialog box.
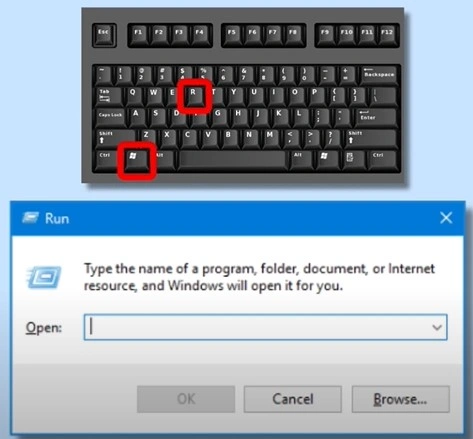
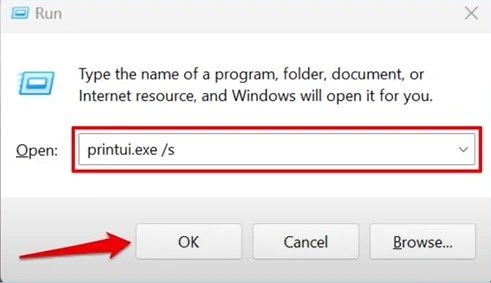
13. Moreover, in the search section of the Run command box, type printui.exe/s in the field and then select OK.
14. Next, on the open page, move to the Drivers tab and then try to look for your HP printer driver option.
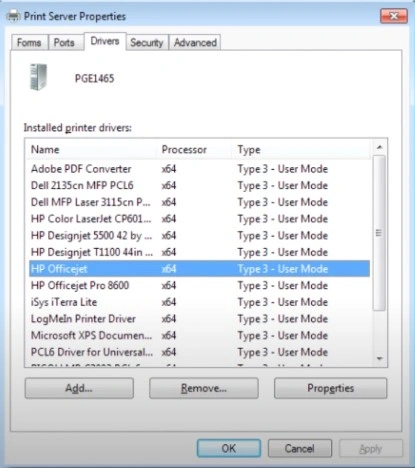
15. When you find the correct HP driver name, click on it and then click on the Remove button.
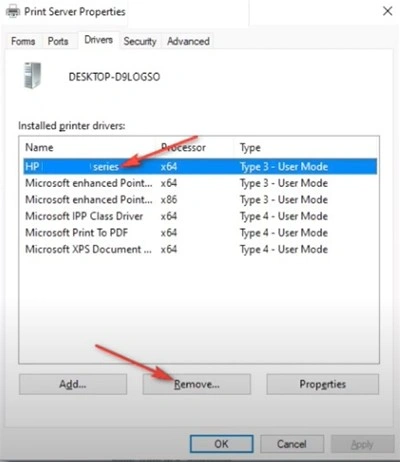
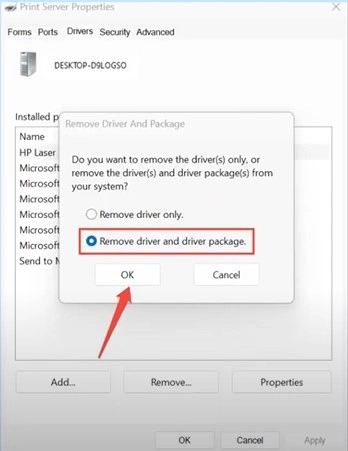
16. Then select the radio button to remove the driver and package, and then select the OK option.
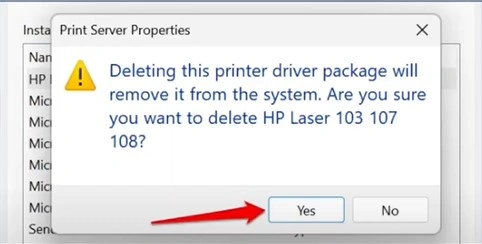
17. Choose the Yes option on the pop-up prompt to confirm your driver uninstallation process.
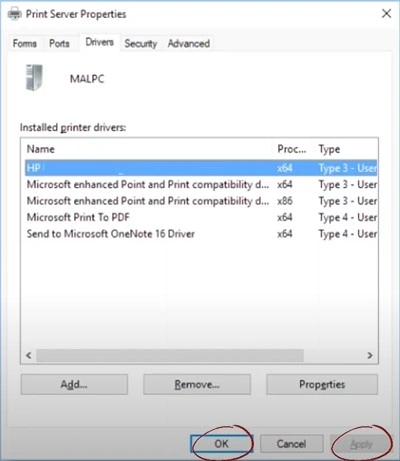
18. After that, click on OK, then select Apply on the Printer Server Properties window.
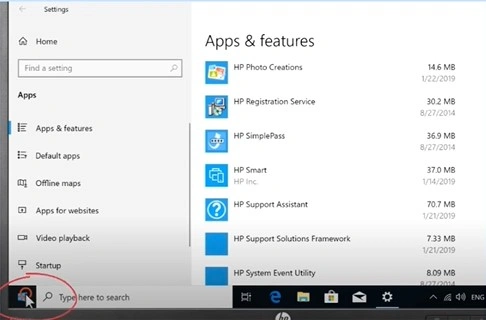
19. Now, after closing the open window, click on the Window Start icon from the top left side of the screen.
20. Then click on the power icon and click on the Restart option.

21. Once the restart is complete, go to the official HP website, then download and install the latest printer driver for your HP driver.
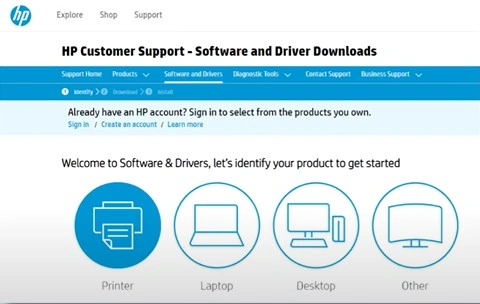
22. Finally, check if your HP Officejet 5258 printing issue is resolved or not.
Solution 2: Check the Print Settings
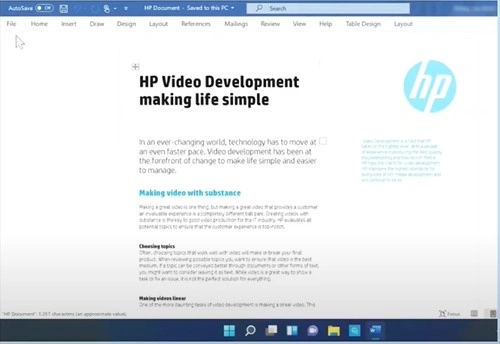
If you are having a printing issue on your HP printer, then it could be the result of the wrong print settings. You can make changes in the print settings by following these simple steps. 1. Initially, open the HP printer software application, go to the file you are trying to print, click on it, and then select the Print option.
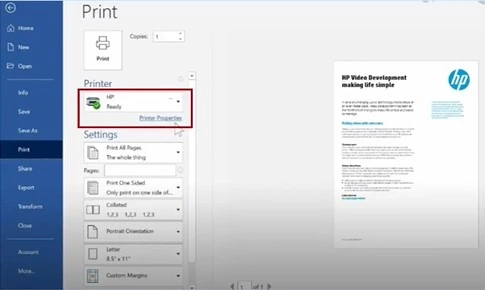
2. Then, you should click on the Printer Properties option.
3. Next, check the paper type and ensure that it matches the paper you are trying to print on.
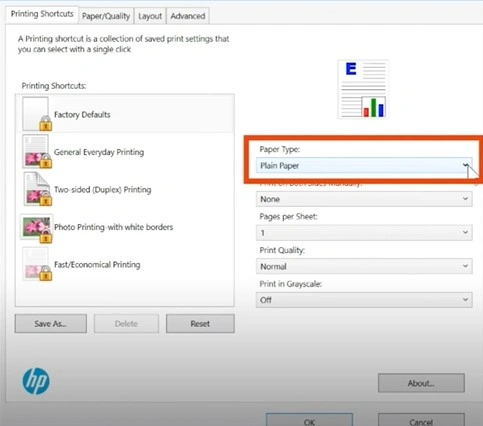
4. Now, in spite of the print quality then, you have to make changes to it as per the requirement.
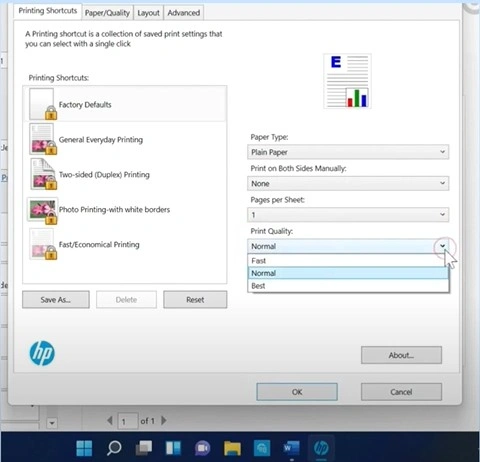
5. In addition, you can turn on or off the Print in Grayscale option based on your choice to print the documents in color or black & white.
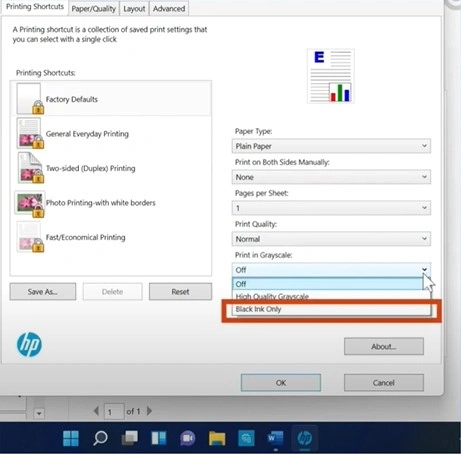
6. When all the required changes are complete, select the OK option to apply the changes.
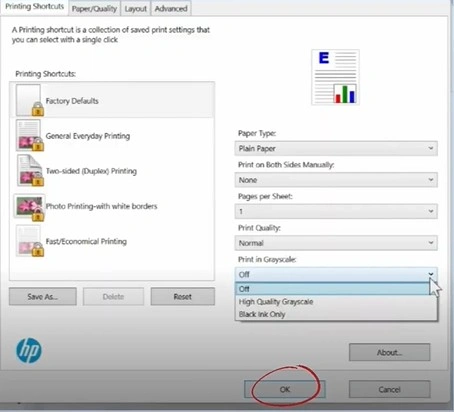
7. Now, see if your HP printer is showing the same problem on your device.
Solution 3: Manually Clean the Area Around the Ink Nozzle
With the help of the process mentioned here, you can easily clean the area around the ink nozzle manually.
1. At starting, open the ink cartridge access door and wait for the printhead to slide into the correct position.
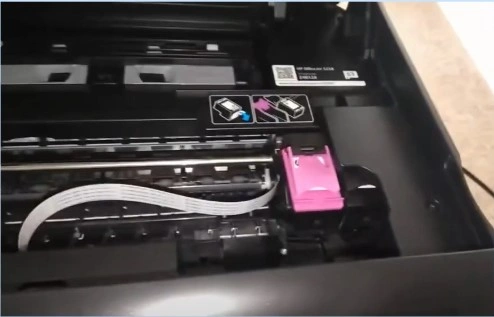
2. After that, lift the lid on the ink cartridge and the cartridge out of the printer.
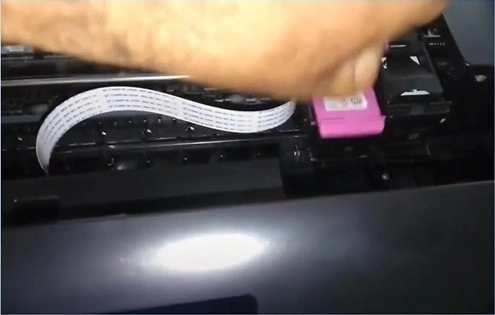
3. Now, take a cotton swab and lightly dampen it to clean the cartridge.
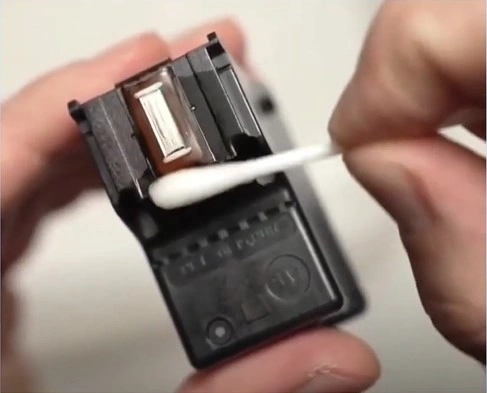
4. Next, use a completely dry cotton swab to wipe off the excess water.
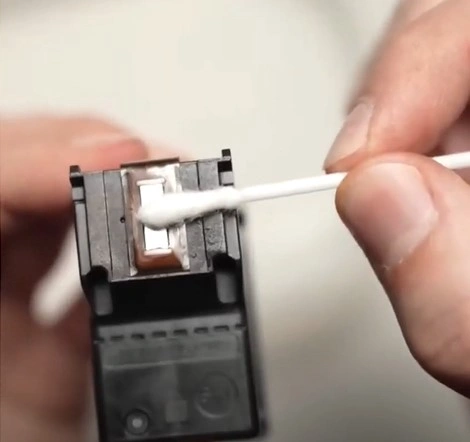
5. You need to repeat the same process for all other ink cartridges.
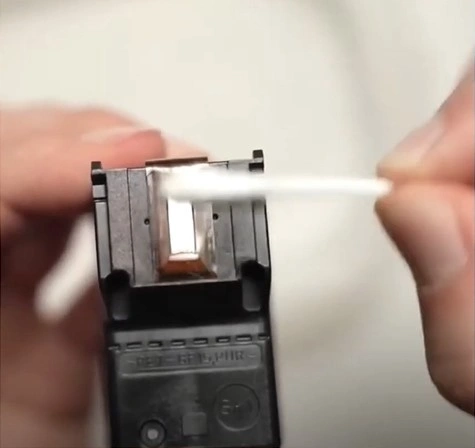
6. Wait for approximately 10 minutes for the ink cartridge to dry completely.
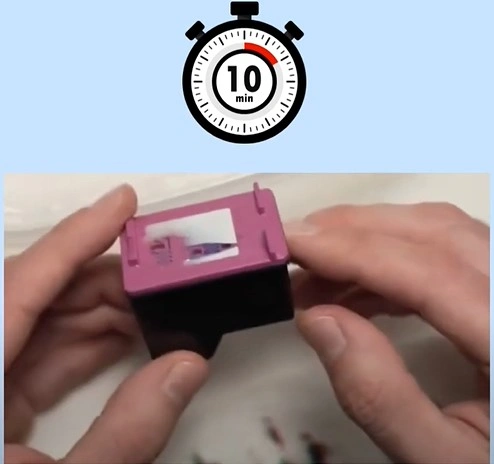
7. Once the cartridges are dried, insert the ink cartridges back into their slots.
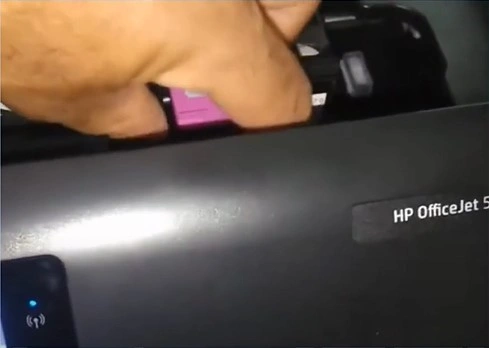
8. Afterward, close the lid of the ink cartridges to secure them in place.
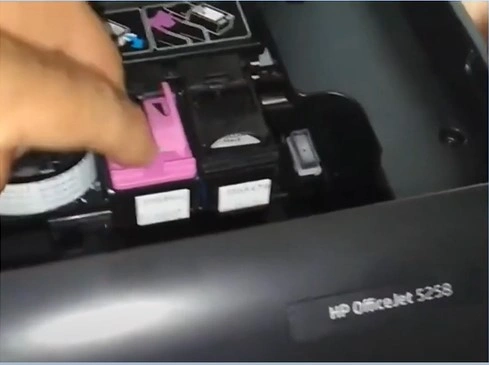
9. Moreover, you should close the ink cartridge access door.
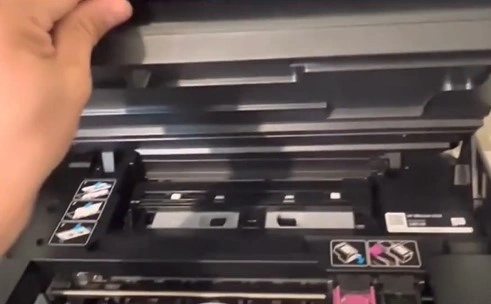
10. Finally, try to print a fresh copy to check if the same problem still persists on your device or not.
Final Words
You do not need to stress out if you find your printer device is not in a printing state. Most of the time, this can happen due to a small error or technical glitch. You can quickly and easily get rid of the issue by learning about the key cause of the problem first and then taking troubleshooting steps accordingly. Plus, our methods will allow you to fix the problem hassle-free if you are unable to figure out the key cause. However, if necessary, try to find additional assistance.

