Konica Minolta Printer Setup Via USB Cable Connection
The printer setup is essential to receive a print command from the device. The complete process requires multiple steps that need to be fulfilled. It includes preparing the driver CD, checking the driver type and the OS, installing the driver, etc. Below is the step-by-step guide for the Konica Minolta printer setup. Make sure you follow each of them carefully for a successful printer setting.
Konica Minolta Printer Installation Process
In this, one of the crucial things that must include is the printer driver. Without this, you won't be able to set up your printer. It is also necessary that you must download a suitable driver for your printer according to the operating system you are using.
Step 1: Prepare the Printer Software CD
Before starting with the USB cable connection, the first step is to prepare the printer driver CD. Here, it is a must-have component without which you cannot start the process. Before inserting it into the system, you need to check the printer model and machine name written on the CD-ROM.
Step 2: Check the Driver Type And the OS
Now, you need to check the type of driver the printer use and the system's OS. You must verify the driver version compatible with the computer operating system. An unsuitable driver on the system does not allow the printer to work correctly. Usually, there are three types of printer drivers PCL driver, PS driver, and the XPS driver. Each driver is suitable with some specific OS that you must take care of.
Step 3: Change the Installation Settings
If you use Windows 7 or Server 2008 R2, modify the PC settings before installing the driver as instructed below.
- From the Start menu, hit on the Control Panel option.
- Go to System and Security and then the System option.
- Hit on the Advanced System Settings option on the menu.
- It will open the System Properties window on the screen.
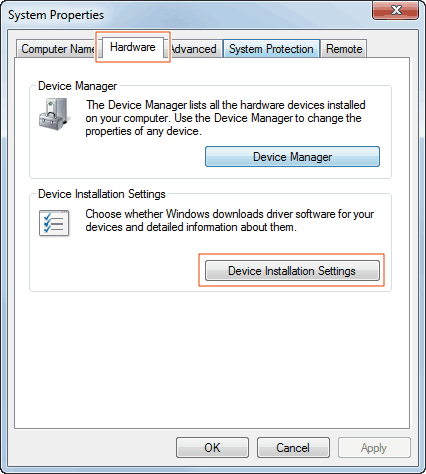
- Under the Hardware tab, click the Device Installation Settings button.
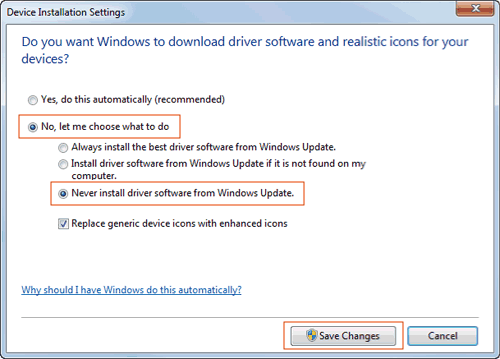
- Select the second option, "No, let me choose what to do in the new window" option.
- Under the same option, choose "Never install driver software from Windows update."
- After that, click the Save Changes button and proceed to the next step.
- After installing the driver, change the settings to "Yes, do this automatically (recommended)."
- Now, click OK, and it will close the System Properties window on the screen.
Step 4: Install the Printer Driver
- Insert a USB cable to the USB port of the printer and the system.
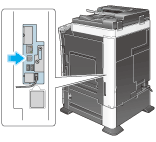
- If a new window appears on the screen to add hardware, click Cancel.
- Insert the software CD into the CD-ROM drive of the system.
Read Also:- How to Fix Konica Minolta Printer Offline Problem?
- Ensure the installer starts and then click on the Printer Install button.
- If it does not start, double-click on the .exe file. Read and accept the license agreement by clicking on the Agree button.
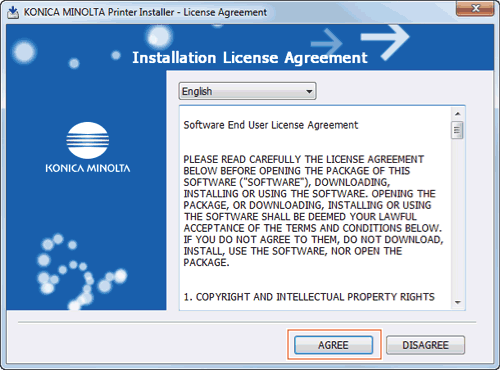
- If a new User Account Control window appears on the screen, click on the Continue or Yes button.
- On the Konica Minolta printer installer window, select the Install printers/MFPs option.
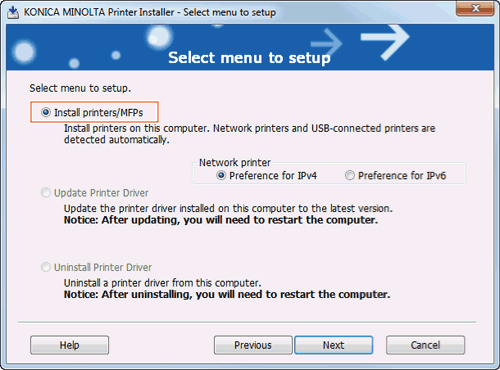
- Then, hit on the Next button, and it will detect the USB-connected printers.
- Now, select your printer, click Next and choose the printer driver you wish to install.
- Again, click Next, verify the items you selected to install, and then click Install.
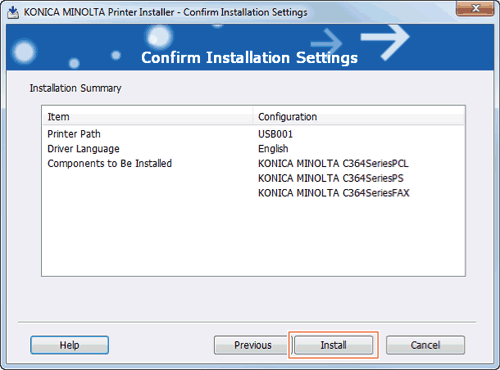
- If required, change the printer's name or print the test page. Now, hit Finish to complete the driver installation process.
Change the Default Print Settings
After installing the printer driver, another thing that you can do is to set the settings according to your requirement. In this optional step, you will modify the default print settings of the driver. Read and follow the below instructions for the same.
- First, open the Printing Preferences window of the driver.
- Then, modify the print settings according to the requirement.
- After setting the print preferences, click the OK button.
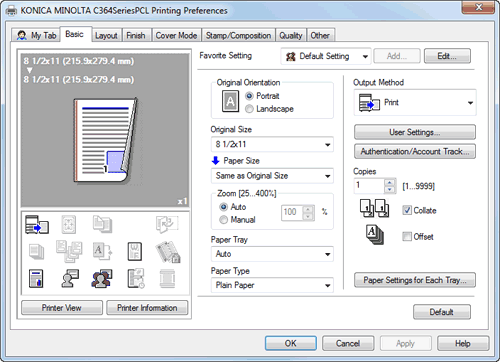
- The modified settings are applied when the printing is done from any application software.
Frequently Asked Questions
Why set up a Konica Minolta printer?
The printer setting is required to receive print commands from the system. You can either set it up on Windows or the Mac operating system. You need to follow some steps to complete the setup process.
What is the driver's role in the printer setup process?
The driver is one of the vital software components of the printer. It helps convert the soft file on the system into a printable format. You can also call it a print processor, which allows the system to interact with the printer.
What are the different types of printer connection processes?
To set up a printer, you can use a wired connection through a USB cable or a wireless connection. Both successfully connect your printer to the device. However, every printer model comes with its setup feature. You must look at the type of printer you are using are set it up accordingly.

