Brother HL L6200DW WiFi Setup
Do you want to connect your Brother HL L6200DW printer to a wireless network? Setting up your printer on WiFi keeps your workspace tidy and gives you the freedom to print from anywhere you want.
In addition, a wireless printer connection can also let users quickly switch to PCs or mobile devices on the same or different networks. Here, you will gain in-depth knowledge of two well-tailored and effective methods to complete the wireless setup on a PC and smartphone hassle-free. So, let's jump right into it!
Method 1: Via WiFi Direct Setup
Below are the quick step-by-step instructions to complete the wireless setup of your Brother printer.
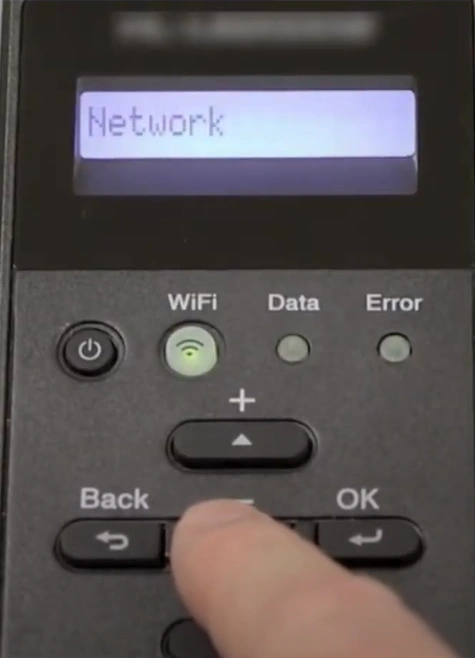
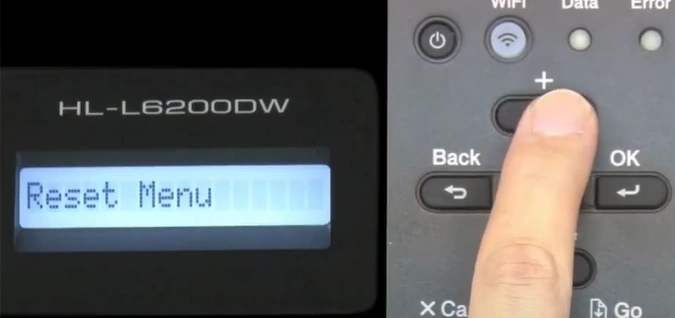
1. Initially, go to your printer's control panel, navigate to the Network, and select OK.
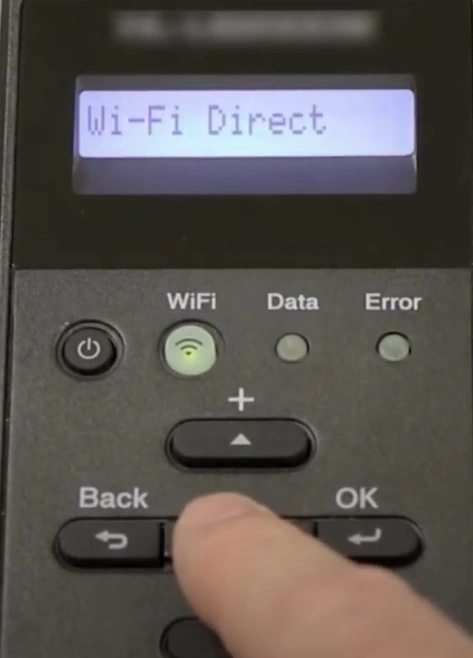
2. Press the down arrow button/key until you reach WiFi Direct, and press OK.
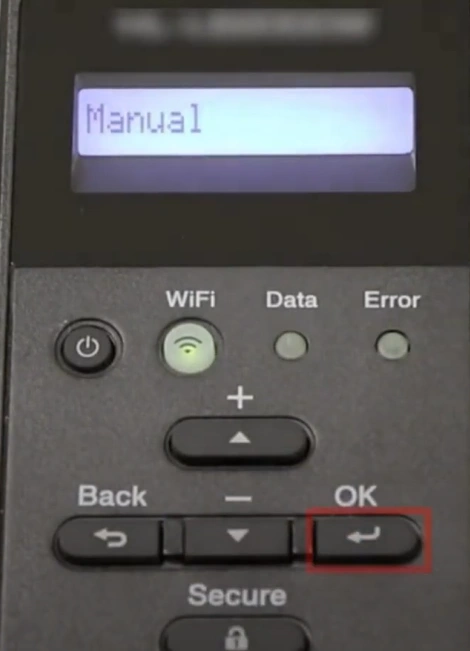
3. Choose the Manual option and press the OK key.
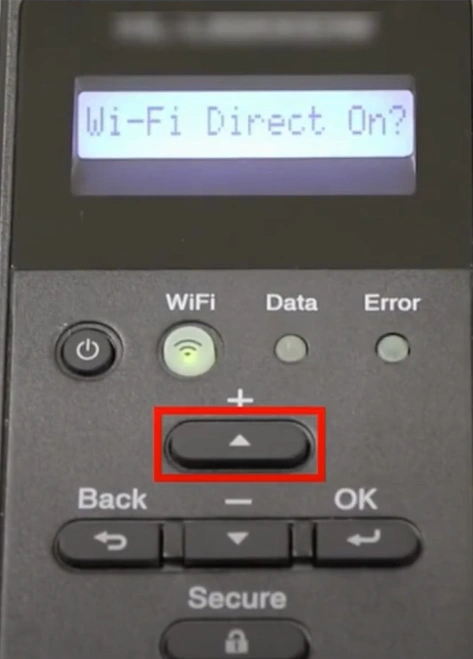
4. If you see a prompt to activate WiFi Direct, press the up arrow button to turn it on, and it will start connecting.
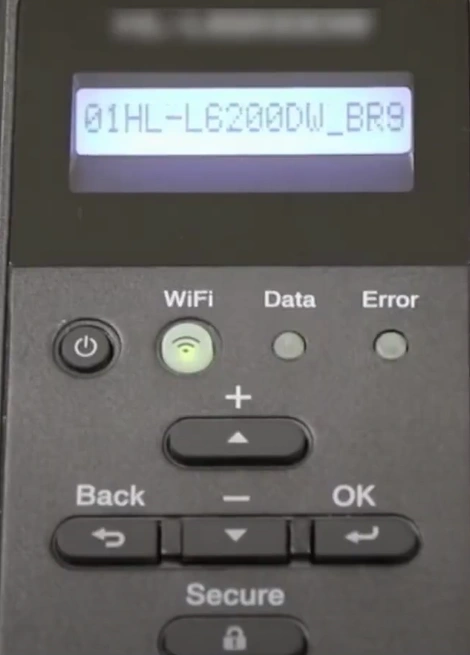
5. Next, the WiFi Direct name and the password will show up. (It will show up only for 2 minutes.)
6. After that, go to your computer or mobile phone device and navigate to WiFi Settings.
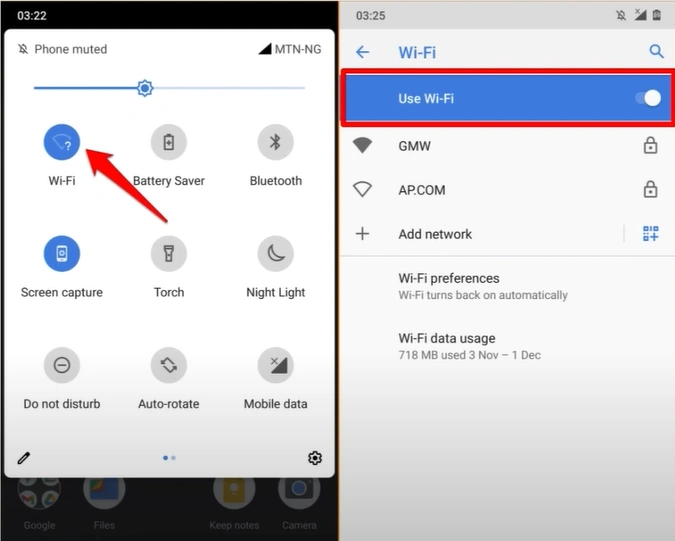
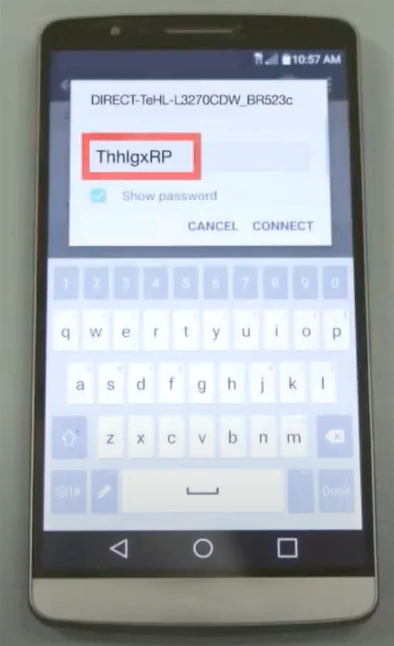
7. Now, choose your printer's WiFi Direct name, enter the password, and tap on Connect.
Also Read:- How to do Brother Printer Wi-Fi Setup?
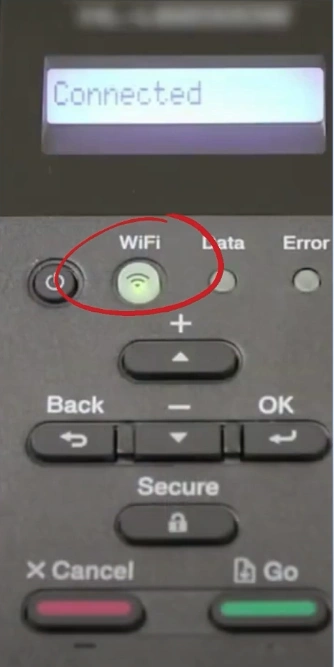
8. Once the connection is established, it will display a Connected Message, and the WiFi light will remain lit. .
9. Check if the printer wireless setup is successful; if not, then go to the next method.
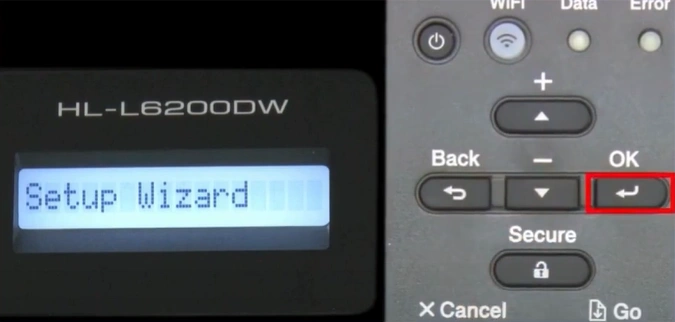
Method 2: WLAN Setup Wizard
You can use the WLAN Setup Wizard method to complete the connection process of your printer. Here are the simple and extensive steps for that.
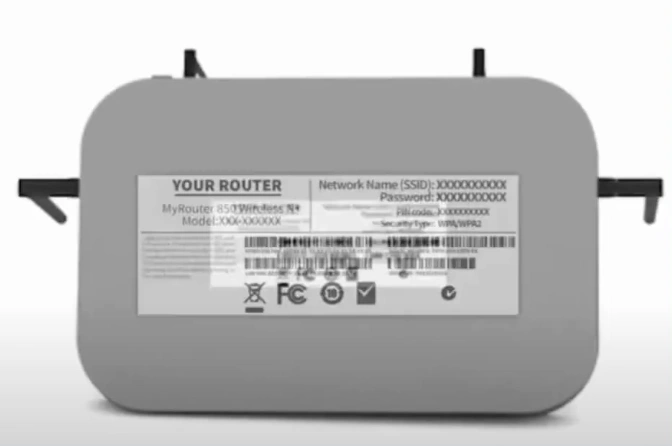
1. For this connection method, you need the SSID or Network Name and the network key or password of your wireless network.
2. Next, go to the printer control panel, navigate to Network, and press OK.
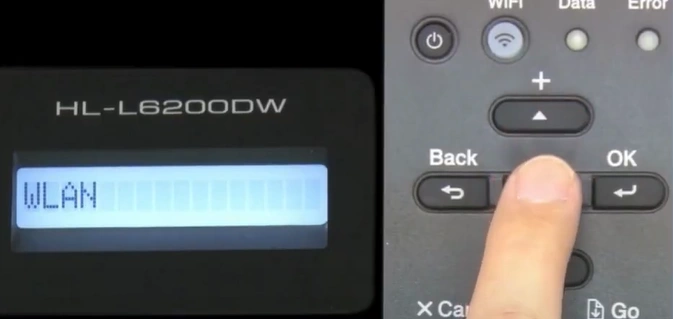
3. In the next step, choose WLAN and press OK.
4. Then, choose Setup Wizard and press the OK key once again.
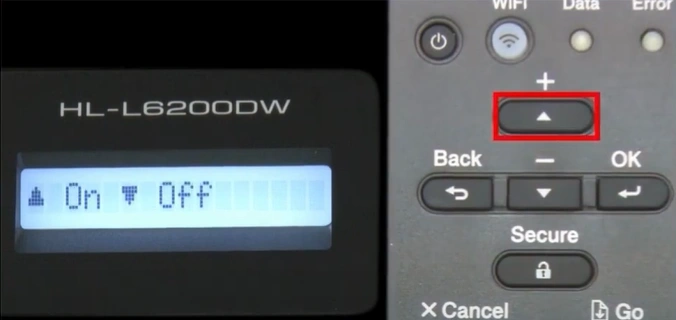
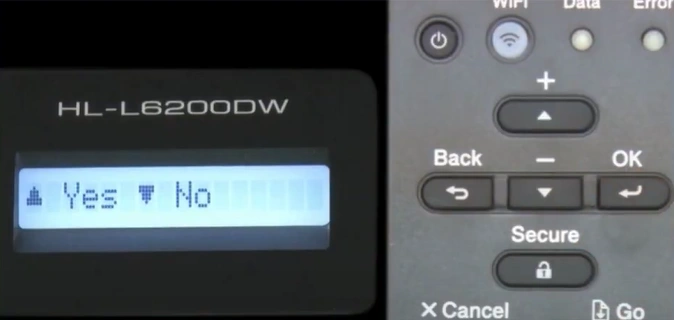
5. When "WLAN Enable?" appears on the screen, press the Up arrow button to turn it On.
6. Choose your network name from the list of options and press OK.
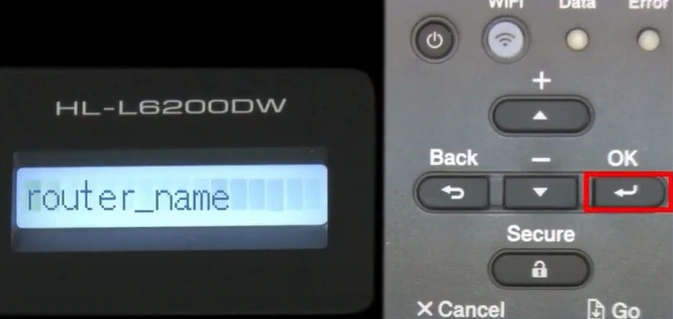
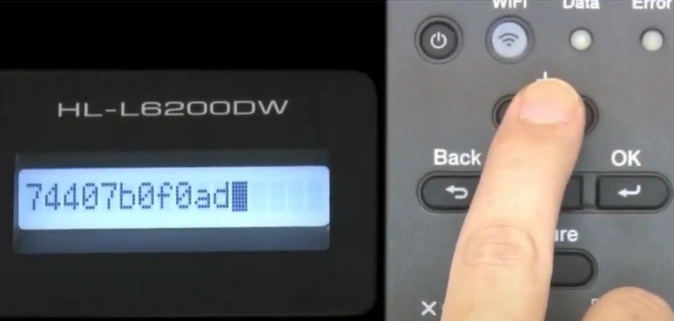
7. Now, enter the correct password for your network and choose OK.
8. When it prompts you to apply settings, press the Up arrow button to select Yes.
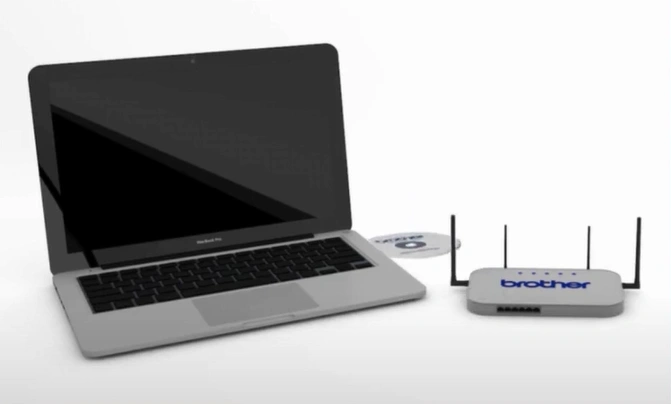
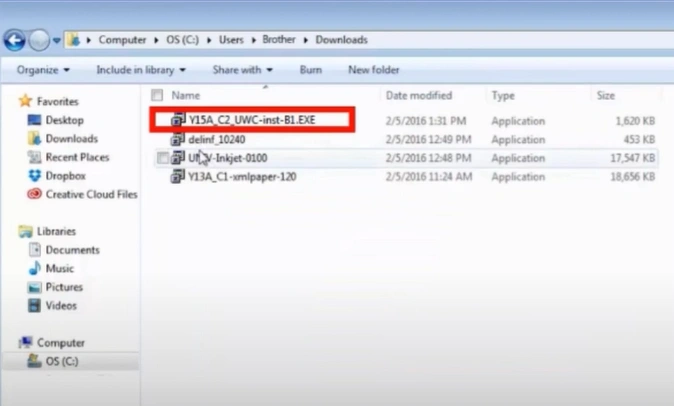
9. Next, insert the driver installation disc that came with your printer into your computer or download the full driver package by visiting the official Brother website.
10. Access and double-click on the installer file to begin the installation.
11. Once the device installation window opens on the screen, select your Language and click on Next.
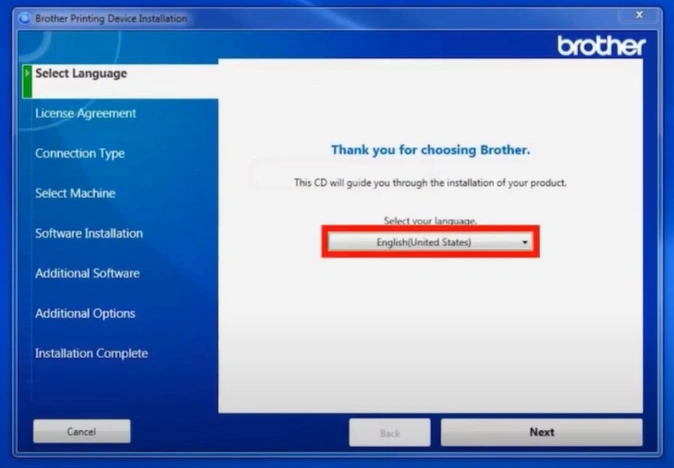
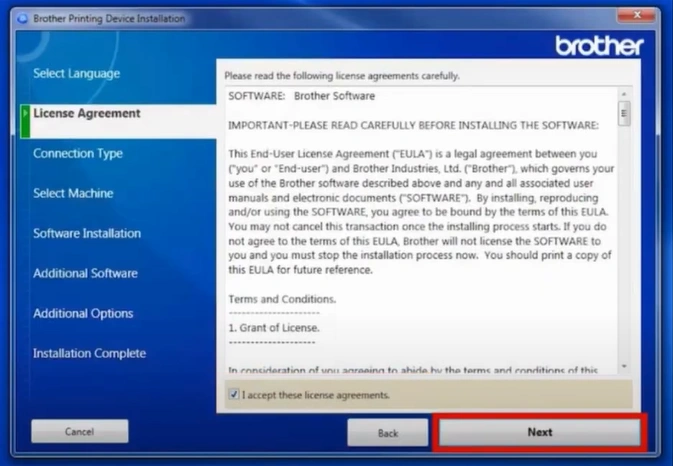
12. Next, accept the HP license agreement and click on the Next button.
13. After that, choose the Wireless Network Connection (WiFi) radio button and select Next.
_1739364377.webp)
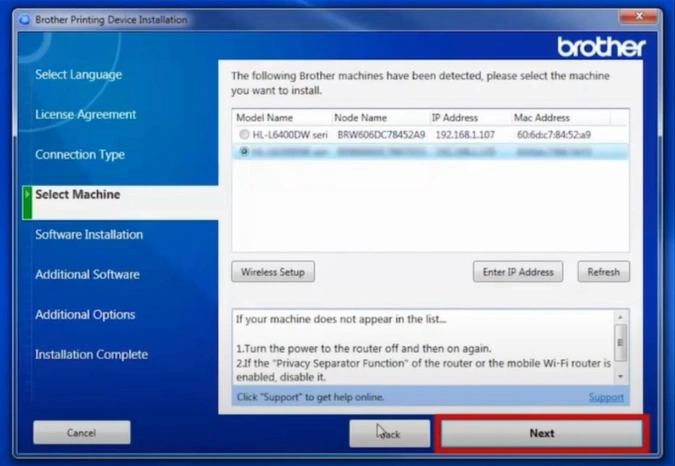
14. Click on the Brother HL L6200DW printer from the list and choose Next.
Final Words
We hope your Brother printer setup process is complete after using these two methods you read here. Read every step carefully and follow it to complete the setup in no time. If any problem occurs, which is very common, then make sure to repeat the method. In addition, you also go for additional help if necessary.

