How to Add Canon Printer to Mac [Wired And Wireless]
You must connect a printer to a Mac device to give print commands from the Mac OS. How to set up the printer for the Mac computer depends on the type of printer. You must check whether the printer supports a wired connection, wireless connection, or both. Know about how to add Canon printer to Mac using a wired and non-wired connection.
How to Setup Canon Printer to Mac Device
If you want to connect the Canon printer to the Mac operating system, you must follow the step-by-step instructions listed below.
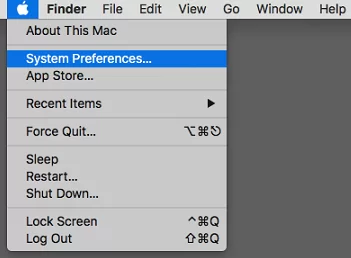
- Open the Mac system and then System Preferences by clicking on the Apple logo.
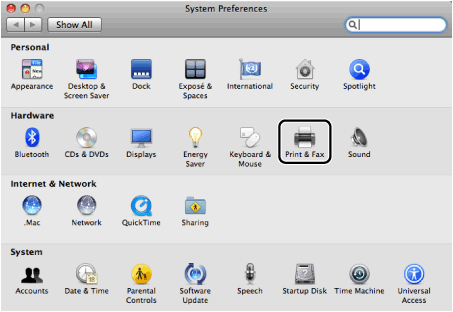
- Double-click on the "Print & Fax" option and a new dialog box will open on the Mac.
- Click on the + sign on the right below side of the same Print & Fax dialog box.
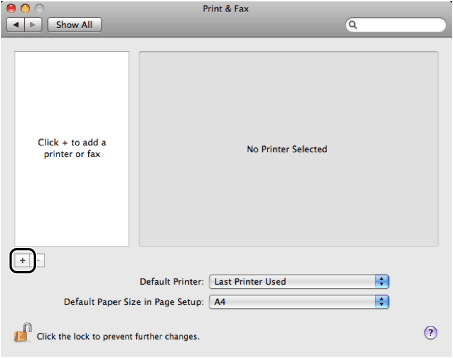
- You may require to hit the Print option and the plus sign on some Mac systems.
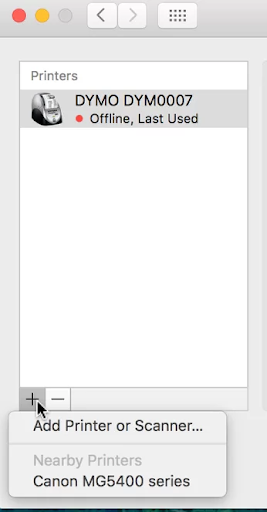
- In a few Mac systems, you must click on the + icon and select "Add Printer or Scanner."
- Select the IP tab in the new window that appears on the Mac OS system.
- After that, from the drop-down list of the Protocol option, choose the LDP option.
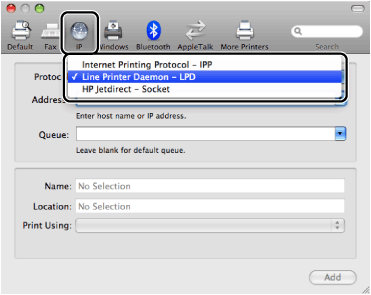
- Mention the IP address of the printer you are using in the Address option.
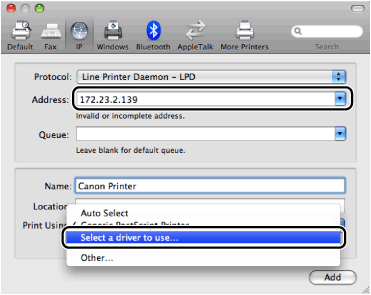
- Click on the Print Using option drop-down list and choose the option "Select a driver to use."
- Choose the driver compatible with your device and add it to the Printer Software dialog box.
- After completing the above steps, select your printer model and click on the Add button.
- Ensure the printer is successfully added and close all the windows open on the Mac system.
How to Add Canon Printer to Mac Via a Wireless Setup Connection
Learn how you can set up a printer for Mac to print wirelessly. If your printer supports a wireless connection, then you can use WiFi to establish the connection between the printer and the Mac system. Before you start a wireless setup connection, ensure the WiFi router has a WPS button.
- Switch On the printer and ensure the wireless router has a WPS button.
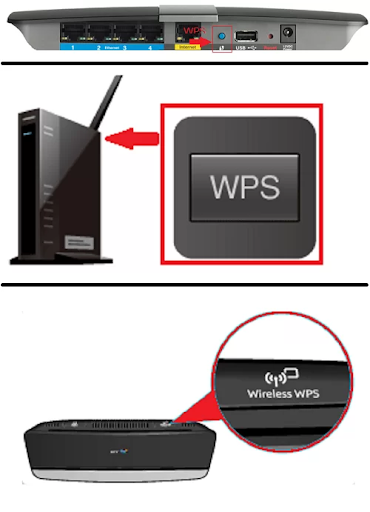
- Ensure the network you are using must use WPA2 or WPA security protocol.
- Press the printer's wireless button and hold it for a few minutes until the alarm LED light blinks.
- Once the WiFi light turns On, press the router's WPS button and hold it for about 2 minutes.
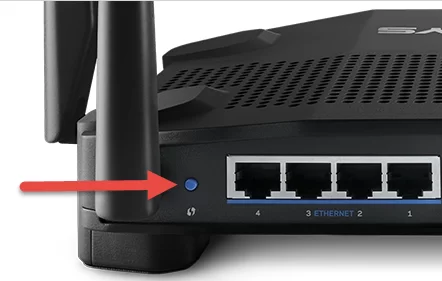
- Now, the WiFi light will flash and search for available networks within the range.
- The WiFi and the printer's power light will start flashing as soon as the WiFi connection is established.
- Ensure the printer driver is installed on the Mac computer. If not, install them correctly and complete the setup process.
How to Connect Canon Printer to Mac Via Wired Setup Connection
When you add Canon printer to MacOS using a USB cable, ensure the cable is in a good situation. While performing the wireless setup process, ensure the USB cable is connected correctly to both printer and the Mac system.
- Switch On the printer and ensure the driver is installed on the Mac system.
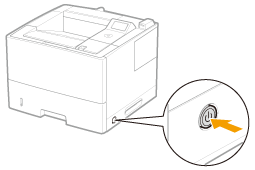
- If not installed, download the printer driver and install it on the system.
- Insert the USB cable to the Canon printer and another end to the Mac.
- Open the System Preferences option by clicking on the Apple logo icon on the Mac.
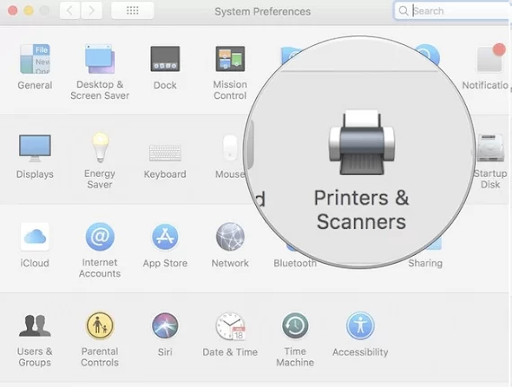
- After that, choose the Printers and Scanners option. A window appears on the screen.
Read Also :- How to Connect Canon MG3620 Printer to Wifi
- Hit the + sign, choose "Add Printer or Scanner," and select your printer model.
- Click on Add to complete the setup process and start printing.
Conclusion
In this blog, you have learned how to set up a Canon printer for a Mac system. You must have understood how to perform wired and wireless setup for Canon printers on Mac.

