How to Connect Lexmark Printer to Wi-Fi? [Step-by-step Guide]
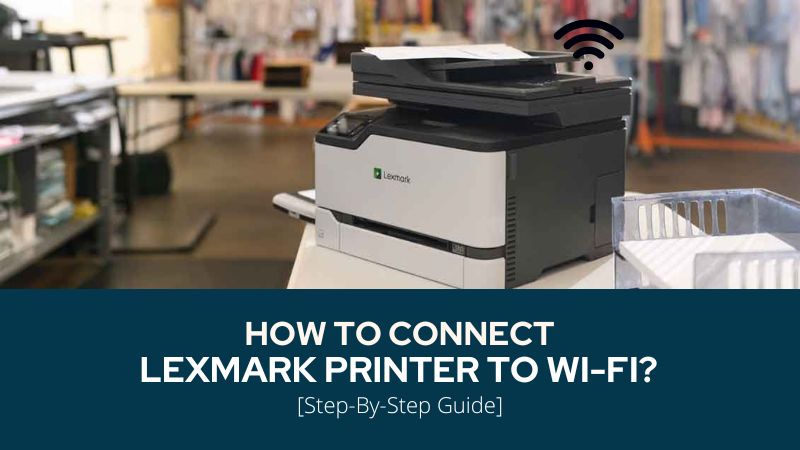
Connecting a printer to the wireless setup has several requirements, such as Wi-Fi Protected Setup or a certified access point. You can connect your Lexmark printer to a wireless setup with or without an installation CD. In this blog, get the instructions for using the PIN or Push button configuration method (Windows/ Mac).
Before You Start the Setup:
- Confirm if you are using an SSID network.
- The access point/ router must have a WPS push button (for WPS Connection).
- Install a wireless network adaptor in the printer.
- If in any doubt, check the manual that came with the device.
Note: If your router or gateway has been installed by an Internet Service Provider, check the setup sheet for the credentials. If you do not know the name of the SSID name or password, contact the service provider. And if you have the details, use two basic methods, USB setup or Wireless Setup Wizard.
Setup Wi-Fi on Lexmark Printer Via Installation CD (Windows)
You can set up a Lexmark machine to a wireless setup using an installation CD received with the print system. Here is how:
- Connect your print device to the AC power outlet.
- Now, insert the installation CD into the CD-ROM drive.

- On the next window, click Install.
- After that, perform the on-screen steps.
- Next, select a Wireless Connection (type).
- Now a Wireless Configuration dialog box will appear.
- On the following window, select Guide Setup.
- In the next step, connect both devices using a USB cable.
_1665116259.jpg)
- After configuration, the setup will ask you to remove the USB cable.
Now, move on to the Mac wireless configuration below.
Setup Wi-Fi on Lexmark Printer Via Installation CD (Mac)
If your wireless setup has Mac restrictions, the printer will not be able to set up Wi-Fi. Below is the configuration process for the setup.
- Examine the backside of the printer for a sticker containing a Mac ID.
- Go to the admin console of the router and select the Wireless option.
- After that, choose Wireless Mac Filtering.
- Then, enter the printer’s Mac address.
- Next, ensure the network is enabled.
- Now, hit the Save button and complete the configuration.
Once the settings are done, perform the procedure of wireless setup on your device.
- Connect the device to the wall outlet.
- Then, turn on the printing device.
- Locate the Mac address of your print system.
- Go to the home screen on the Control Panel.
- Next, go to the Reports section and then tap the Network Page.
- In the Network Card folder, find the UAA (MAC).
- Click the Airport options on Mac.
- On the Apple Menu, go to System Preferences.
- Click the Network option in the next step.
- Navigate to the Airport option now.
- Choose a print server in the Network pop-up menu.
- Next, open a browser and open the Bookmarks menu.
- Choose the Show All Bookmarks option.
- Navigate to the Collections section.
- Then, choose Bonjour or Rendezvous.
- After that, double-click the device name.
- Browse the location from the Embedded Web Server.
- Enter the name (SSID) in the required field.
- Navigate to the Network Mode settings.
- After that, choose the Infrastructure option.
- Choose the security type for the wireless network.
- Enter the security information needed for your printer.
- Connect the wireless setup and tap Submit.
Connect the Lexmark Printer to Wi-Fi Without Using a Driver CD
Before the setup, you must check out the series number and model name of the Lexmark machine. Also, the operating system must be 32-bit or 64-bit. Perform the following:
- First, go to the official Lexmark website.
- Then, click the Download or Support option.
- The navigation page will open after that.
- On the following page, you can download the driver.
- Next, go to the Product Search Bar.
- Then, enter the printer model number.

- Now, the model and series will be visible.
- Choose the Downloads/ Software/ or Printer Driver option.
- Select the operating system of your device.
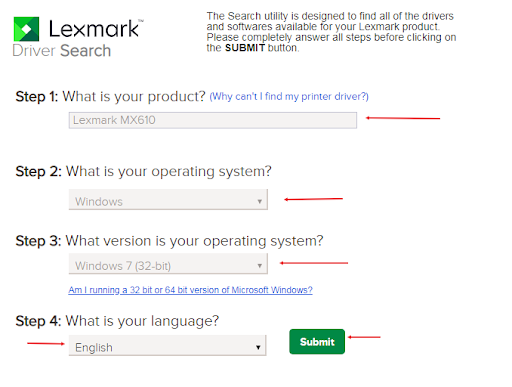
- Select Language and click on Download.
- Download the software or driver package.
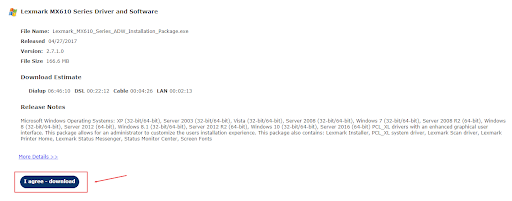
- Locate the software and double-click on it.
- The download file is stored in a new folder.
- Select the Extract option to open the zip file.
- Now, double-click the Setup button.
- And start the software installation process.
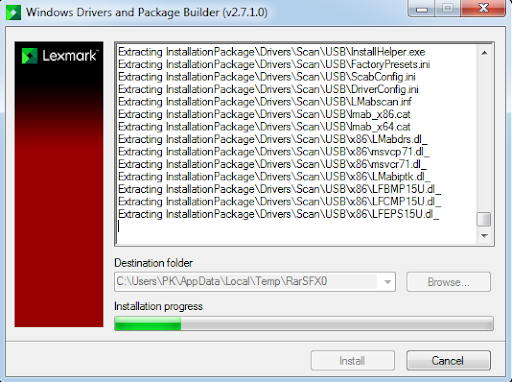
- The installation command will run on your screen.
- On the “Select an Installation Type” screen:
a. Tap on “Install the driver software now.” - Next, click the Start button on the prompt.
- Now, tap the Install option and continue.
- Then, tap the Agree button to permit the license agreement.
- Tap on Continue on the next screen.
- Again, hit the Continue button.
- Then, check the “Set as the default printer” option.
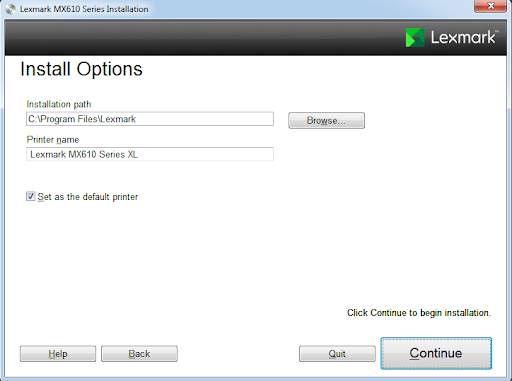
- Navigate to the Select Connection Type.
- Then, select the Wireless Connection option.
- Tap on the Continue button after that.
- Select the Yes/No option for the Network Connection.
- In the next step, tap on Continue.
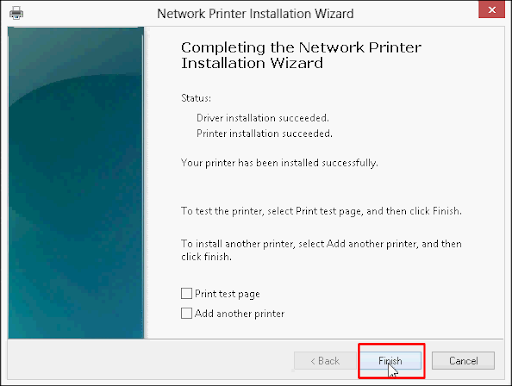
- Now, hit the Finish button to complete the process.
Connect the Lexmark Printer to Wi-Fi Using a WPS Setup
Here you will find two methods to attempt the procedure: the Push Button Configuration method & Personal Identification Number (PIN) method. Let’s see how to set it up:
Push Button Configuration Method
- From the printer control panel, go to Network/ Ports.
- Then, open the Network [x] option.
- Next, navigate to the Network [x] Setup.
- After that, click the Wireless button.
Read Also:- How to Troubleshoot Lexmark Printer Offline (Windows/Mac)?
- Now, go to the Wireless Connection Setup.
- Then, tap the Wi-Fi Protected Setup option.
- Click the Start Push Button Method option.
- After that, the screen will display the instructions.
- Follow the prompts and complete the setup.
Personal Identification Number (PIN) Method
- On your Control Panel, navigate to Network/ Ports.
- Then, go to the Network [x] option.
- Next, tap the Network [x] Setup icon.
- Now, choose the Wireless option in the next step.
- After that, go to the Wireless Connection Setup.
- Click the Wi-Fi Protected Setup.
- Then, navigate to the Start PIN Method.
- Now, copy the eight-digit WPS PIN.
- In the next step, open a web browser.
- After that, enter the IP address of your access point.
- Open the WPS settings and check the manual (if needed).
- Provide the passphrase (eight-digit).
- In the end, save the settings.
Note: If you do not know, the IP address will appear as four sets of numbers. The number sets will be separated by periods, for instance, 123.123.123.123. For a proxy server, you must temporarily disable the IP address to open the Web page correctly.
The wireless configuration for the print system can be confusing or frustrating. However, this guide will help you enable the wireless network via WPS or Installation CD. If, in case, you are unable to understand the method, connect with Printer Tales right away. Here, you can rest assured with the help of skilled professionals. Call us at +1-877-469-0297/ +44-800-054-8150 or email us at info@printertales.com.
Frequently Asked Questions
How do I set up Wi-Fi on my Lexmark MC3426 model?
Setup the Wi-Fi Direct:
Go to the home screen.
Then, tap the Settings option.
Next, click on Network/ Ports.
Tap on Wi-Fi Direct and configure the settings.
Turn on the Wi-Fi Direct feature now.
Then, allow the broadcast to its own network.
Can you connect the Lexmark B2338 printer to Wi-Fi?
Yes, find the steps below:
First, navigate to the control panel.
Then, go to the Settings section.
After that, select the Network/Ports option.
Click on the OK button.
And then choose the Wireless option.
Again, tap OK, and choose “Setup on printer panel.”
Hit OK and follow the instructions on the screen.
How do I set up my Lexmark MC3224 printer to Wi-Fi?
Set Up My Lexmark MC3224
Open the Printers & Scanners section.
Then, tap on Add a printer or scanner.
Tap on Show Wi-Fi Direct printers.
Next, choose Wi-Fi Direct name.
From the display, note the eight-digit PIN.
Provide the PIN on the PC.
Where do I locate the WPS PIN on my Lexmark?
Go to the home screen and tap Settings. Then, click Network/Ports and open the Wireless option. Now, tap Wi‑Fi Protected Setup and navigate to Start PIN Method. Copy the eight‑digit PIN and enter it in the box.

