How to Get Your Canon TS702a Connected to Wi-Fi?

The setup is one major step before you can start using your all-new Canon PIXMA TS702a printer wirelessly. Once the printer is connected to Wi-Fi, you won’t have to deal with messy wires and cables around your work desk.
To perform the Canon TS702a Wi-Fi setup, you need to be a little patient and keep the right instructions in mind. Maybe you are new to Canon printers and not sure how to connect your printer to Wi-Fi. No need to worry, as this guide explains the complete setup process step by step.
Before we get into how to connect the Canon TS702a printer to Wi-Fi on a laptop or desktop, we want you to first look at the challenges that might arise.
Challenges Faced When Connecting Canon TS702a to Wi-Fi
These are a few problems that might show up while you are attempting to connect the Canon printer to your Wi-Fi network:
- Incorrect Wi-Fi password or network name (SSID)
- Poor internet connection
- Printer not in setup or pairing mode
- Outdated printer firmware or drivers
Dos and Don’ts to Keep in Mind Before Setup
Connecting your Canon TS702a printer to Wi-Fi seems very simple. But it works properly only when you follow the correct steps. To do things the right way, here are the dos and don’ts to look at:
Dos
- Do check that your router supports the 2.4 GHz Wi-Fi frequency band.
- Do use the official Canon Print Inkjet/SELPHY app.
- Place your printer at a reasonable distance from your Wi-Fi router.
Don’ts
- Don’t fill in the wrong Wi-Fi password.
- Don’t force a connection if your printer is currently performing another process.
- Don’t skip the step to restart both the Wi-Fi router and the printer.
Steps to Perform Canon TS702a Wi-Fi Setup
Follow these instructions to get your Canon PIXMA printer connected to your Wi-Fi network:
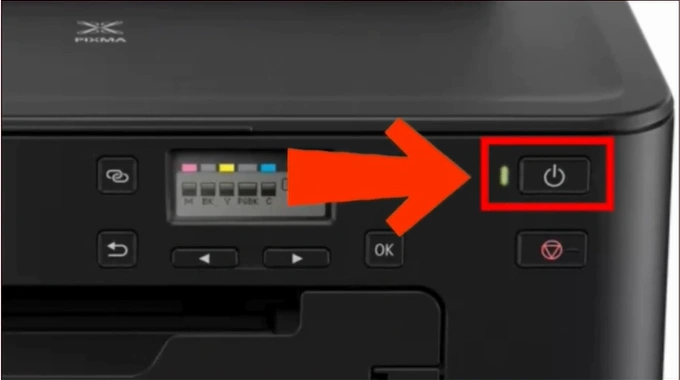
Step 1: Power on your Canon printer.
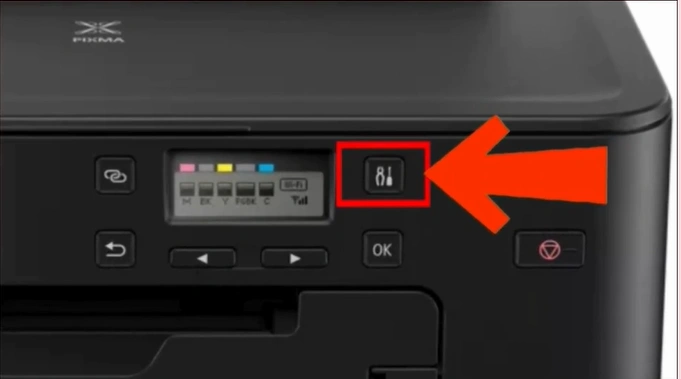
Step 2: After that, press the Setup button on the printer’s control panel.
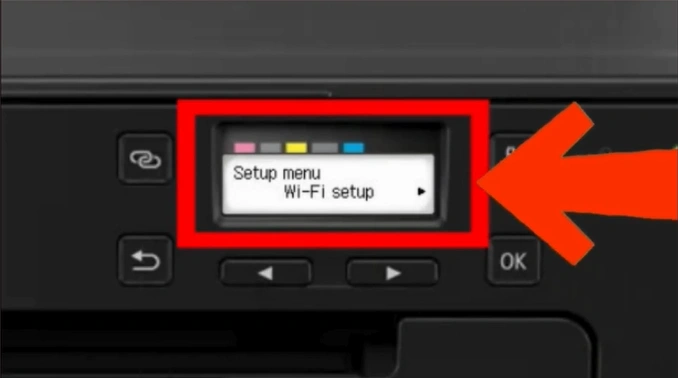
Step 3: Select the flashing Wi-Fi Setup option on the printer’s screen.
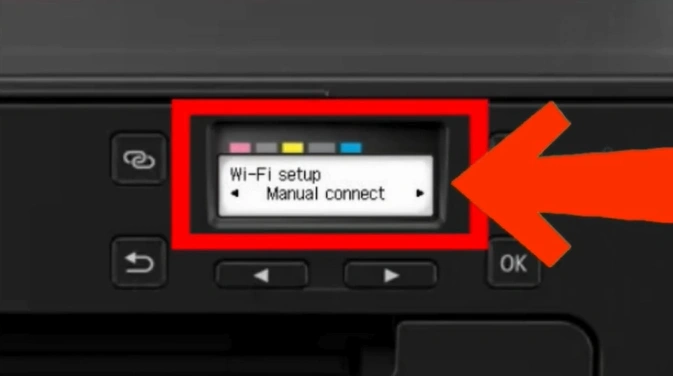
Step 4: Next, choose the Manual connect option.
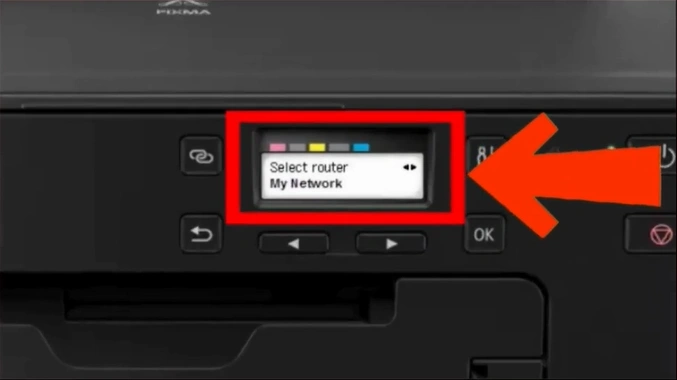
Step 5: Now, you will need to select your Wi-Fi router. Scroll and select your network by pressing the OK button.
Step 6: Press OK again to go to the password entry screen.
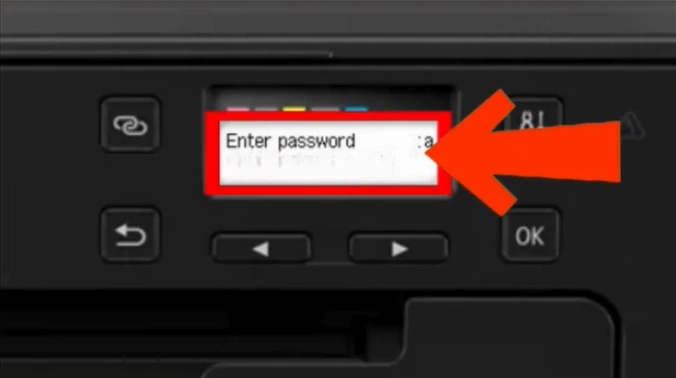
Step 7: Use the arrow keys to find a letter, then press OK to select it.
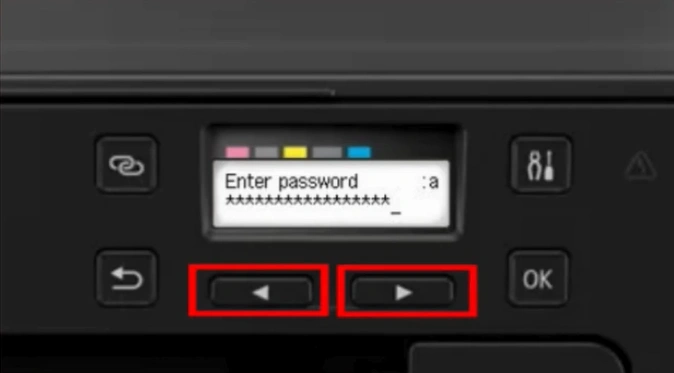
Note: Use the Setup button to uppercase and lowercase the letters.
Step 8: After entering the password, press and hold the OK button to submit.
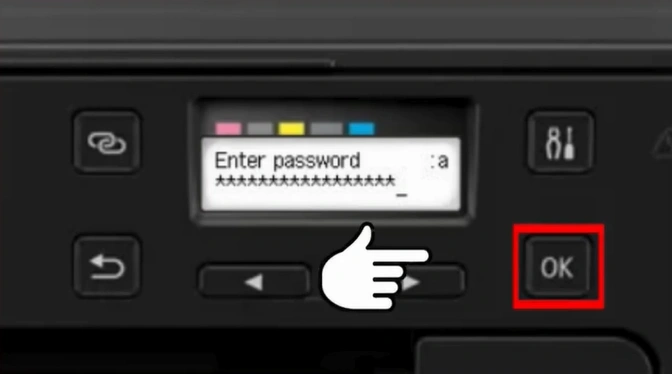
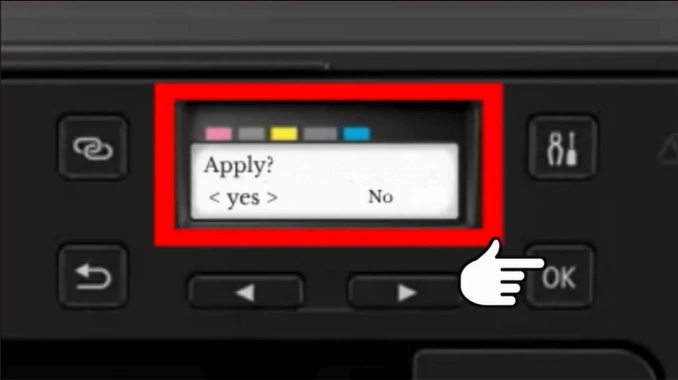
Step 9: Once the screen shows “Apply?”, release the OK button and select the “Yes” option.
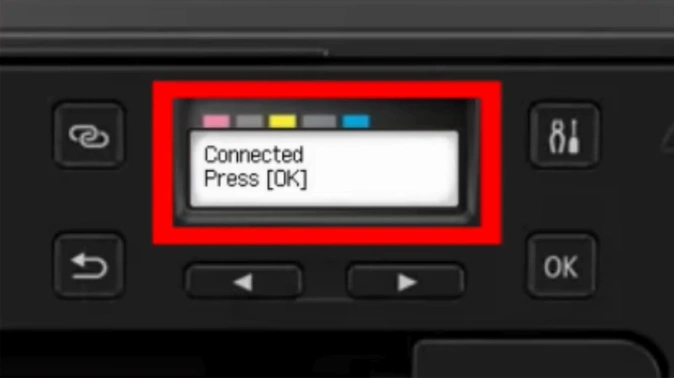
Step 10: Once the Wi-Fi is connected, press the OK button.
Summing Up
That’s all we want to share with you about how to connect a Canon printer to Wi-Fi. No more getting tangled with those messy cables and wires. Place your printer anywhere you want, where it feels most convenient. Make your workspace clutter-free and complete your print jobs with ease. Leave plenty of space for other items such as a coffee mug, a book, pen holders, or decorative plants.
Related Article
How To Fix Error Code 1300 in Canon Printer?

