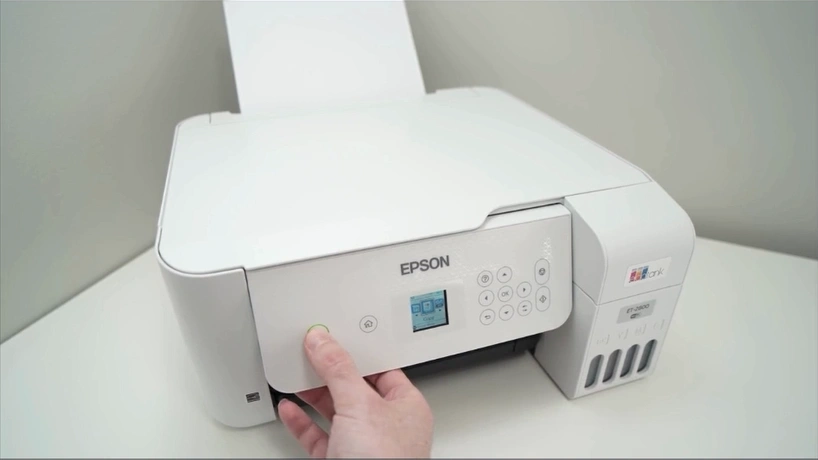
Epson Printer Not Connecting to WiFi [Fixed]
![Epson Printer Not Connecting to WiFi [Fixed]](https://printertales.com/public/upload/blog/6887346f8a390_epson-printer-not-connecting-to-wifi-fixed.webp)
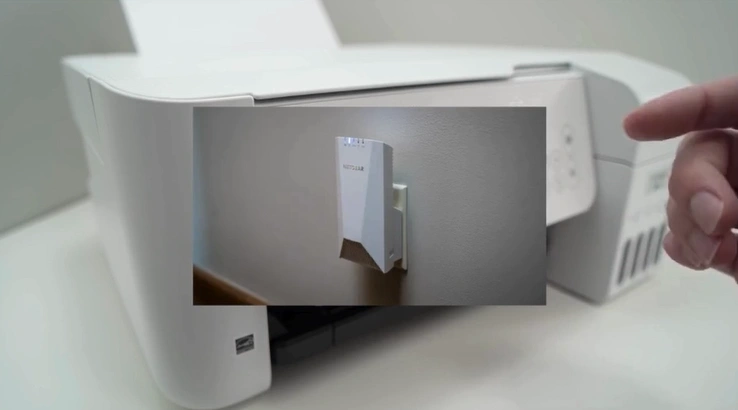
Is your Epson printer showing an issue when connecting to WiFi? Are you unable to fix the issue with your printer's WiFi connectivity? Connecting your Epson printer to WiFi can be troublesome sometimes due to many reasons, like network compatibility issues, following the wrong procedure, keeping the printer far from the WiFi router, or several other reasons.
Figuring out the root cause of the problem and resolving the issue can be challenging for many. Don’t worry, we are here to help you fix your Epson printer's WiFi connection problem. Below, we explain the 4 proven methods to set up your Epson printer to WiFi.
Method 1: Fix Manually
These are the quick steps you can follow if you want to fix your Epson printer printing issue manually.
1. Turn off your Epson printer.
2. Once the printer is turned off, unplug the power cable from the printer's back.
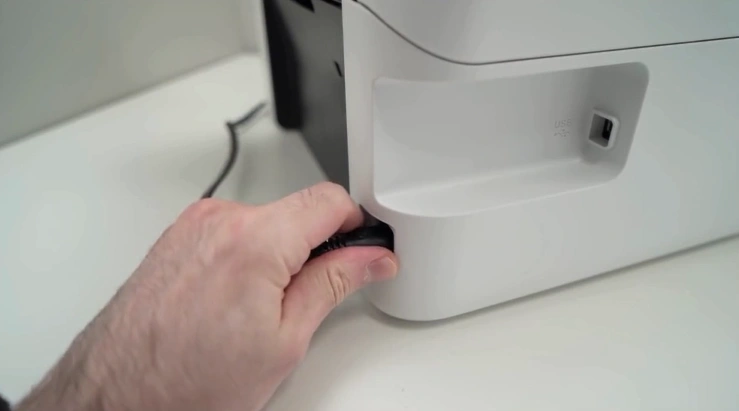
3. Then, wait for 6 minutes.
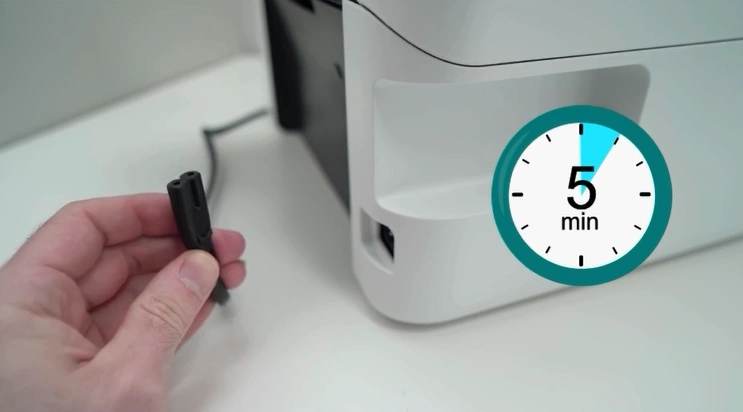
4. After 5 minutes, plug the power cable back in.
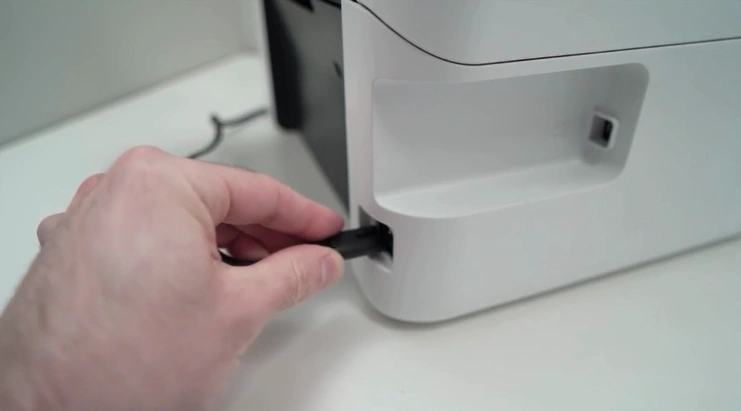
5. Now, check if your Epson printer problem has been resolved.
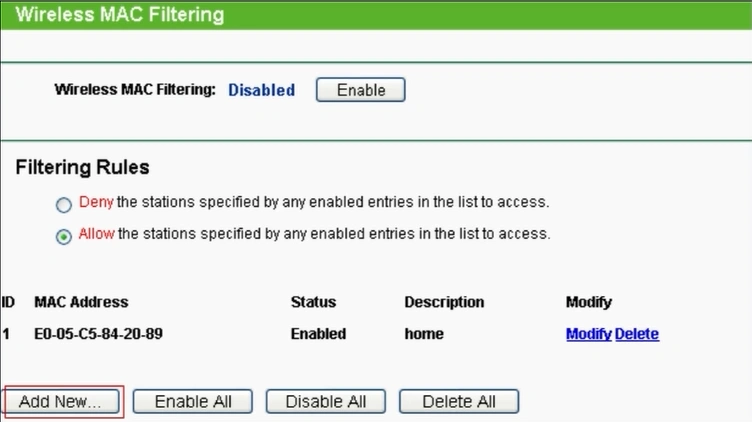
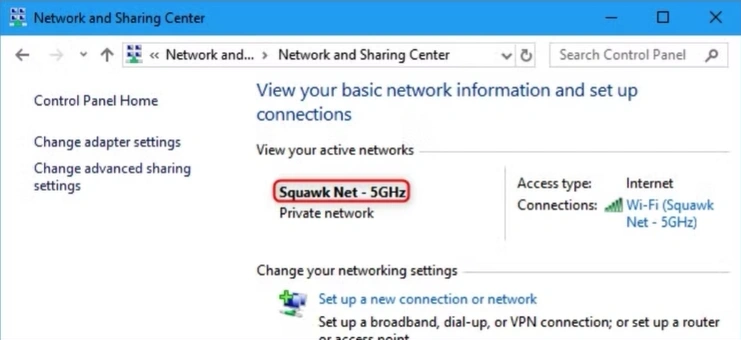
Method 2: Change WiFi Settings
With the steps below, make changes to your WiFi settings to remove the printing issue.
1. Check your WiFi MAC address filtering.
2. Rename your network name if it includes a symbol.
3. Now, try to connect your printer to WiFi.
Method 3: Reset Your Printer
You can also try resetting your Epson printer to get rid of the issue. Make sure to follow the steps below carefully to reset the device properly.
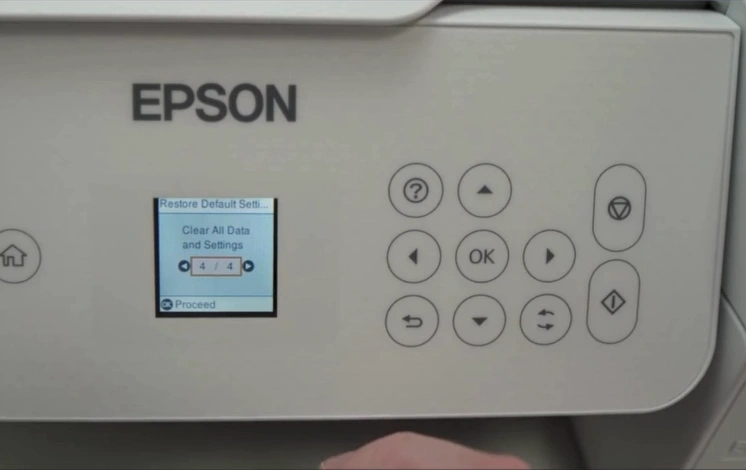
1. In the printer's menu, scroll and open Settings.
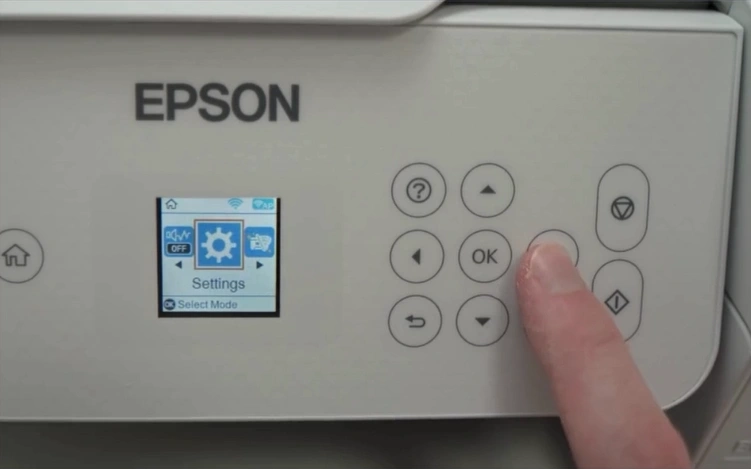
2. Scroll down and select Restore Default Settings.

3. Go to Clear All Data and Settings.
4. Press OK to proceed and follow the further prompts.
Method 4: Update Epson Firmware
Outdated or corrupt drivers/firmware can also be the cause of issues in your Epson printer. Follow the instructions given below to update your device firmware and see if it is able to fix your problem.
1. First, you need to connect your printer to the device.
2. Make sure the device and printer have a stable connection.
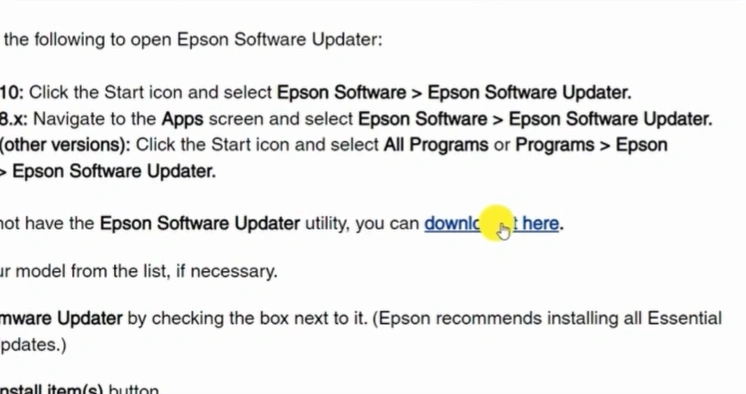
3. Now, open your browser and go to the official website for the Epson printer firmware update.
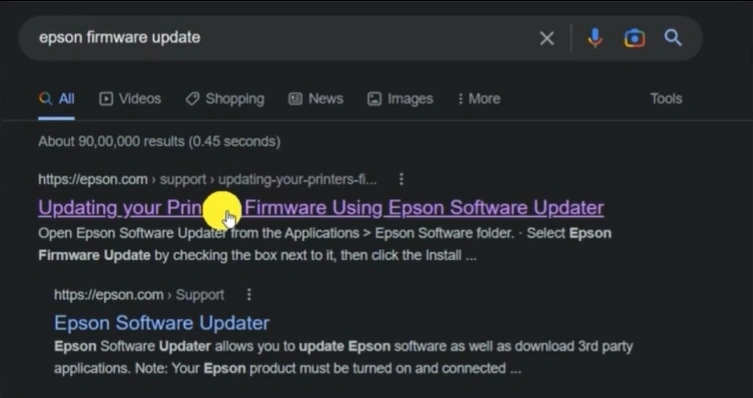
4. Scroll down and click on "Download it here" in the Epson software updater.
5. Next, you should scroll down and click on the Download button according to your device's operating system.
_1753692755.webp)
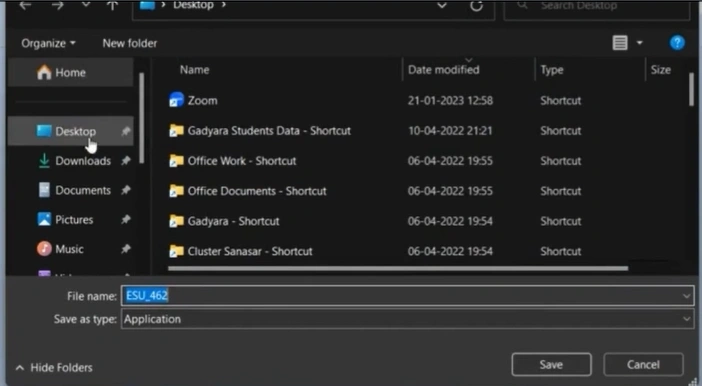
6. Then, you need to save the file on your computer and click on the Save button.
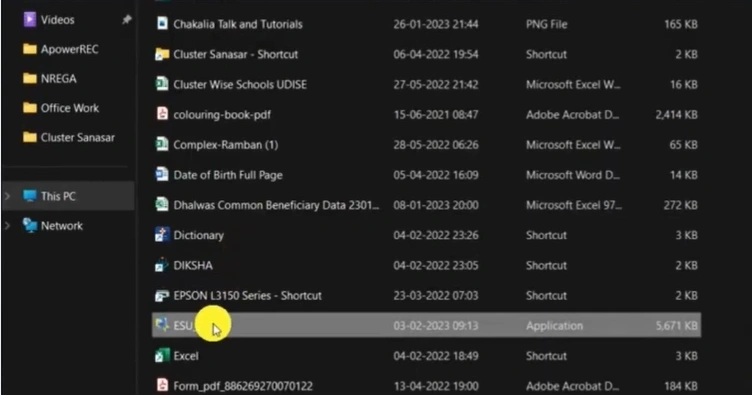
7. After downloading, go to the downloaded application, right-click on it, and select Run as administrator.
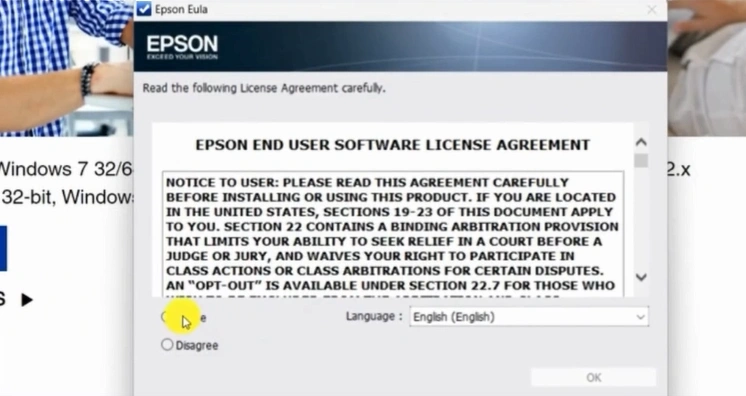
8. Select the Agree option, then click OK.
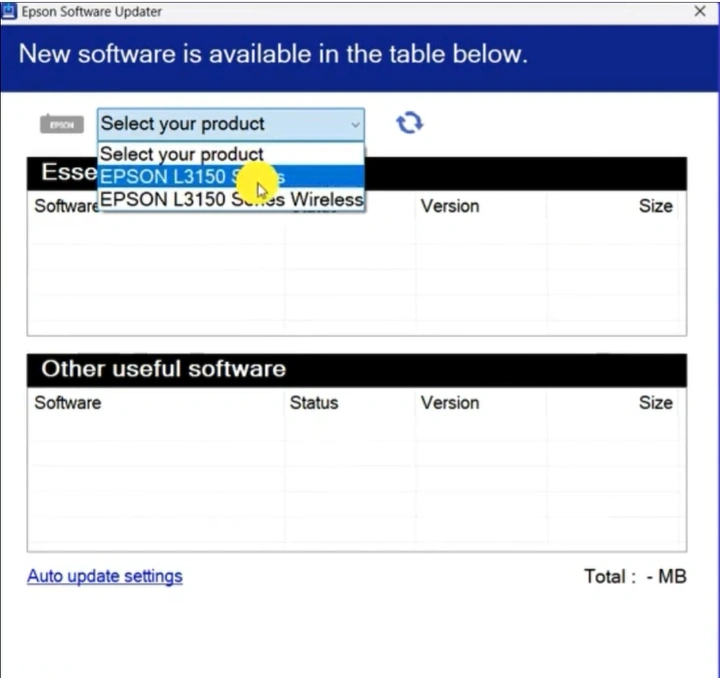
9. In the Epson Software Update window, select your product.
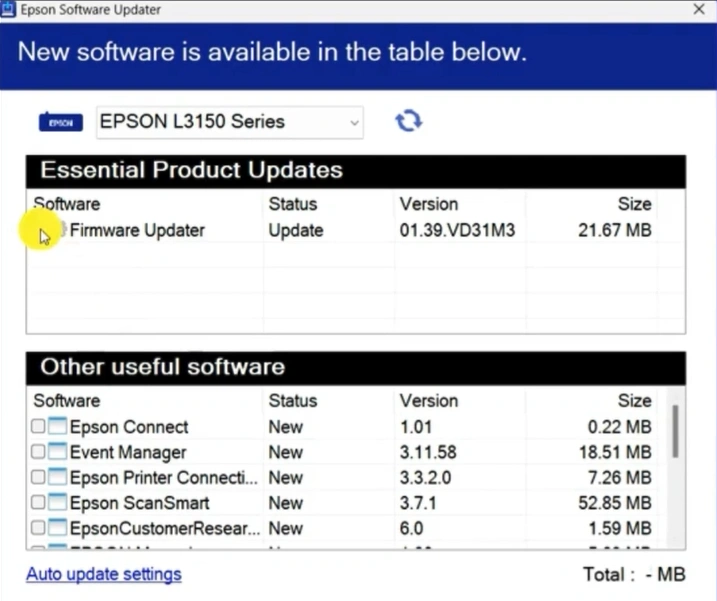
10. Select the Firmware updater, unselect all other updates, and then click the install items button.
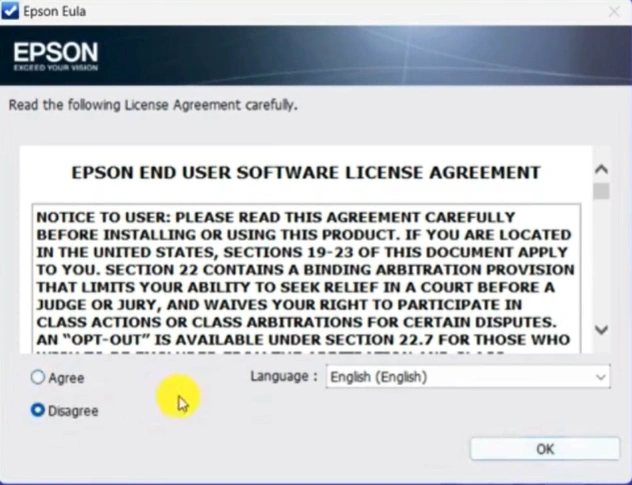
11. Select Agree, then click OK.
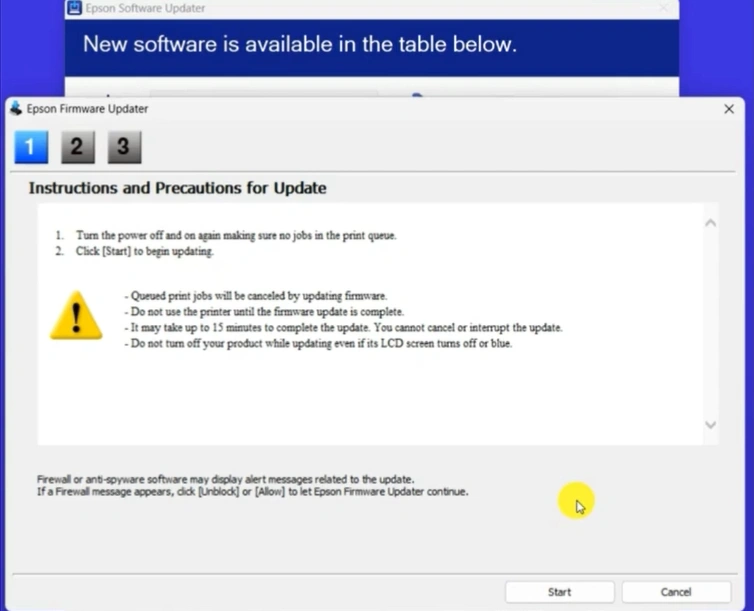
12. Now, follow the instructions and precautions for the update.
13. Click on the up arrow in the notification panel.
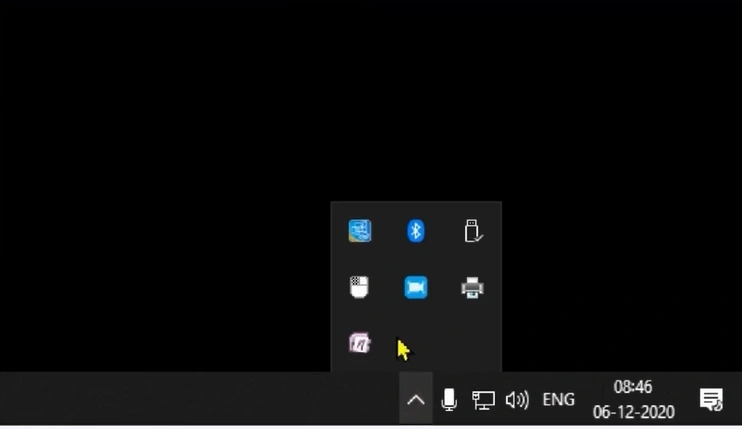
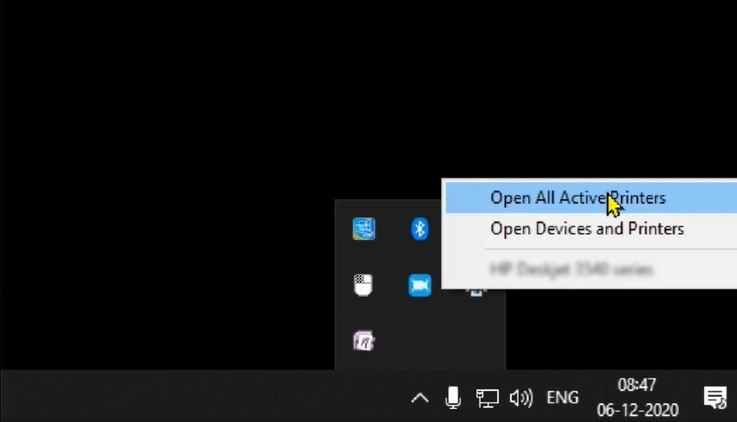
14. After that, right-click on the printer icon, then select the "Open all active printers" option.
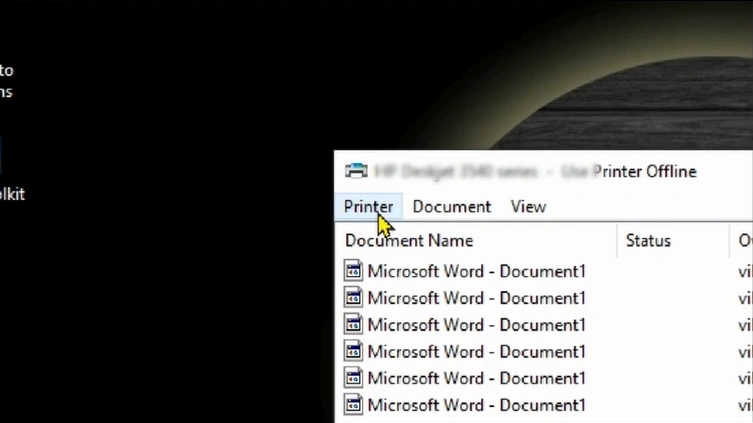
15. Go to the Printer tab on the top left, then click on the "Cancel All Documents" option.
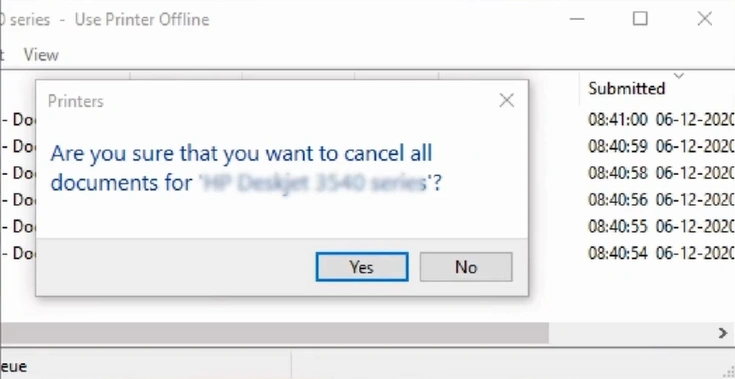
16. Confirm and cancel all documents by clicking on Yes.
17. Press the power button to turn the printer off, then power it on.
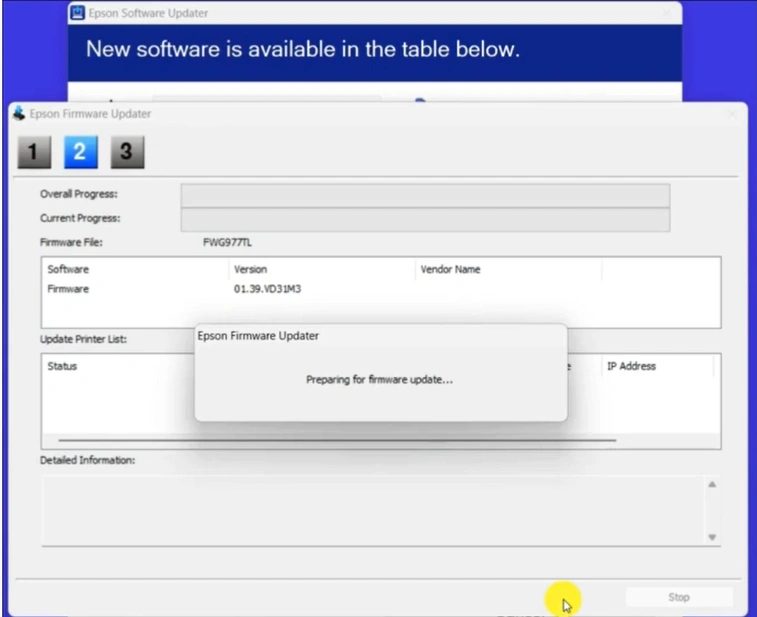
18. Now, return to the Epson Firmware Update dialog box, then click on the Start button.
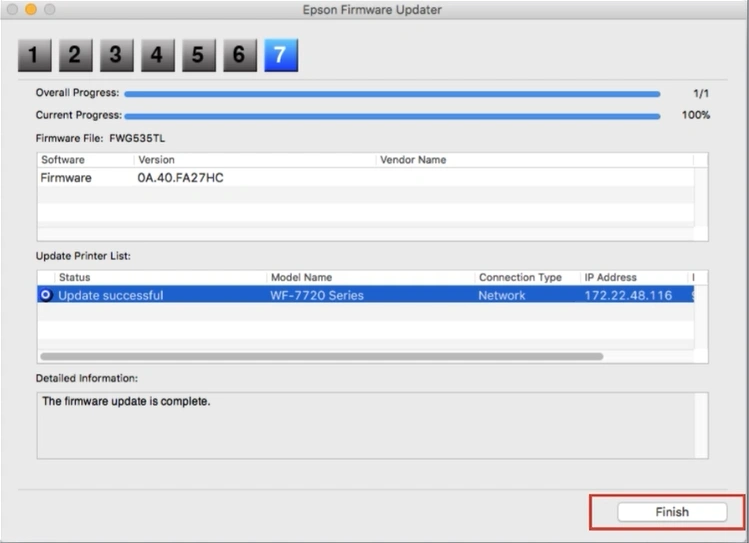
19. After the successful update, click on the Finish button.
20. Finally, check if your Epson printer is still facing the "not printing" issue.
In Conclusion
We hope that with the help of these methods, you will be able to troubleshoot the Epson printer not connecting to wifi issues efficiently. Moreover, depending on the root cause of the problem, you may need to use other solutions. In this case, it would be best to look for more solutions if your Epson printer is still not out of the error state.
Related Guide

