How To Connect Epson Printer To Mac On A Wireless Network?
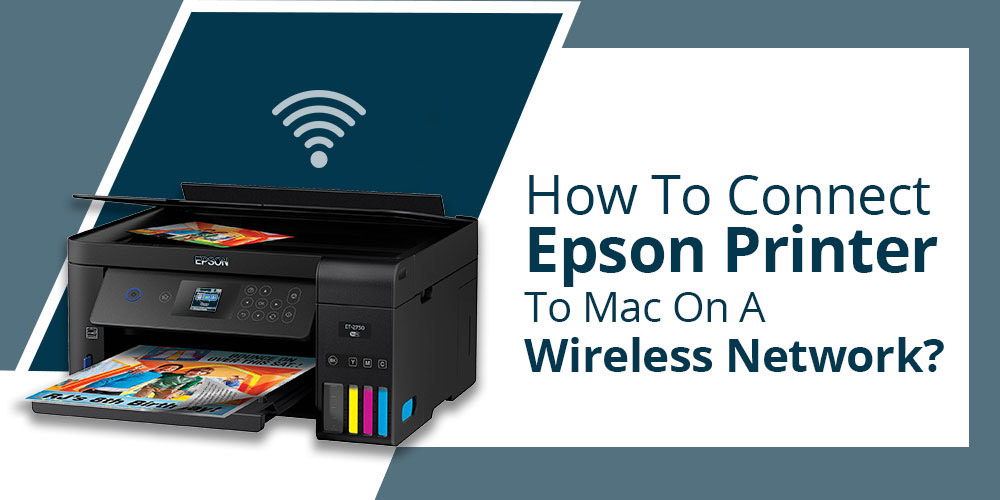
Are you a Mac user? Are you looking to set up a printer on your Mac OS? Then, you have landed at the right place. To give print commands from the Mac system, you must connect it to the printer. You can do it either via a wired connection or wireless. This article will teach you how to connect Epson printer to Mac using a wireless network. Before starting, ensure the printer has the wireless feature and also make sure it is suitable for your Mac system’s OS. Below you will know how to use it and avail of its benefits.
How to Setup Wireless Epson Printer to Mac System
Pay attention to the necessary instructions below, and then follow the steps according to the wireless connection type.
- Turn On the printer and ensure it is not attached to the system with a USB cable.
- Visit the Epson site or insert the software CD to download the software package.
- Choose the language, tap Continue, and then hit the Continue button again.
- Read the license agreement and accept it to proceed with the software installation.
- Hit Install and ensure to install Software Update to receive for your printer.
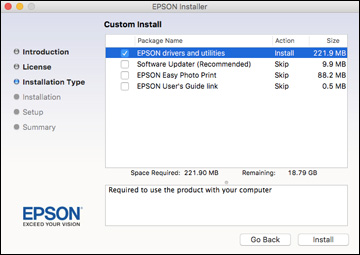
- Click on Yes or No button to install/not to install Epson Customer Participation software.
- When the printer setup screen emerges, click Start to set the printer on a network.
- Select the Wireless Connection option and then click on the Continue button.
- Choose the “Set up printer for the first time” option and hit on Continue.
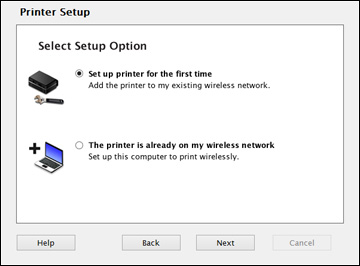
From this stage, you have three ways to proceed. Have a look at each one of them and choose the most suitable one for yourself.
Read More:- Why My Epson Printer Is Not Printing? [Quick Solutions]
Setup Epson Printer to Mac Using the Control Panel
While adding a printer to a WiFi network via the control panel, you may require to know the SSID and the password. After following the above-required steps, proceed with the instructions below to complete the process.
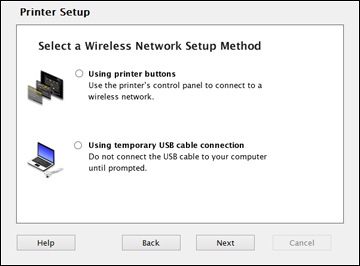
- Select the “Using printer buttons” option, and then hit the Continue button to proceed again.
- Again, tap the Continue button on the “Know your wireless network” screen.
- Follow the instructions on the screen to set the wireless network settings.
- After you finish the on-screen instructions, click Add Printer on the Printer Setup screen.

- Again, follow the on-screen steps to add the printer and print queue on the Mac system.
- Click on Continue and ensure to select your printer in the Print Using or Use drop-down list.
- Click the “Print Test Page” and then hit Continue to go to the next step.
- Select the Add Fax option following the on-screen instructions to insert a fax queue.
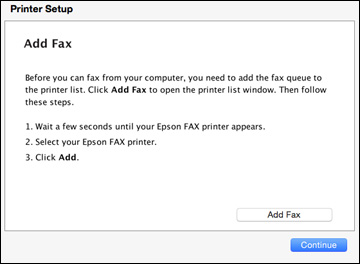
- Click on Continue, and then “Set Up Fax” for fax settings; else, click Continue to skip.
- Now, follow the instructions on the screen to complete the printer setup.
- Finally, finishing the above steps, click Close to quit the installation program window.
Connect the Epson Printer to Mac OS Using WiFi Auto Connect
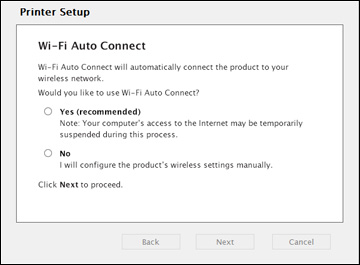
WiFi Auto Connect is an advanced connectivity feature to set up a device on a WiFi network automatically. Follow the above-given required instructions and use the below steps to set up a printer.
- When the WiFi Auto Connect screen appears, click on the Continue option and then hit Next.
- Click Allow or Unblock when the firewall alert message appears on the screen.
- Ensure not to select the “Ask Me Later, Keep Blocking or Block” option.
- When the Keychain Access confirmation window appears, click OK and then Allow.

- Follow the step-by-step instructions on the screen to allow the Mac system to configure the printer on the network automatically.
- If the configuration does not start automatically, you may ask to enter the SSID and the password.
- Click on Add Printer and follow the instructions to add the printer and the print queue on Mac.
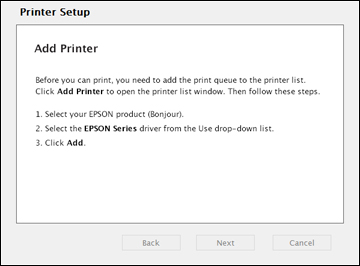
- After that, click the Continue button, print a test page, and again hit the Continue.
- Click on Add Fax button and follow the instructions to add the fax queue on the Mac system.
- Tap on Continue, and click the Set Up fax button to set up the fax setting on Mac.
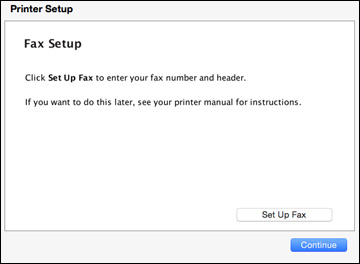
- To set the fax settings later, tap the Continue button and proceed to the next step.
- Follow the instructions that appear on the screen to complete the process.
Connect Epson Printer to Mac Via a Temporary USB Cable
It is a third way to connect the printer to WiFi. Here you will use a temporary USB cable. After using all the necessary instructions, ensure to use the steps underneath.
- After selecting the “set up printer for the first time,” a new screen will appear.
- Under Wireless Network Setup Method, select the “Using temporary USB cable connection” option.
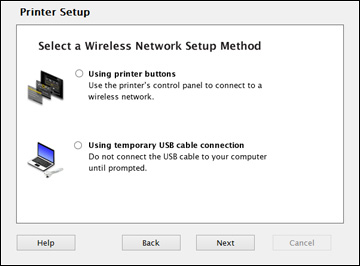
- Click Continue on the next screen to ensure the printer has completed charging the ink.
- Again, tap Continue, connect the USB cable, and wait till the installer detects your printer.
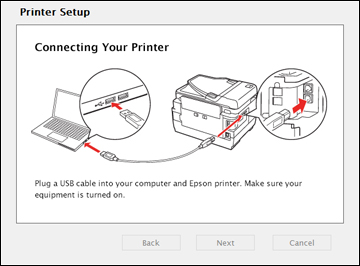
- Ensure the printer is switched On to get it detected and click Start Network Setup.
- Click Next on the Firewall Warning screen. If any firewall alert message emerges, click Allow or Unblock.
- Now, hit the Yes button of the EpsonNet Setup window, click OK and then Allow to access the password info.
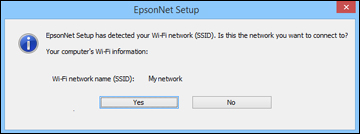
- If you receive an SSID window, select the SSID from the list and click on the Next button.
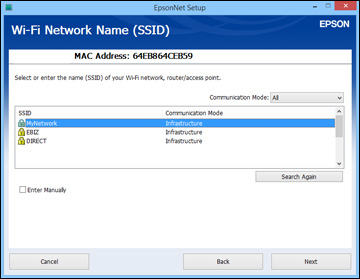
- Now, enter the network password and then click Next. Wait till it gives a confirmation message on the screen.
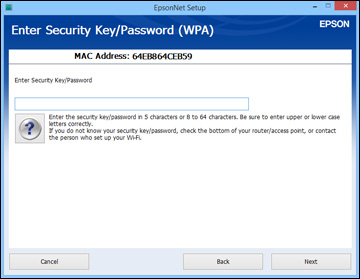
- After receiving the pop-up message to remove the USB cable, disconnect it and click OK.
- Click Finish, hit the Add Printer option, and then follow the insert to add the printer.
- Now, tap the Continue button, print a test document, and then choose to Continue.
- Select Add Fax, click on Set Up Fax for the printer fax settings, and then hit Continue.
- Follow the instructions to complete the setup and hit the Close icon to close the installation window.
Frequently Asked Questions
Why connect the printer to Mac using a wireless network?
There are a lot of features for wireless connectivity. It provides a handy and quick solution to print documents using your mobile, laptop, and tablet.
How to connect Epson printer to Mac on a WiFi network?
If you want to set up the printer on a wireless network, you can follow the three methods. You can do it using the control panel, WiFi Auto-Connect, or the temporary USB cable.
Which is the best connection method- Wired or Wireless?
Both are suitable for connecting the printer with the system. However, wireless connectivity offers a better and more convenient way of printing documents through a wireless device.

