How to Update the Epson P900 Firmware?

One day, as you powered on your Epson P900 printer to carry out your routine tasks, it suddenly refused to print. There was no humming sound, and your screen displayed the message: 'Firmware Update Required.' Confused, you tapped the menu button, but the screen remained frozen on that message.
Periodic updates are essential to keep any device running smoothly, including your Epson P900. Firmware updates can provide security patches, enhance performance, and fix bugs.
Before you update your Epson P900 firmware, it is very important to consider some points to ensure the process goes smoothly. Here’s what you need to know before getting started.
What to Know Before Updating Epson P900 Firmware
These are a few important considerations before you start the Epson P900 firmware update process:
Stable Power
Check that your printer is connected to a stable power outlet, and avoid performing the update during times of likely power cuts, such as storms or unstable power supply periods.
Backup Current Firmware
Create a backup of your current firmware. This helps you restore the previous version if the new update causes any issues.
Avoid Ongoing Print Jobs
Do not start any large print jobs before updating the firmware. Once the update is complete, test with a small print to ensure everything works correctly.
Give Enough Time
The firmware update can take several minutes. Make sure you have no urgent print tasks, and the printer will remain in place until the update is complete.
Update Drivers and Software
Ensure your printer driver and Epson utilities are up to date. The firmware updater may require specific OS versions to work correctly.
Common Challenges During Epson P900 Firmware Update
You may encounter the following issues when updating the Epson P900 firmware:
- Connection problems
- Wrong firmware file
- Firewall blocking the update
- Power interruptions
- Driver conflicts
Steps to Update Epson P900 Firmware
Updating the Epson P900 firmware assures optimal performance and access to more advanced features. The process is simple, and these are the instructions to perform the firmware update correctly:
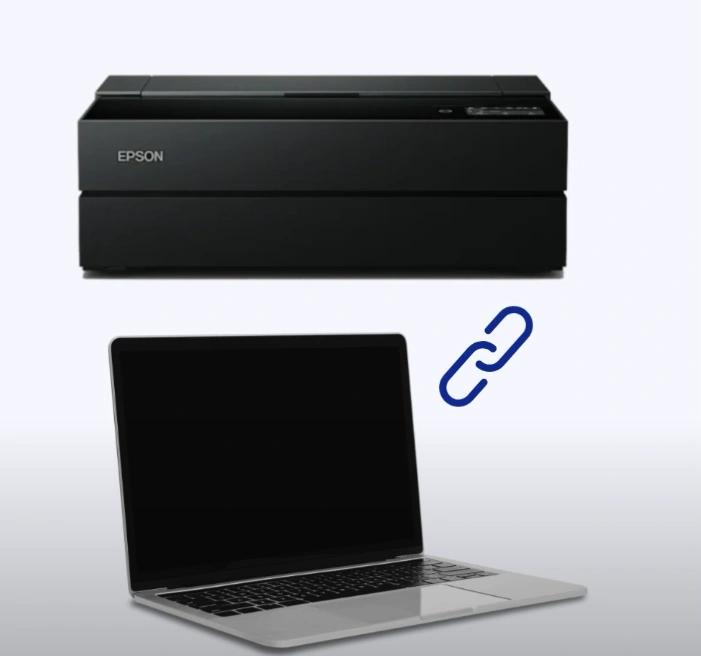
Step 1: Confirm that your PC is connected to the printer.
Step 2: Make sure the device and printer have a stable internet connection.
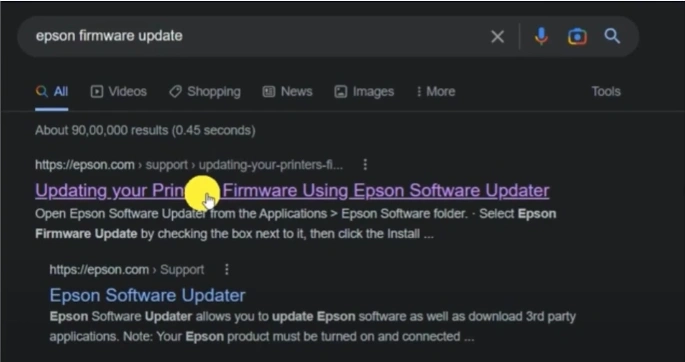
Step 3: Open an internet browser on your computer and visit the official website for the Epson firmware update.
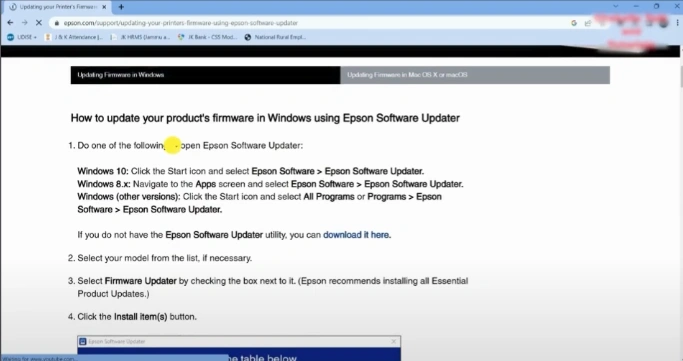
Step 4: In the Epson Software Updater, click “Download it here.”
Step 5: Choose the Download button according to your device’s operating system.
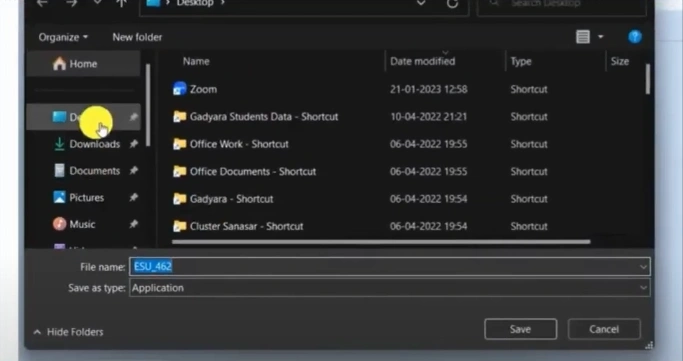
Step 6: Save the file on your PC and click on the Save button.
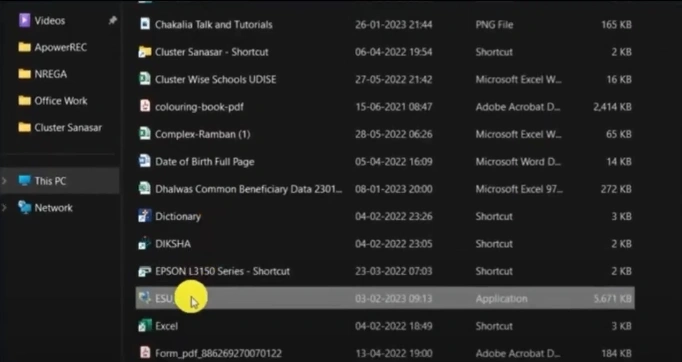
Step 7: After downloading, go to the downloaded application, then right-click on it and select Run as administrator.
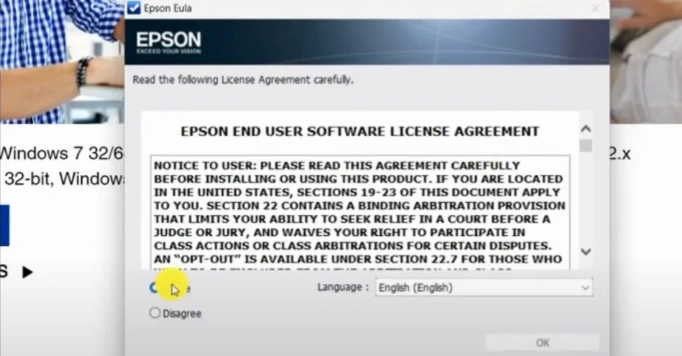
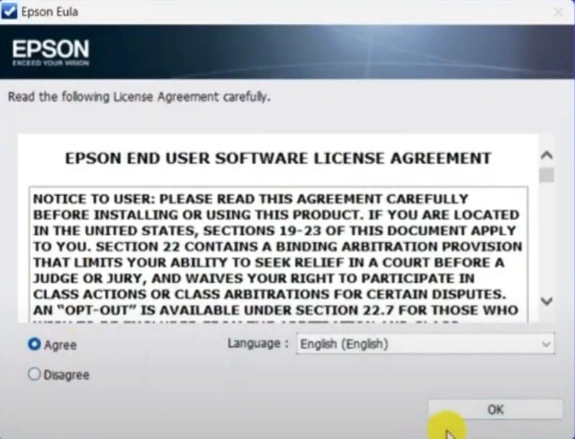
Step 8: Select the Agree option, then click OK.
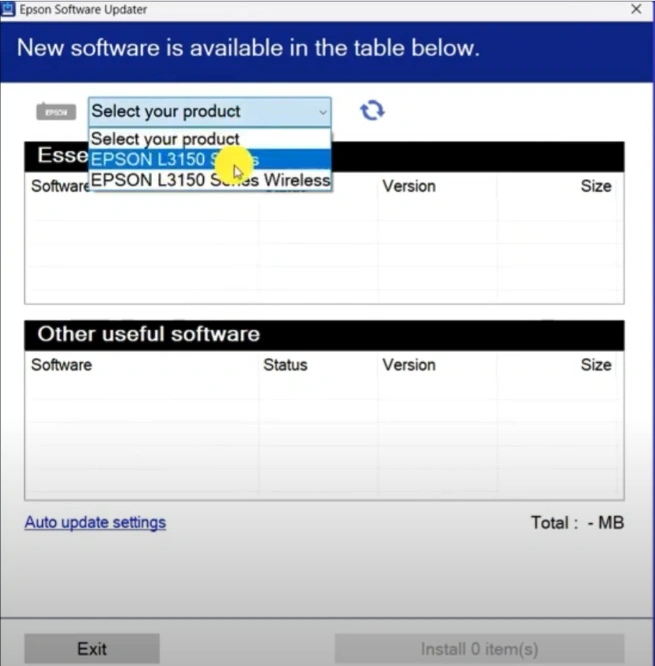
Step 9: In the Epson Software Update window, select your product series.
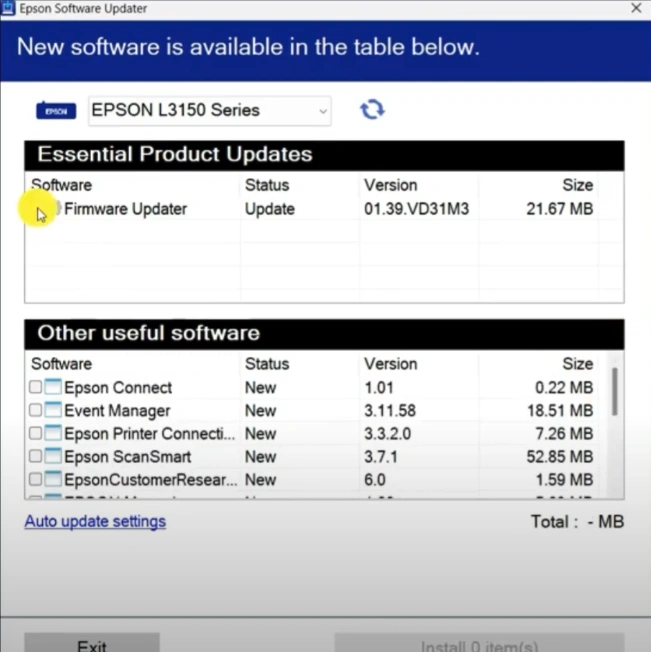
Step 10: Select the Firmware updater and uncheck all other updates, then click the Install items button.
Step 11: Select Agree, then click OK.
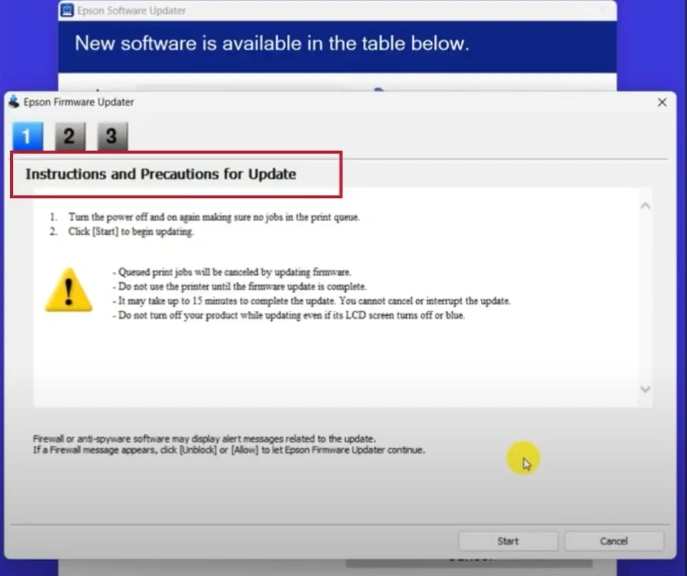
Step 12: Follow the instructions and precautions for the update.
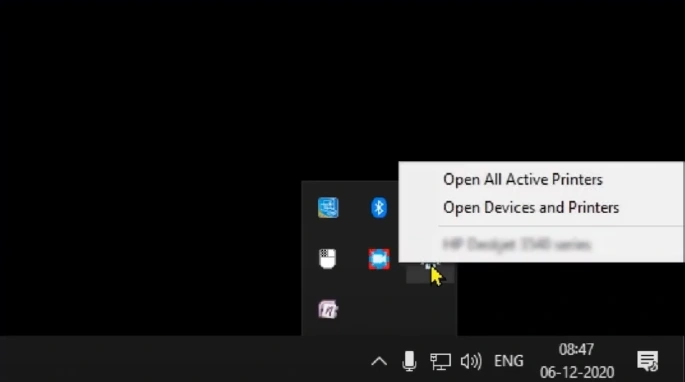
Step 13: Click on the Up arrow in the notification panel.

Step 14: Right-click on the Printer icon, then select Open all active printers.
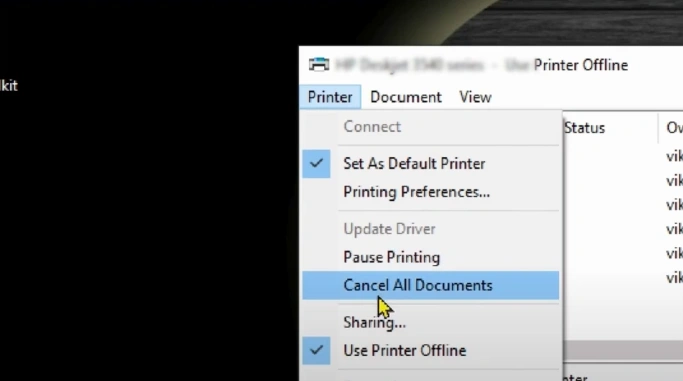
Step 15: Go to the Printer tab on the top left, then click on the Cancel All Documents option.
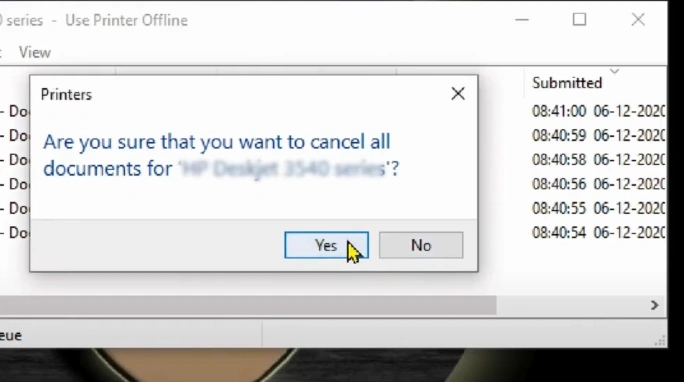
Step 16: Confirm and cancel all documents by clicking on Yes.
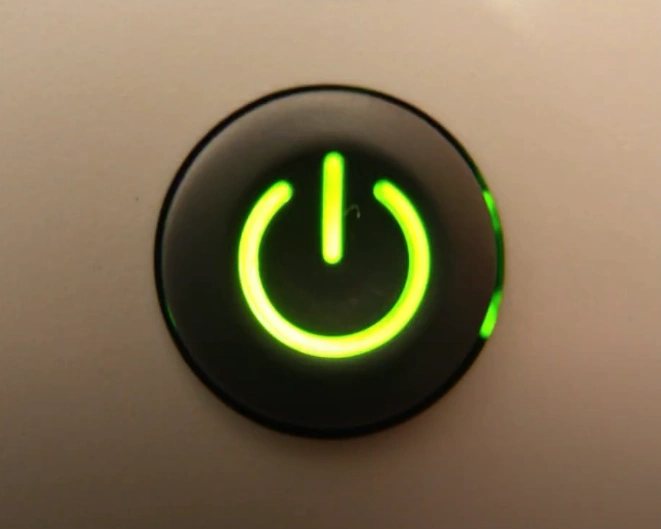
Step 17: Press the power button to turn the printer off, then power it on.
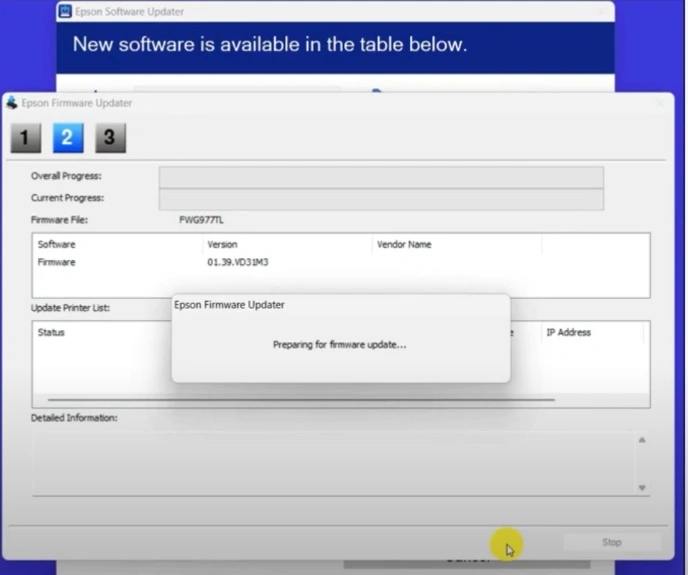
Step 18: Return to the Epson firmware updater window, then click on the Start button.
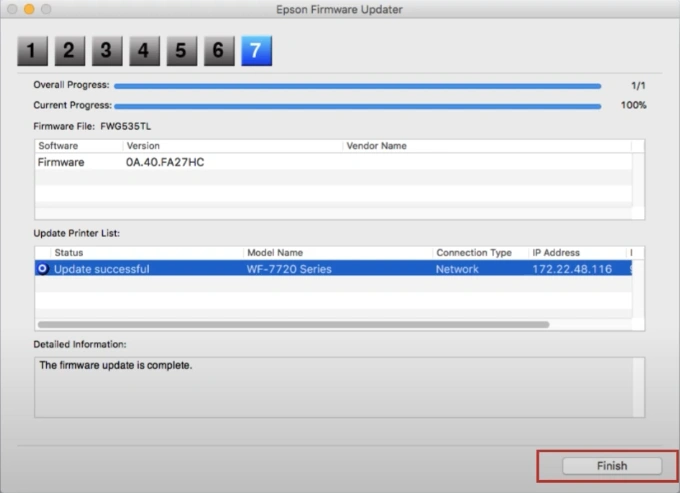
Step 19: After the successful update, click on the Finish button.
Wrap Up
Update your Epson P900 firmware to the latest version for smooth, error-free printing. Follow the steps carefully, and restart your system after the update to ensure all changes take effect.
Make sure you have a stable internet connection and back up your current firmware in case you need to restore it. Also, avoid starting large print jobs during the firmware update.

