Why Is My Epson Printer Not Printing Color & How to Fix It?
Is your Epson printer not printing color? If yes, then there can be a problem with the ink delivery. It’s one of the main reasons why users receive prints with different gray shades rather than colors. A blocked nozzle and low ink levels are some of the possibilities resulting in the color printing problem. If the Print software is unrecognizable by the hardware, it can also lead to this error. Read the complete article to learn how to fix it via five different methods.
Solution 1: Check and Replace the Ink
When you discover the printer is not printing in color, the first thing that comes to mind is the ink. You must check its level and ensure the printer is not running out of ink. If it is, you may need to get new ink. Here are the steps to do it.
- Visit the Printers and Scanners option on the system.
- Select your Epson model from the Printers list.
- Then, you need to visit the Maintenance tab.
- After that, tap on the Epson Status Monitor 3.
- It will display the exact ink level.
- Now, you will need to replace the ink.
- For the replacement, open the printer cover.
- After that, press the ink replacement button.
- Move the cartridge lever upper side.
- Then, take the cartridge out.
- Set the new cartridge and push down the clamps.
- After following the above steps, close the cover.
Note: Leave the print head as it is while replacing the ink cartridges. If you do, damage to the printer is quite possible.
Solution 2: Clean the Epson Print Head
The second thing you inspect for is the clogged or dirty print head and nozzles. You can use the Epson Head Cleaning Utility for Windows and Mac. Below are the instructions.
Use Epson Utility on Windows
- To check the nozzle pattern, below is the illustration:
a. Positive Sample

- Cleaning is required

- Make sure the machine is powered up.
- And the ink out light is off.
- If the ink-out LED is blinking, you cannot clean it.
- You will need to change the ink cartridge first.
- Open the Epson software on your PC.
- Tap the Utility tab and click the Head Cleaning button.
- Now, follow up on the instructions on your screen.
- The power light and the ink LED blink while the cleaning process.
- You must never power off the machine while the power LED blinks.
- Once the LED stops blinking, tap on [Print Nozzle Check Pattern].
- To maintain print quality, print a few pages once every month.
Use Epson Utility on Mac
- Make sure that the device is turned on.
- And the ink-out LED should be off.
- Open the Print or Page Setup dialog box.
- Then, you need to click the Utility icon.
- Tap on the Head Cleaning button.
- Go through the instructions on your screen.
- The power light and the ink LED flashes during the cleaning.
- When the power LED stops blinking, press Confirmation.
- It will reset the cleaning cycle and repeat the process if needed.
If the print quality remains spoiled even after applying the above trick, some of the ink cartridges might be old or damaged.
Solution 3: Change Printing Settings & Flush the Ink
If you need to resolve the printer not printing issue, you must change the settings to color. Verifying it will inform you if the problem is due to an incorrect configuration.
Modify the settings
- Open the Print Dialog box in the first step.
- Then, you need to choose Printer Settings.
- Select the Basic Settings tab after that.
- Now, you will need to open Black on the right.
- Next, tap on the Color option on the left.
- Select Color if you would like to print in color.
- Go to the bottom of the dialog box and click on Print.
- It will start the test process of printing and save the settings.
Flush the Ink
- First, go to the Settings app.
- Then, you need to click Printers and Scanners.
- After that, tap on Printing Preferences.
- Now, you need to click on Maintenance.
Read Also:- Complete Guide to Fixing Epson Printer Error Codes
- In the next step, click on Power Ink Flush.
- In the end, click on the OK button.
Modify the settings to color, then flush the ink. It will help you with the maintenance of the device and clear the issues. Now, you can use the device fresh.
Solution 4: Use the Color Management Options
If the printer starts to print in color, it means you have successfully resolved the color printing issue. Though, you can discover that the prints on the documents may differ from the color you see on the screen. You can use the color management option to bring the somewhat exact color to the ones you have selected on the screen.
- First, choose a photo or document to print.
- Then, click on your model and choose Properties.
- Select Custom as the mode and hit on the Advanced option.
- Now, under the Color Management option, click the ICM option.
- Choose the Driver ICM (Basic) or Driver ICM (Advanced) option.
Solution 5: Reinstall the Epson Printer Driver
You will need to reinstall the Epson Printer Driver with the steps listed below. Here, get the method for both Windows and Mac devices.
Windows
- Power on the printer first.
- Then, visit the official website.
- Next, choose Epson Connect Printer Setup Utility.
- Download and install the Windows version.
- Permit the agreement now and tap on Next.
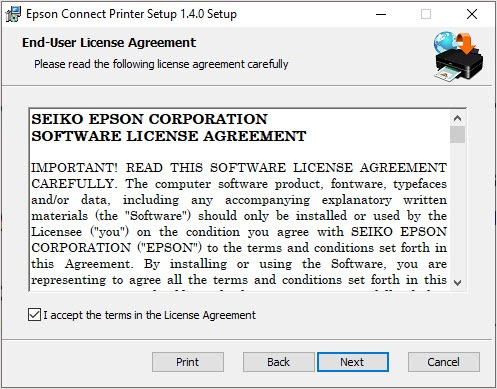
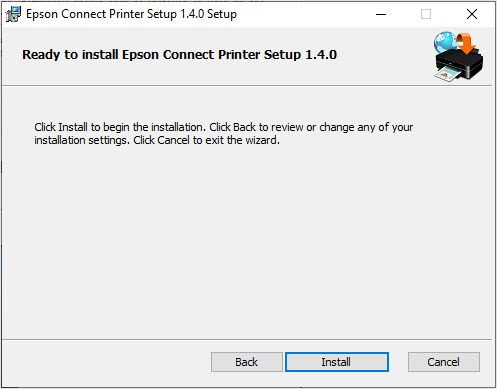
- Click the Install button after that.
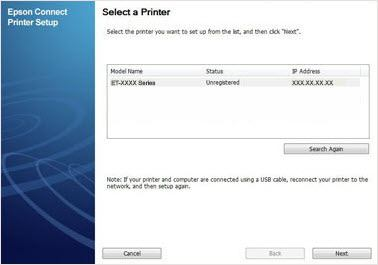
- Choose your product in the menu and tap Next.
- Tap on Printer Registration and click Next.
- Click the Agree button and tap on Next.
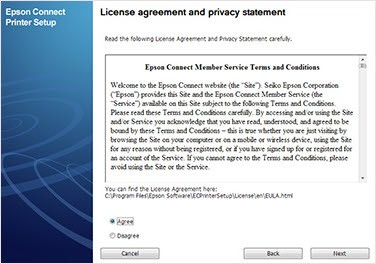
- Now, Register a printer to Epson Connect.
- Then, click the OK option.
- Create a new account and sign-up with the existing one.
- In the end, click the Close button.
Mac
- Power up the Epson machine first.
- Then, visit the Epson Official Website.
- Choose Epson Connect Printer Setup Utility.
- Tap the Continue button now.
- After that, click Continue again and press the Agree button.
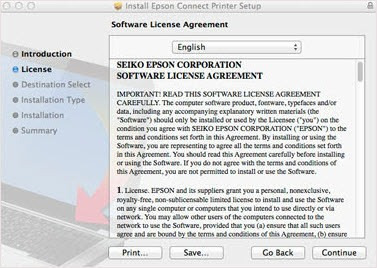
- Click on the Install button and tap on Close.
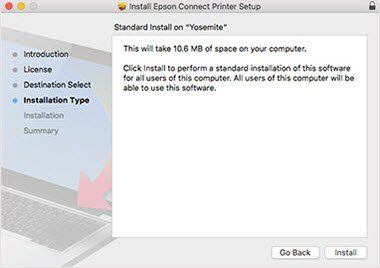
- Choose your device and tap on Next.
- Select the Printer Registration option.
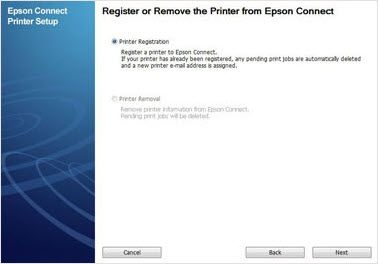
- Now, click the Next button and tap on OK.
- Scroll down the content after that.
- Thereafter, check the I Accept the Terms and Conditions.
- Then, press the Next button.
If all of these solutions did not help you clear the error, simply connect with printer experts at Printer Tales. Here, we resolve all your printer-related issues and offer assistance with the setup installation. We are available 24/7 under our online directory service. Call us anytime at +1-877-469-0297 & +44-800-054-8150 or email us at info@printertales.com.
Frequently Asked Questions
Can an empty ink cartridge cause a color printing problem?
Yes, an empty cartridge creates a printing issue. You must replace the ink or refill it to fix it. You can check the ink levels via the print settings. Or you can go to the Maintenance option and click the Epson Status Monitor 3 button to inspect for the same.
Can Grayscale/Black print settings lead the printer not to print in color?
If the Grayscale/Black print setting is enabled, you must disable it. To do so, right-click on your printer and go to the Printing Preferences option. After that, disable the “Grayscale/Black print-only” mode. Now, you may find that the problem is resolved, and the printer prints in color.
I have cleaned the printhead, but the print issue is not resolved. Why?
If you have used the Epson cleaning tool and the problem does not resolve, try deep cleaning. If the color printing problem persists, you may also choose the manual cleaning process.

