How to Fix Xerox Printer Error 010-397 [Fuser Error]?
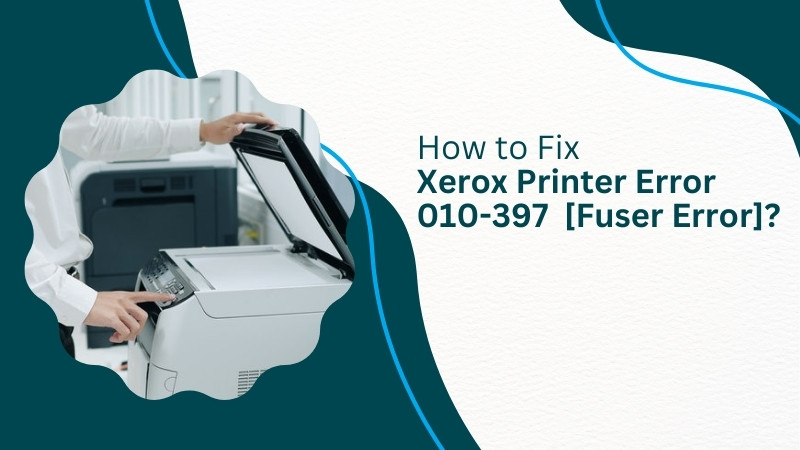
Xerox printer error 010-397 denotes a Fuser failure or damage. After completing a full life cycle, it displays a status code on the Control Panel.
You will need to check inside the machine to see if the unit has been damaged or needs a reset. Let’s get to know the reset and replacement methods in the guide below.
How Does a Fuser Unit Work in Xerox Printer?
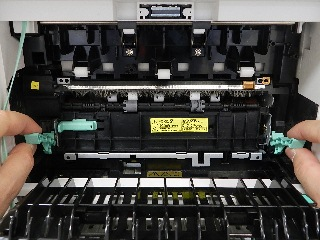
Have you ever wondered why paper fresh out of the printer is warm yet does not burn? In your print device, you will find a pair of heated rollers; that is the Fuser Unit we are talking about. Here, toner particles are dragged onto the paper to create required images and texts. And the paper will slowly pass the imaging drum.
Then, the paper is forwarded to the fusers, which melt the toner into the fibers of the paper and allow it to stay permanently. Both heat and pressure are applied to the users to activate this function. Once the paper passes through the fuser assembly, it will roll out to the output tray.
What is the Common Indication of a Fuser Failure?
The fusers are designed as the core part of the printing process. Unlike any other consumable part, it wears out the regular use of prints. Also, it is one of the parts that suffer the most due to overheating, mechanical wear, and high temperature. So, a fuser usually fails after completing a functional life or due to damaging its composition.
The machine will send a message to the Control Panel with an error code for a replacement or check-up. Here are the common causes for the fuser issues:
- Taints on the printed sheets
- You will find parallel dots across the sheet
- The print system will begin to lose the toner
- Also, the toner will not stick to the sheet
- Irritating noise from the gear wear
- The heat will not generate due to the lamp failure
- The printing has stopped even though the paper reaches all the way.
How much life a fuser offers for printing pages depends on the model you are using.
How to Reset Fuser to Resolve Print Issues?
At around 50,000 thousand prints, the fusing assembly will indicate the end of its life. At this point, fuser damage can result in poor print quality. Once the Control Panel of your printing device notifies you about the fuser replacement, get a new one. Then, reset it with the instructions listed below.
Reseat in Machine
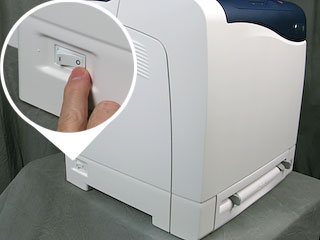
- Tap the power switch and power off the printer.
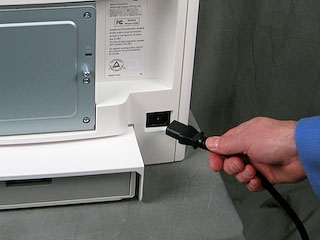
- Then, disconnect the power cord.
- Now, let your fuser cool down for at least 30 minutes.
- Once it is cool, tap the button on the top right side.
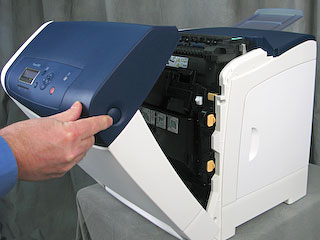
- Next, pull the green tabs and open the cover.
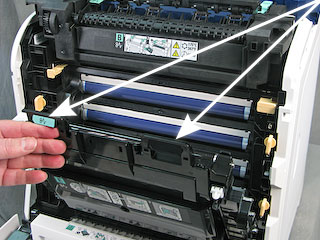
- Thereafter, you need to lower the transfer belt.
- Now, pull the gray lever and release the lock.
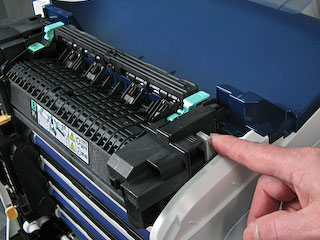
- Swing the right side of the fuser and unplug it.
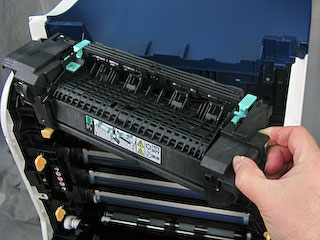
- Lift it up and right to take it out.
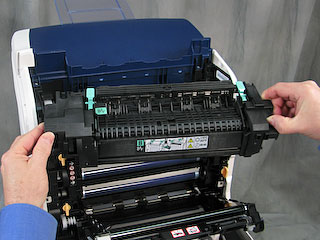
- Slide it into the printer positioning the two pins.
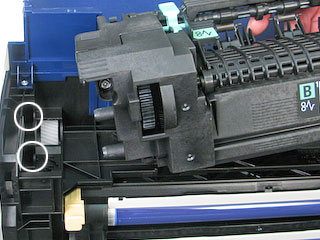
- Slide it to the right side and push it inward.
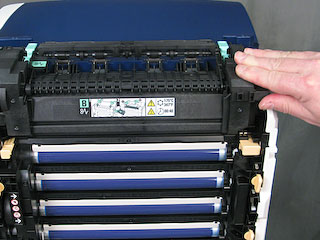
- Now, lock it inward and lock the latches.
- Set the transfer belt to its original position.
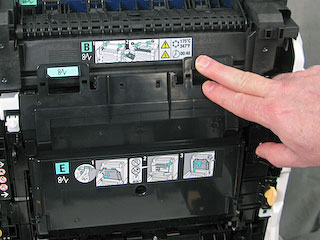
- In the end, close the front cover.
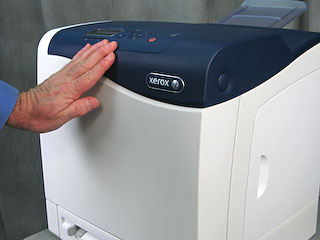
- And connect all the cords to the printing system.
Reset the Control Panel
- Go to the Control Panel in the next step.
- Then, click the System button.
- Now, tap the Up or Down Arrow.
- Thereafter, locate the Admin menu.
- In the menu, press the OK button.
- Tap the Up or Down arrow again.
- Look for the Maintenance mode.
- Now, you have to click the OK button.
- Click the Up or Down button again.
- Now, locate the Reset Fuser option.
- Press the OK button in the next step.
- A message “Are you sure” will display on the screen.
- Click the OK button to start the process.
- The initialization prompt will display.
- After completing, the maintenance mode will display.
These are the complete reset instructions if you have encountered the issue while installing the new fuser.
How Do You Fix the Fuser Error (Xerox)?
Here are a few methods to try to resolve the error. Do not try all of them. First, you must look for the fault and then try to perform one of these.
Method 1: Replace the Fuser
If you have not installed the optional productivity kit (HD), ensure the Ready LED is off before turning off the print device. Once you have turned off the data in the memory, the data will be cleared. Then, do the following:
- First, turn off the print device.
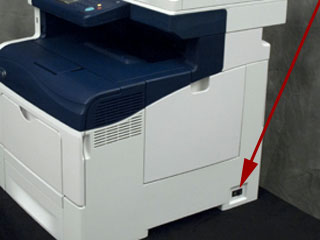
- Then, go to the Related Content section.
- Press down the Release button.
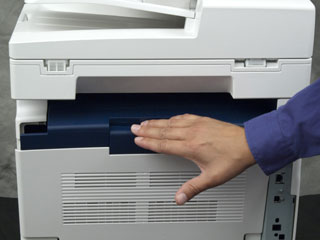
- Thereafter, lower the Rear Door into the open position.
- Grab the lower part of each lever on both sides of the fuser.
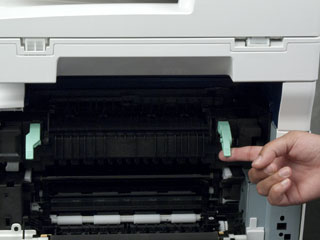
- Now, you need to lift up the lever.
- After that, go to the left side of the fuser.
- Then, push up the release button.
- Press the Release button and keep pressing it.
- Then, pull the fuser out of the machine.
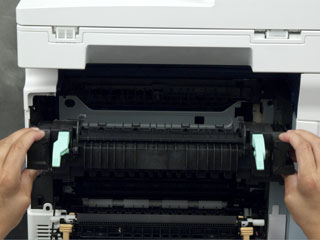
- Remove the old fuser for recycling.
- Now, take the new fuser out of the packaging.
- Also, take out the clips on both sides of the new fuser.
- Take the slots in the machine and line up the knobs.
- Then, push it into the print device until you hear a click.
- Push down the levers in their original position.
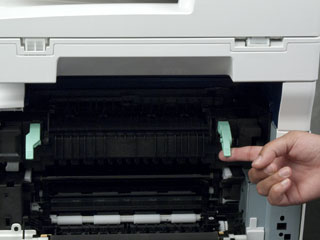
- Close the rear door after that.
- Lastly, power up the print device and use it.
Method 2: Remove & Reinstall the Fuser
If there is no optional productivity kit installed, make sure the Ready LED is off before turning off the print device. It is because the data in the memory is cleared when the device is off.
- Turn off the printing device as your initial step.
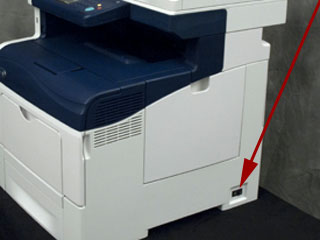
- Press down the release button next.
- Thereafter, lower the Rear Door into the open position.
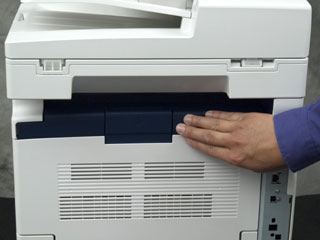
- Then, grasp the lower part of each lever of the fuser.
- Next, you need to lift it up.
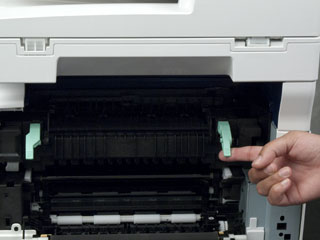
- Now, push up the release button on the left side.
- It will unlock the fuser in the machine.
- Press the release button and hold it.
- After that, take the fuser out of the print system.
- Then, take the knobs and line them up on both sides.
- Once the knobs are aligned, push the fuser into the machine.
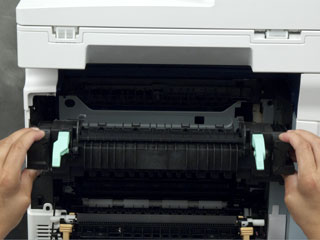
- Set it up until you hear a click.
- Place the fuser levers back to the original position.
- Lastly, you can close the rear door.
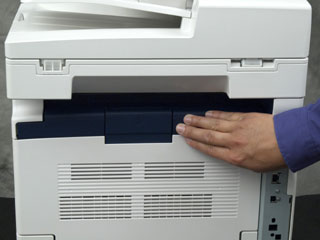
- Now, restart your printer and use it.
These two methods are most likely to get your problem resolved within minutes.
How to Fix the Status Code After Removing an Error?
Sometimes the status code will not clear even though the issue has been resolved. Here, you must reset it via the “Fault Reset 14” procedure.
- Find the Clear [C] button on the Control Panel.
- Then, navigate to the Image Quality option.
a. You can locate it below the Control Panel. - Now, tap these buttons in the following order:
a. First, you need to click Clear.
b. Then, tap on Image Quality.
c. Tap on Clear again.
d. Now, you need to click the Image Quality again. - The error code should disappear now.
- In case the error code does not clear, perform step 3 again.
- Press the buttons until the code clears (only five times).
- Now, go to the Display Screen.
- After that, press the (10) and (01) buttons and enter 14.
- Then, click the Start option, and it should be ready to run.
- Print a copy to check if it is working or not.
Perform the reset and configuration setup listed above and fix the issue easily. If you cannot fix Xerox printer error 010-397 or understand the procedure, connect with Printer Tales now. Here, we provide professional assistance regarding printer installment or resolving technical issues. We are available at your service 24/7. You can call us at +1-877-469-0297 or +44-800-054-8150 or send us your queries at info@printertales.com.
Frequently Asked Questions
How do you get your Xerox printer out of the error state?
Here are the Resolving Methods:
Turn off your printing system.
Disconnect all the power cords.
Let your printer rest for 5 to 6 minutes.
Then, connect the power cords back.
Now, turn on your device.
Use Xerox Global Print Driver and add your device.
Ensure that the time and date are correctly set.
How do you clear error messages on Xerox?
You can clear error or status code with the solution below:
Tap on the Clear option.
Then, click Image Quality.
Press the Clear button again.
Now, tap on Image Quality again.
How do you manually reset the Xerox Work Center?
Manually Reset Work Center:
Log in to Admin mode.
Then, tap on the “I” button on the left.
Click Network Settings.
Tap on the TCP/IP Settings option.
Click the Reset Defaults button.
Lastly, tap the Reset All button.

