How to Add a Canon Printer to Mac?

Canon printers come with multiple connectivity options to connect to various devices. The process of connecting a Mac device to a printer is simple. However, for first-time users, it can be challenging. In addition, there is a chance of facing problems such as incomplete connections, internet issues, and others. But you do not need to stress because we have got your back to streamline the process for you. We will walk you through the top 5 well-tailored and researched methods to complete the Canon and Mac device connection process with the utmost ease.
Method 1: Download the Canon printer Driver on the Mac
Complete the connection between your Canon printer and Mac device by downloading the correct printer driver. Follow the below steps to do that.
1. In the beginning, access the official Canon printer website on your Mac.

2. Next, on the home screen, click on the Support tab.

3. Then, in the search box, type the model number of the Canon printer you are using.

4. From the open list of options, click on your printer name.
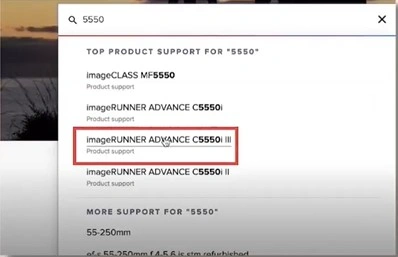
5. After that, scroll down the page to the Software & Drivers section and click on it.
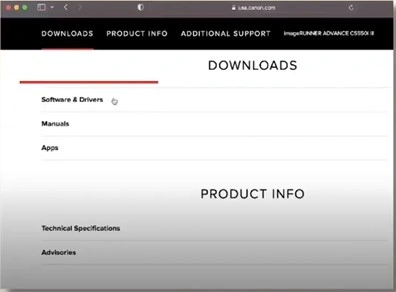
6. In the next step, the website will automatically fetch which OS device you are using.
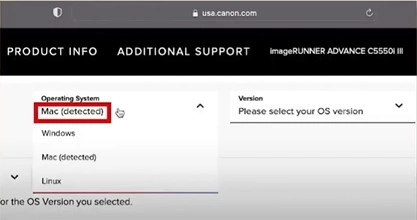
7. If it does not detect your device, then you can select it manually by clicking on the Operating System option.
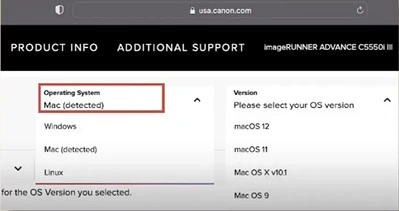
8. Next, you need to click on the version of your OS.
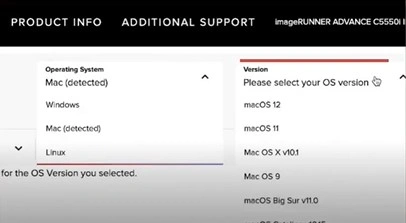
9. Then, it will recommend the compatible drivers for your printer on the screen.
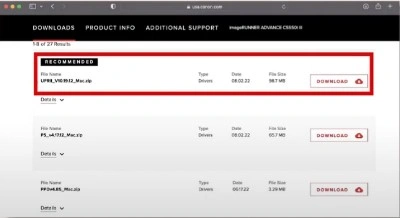
10. From the list, right-click on the driver you want to download.
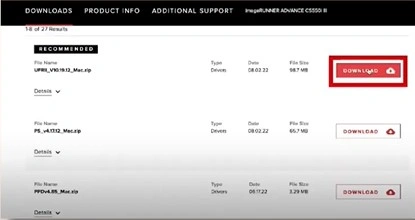
11. Depending on your web browser, you may be prompted with a pop-up, then click on Allow.

Method 2: Add Canon Printer to Mac (OS X 10.5)
These are the quick steps that will allow you to connect your Canon printer to your Mac device without any hassle.
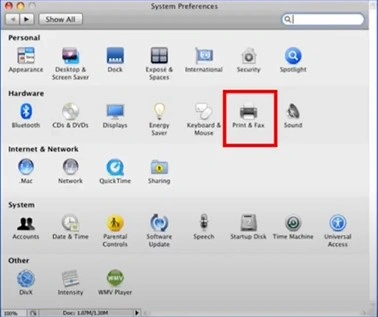
1. Firstly, go to the System Preferences by opening the Apple menu.
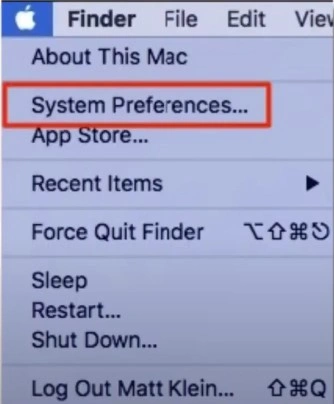
2. After that, click on the Printer & Fax option.
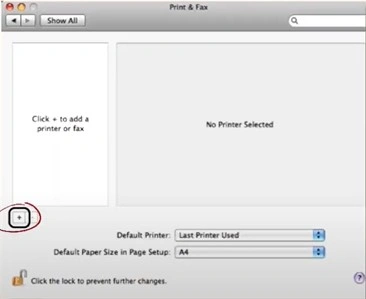
3. On the next page, click on the “+” icon, and a dialog box will pop-up on the screen.
4. Now, a list of connected printing devices will appear on the screen.
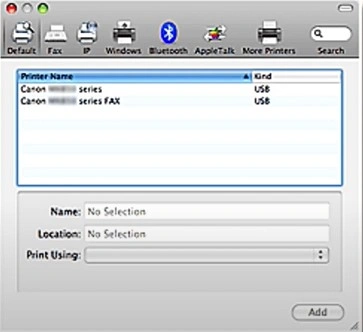
5. If your Mac is connected via a Wi-Fi network, then click on the More Printers option.
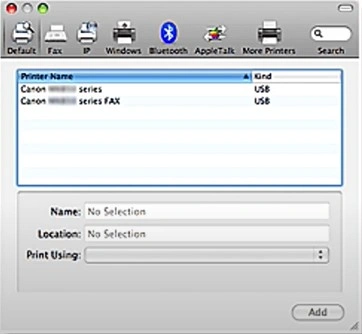
6. After that, you need to choose the connected device.
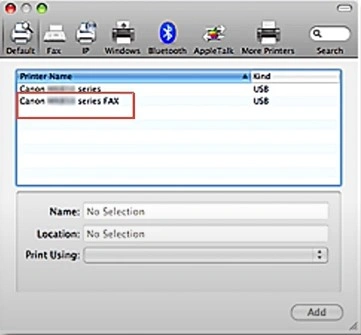
7. Next, select the Add button.
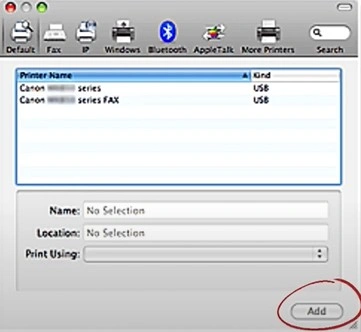
8. In the end, the connected devices are added to your Mac OS 10.5.
Method 3: Add Canon Printer to Mac Wirelessly
To connect the Canon printer and Mac device wirelessly these are the steps that will help you out.
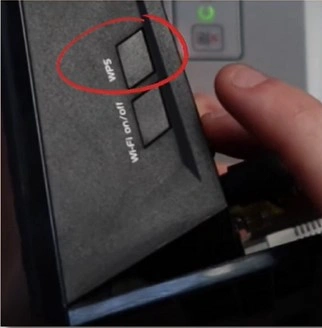
1. First, you need to ensure that the router has the physical WPS button.
2. Next, check to see if the network is using a WPA or WPA2 security protocol.
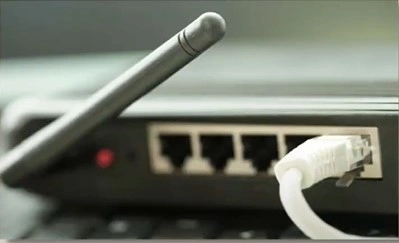
3. After that, make sure your printer device is turned on.
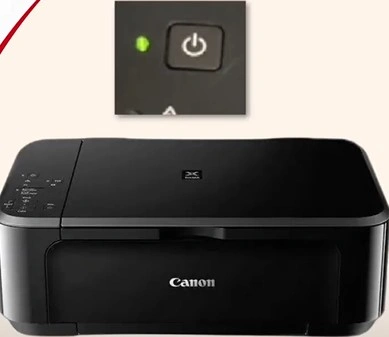
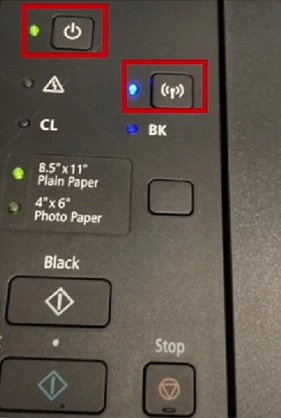
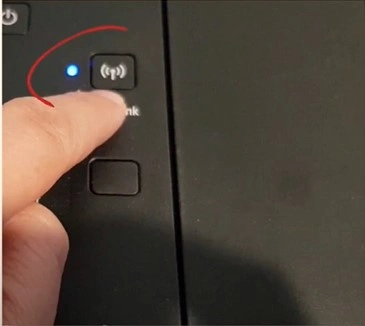
4. Press and hold the Wi-Fi button on the printer until the alarm lamp flashes once.
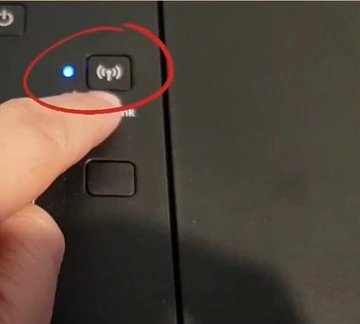
5. Once the lamp next to the button starts flashing blue, go to the router and press the WPS button within two minutes.
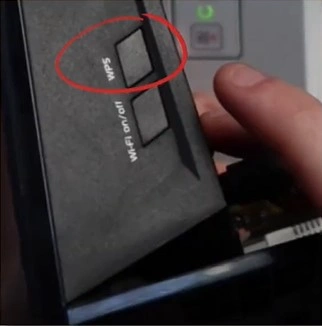
6. The Wi-Fi lamp and power button will continue flashing while searching and connecting to the router.
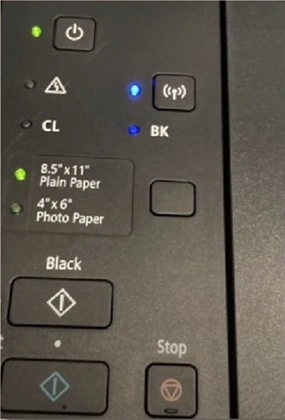
7. Once the printer has successfully made a connection to the wireless network, the power & Wi-Fi buttons will stop flashing and remain lit.
Method 4: Connect the Canon printer to Mac Using a USB cable
You can connect your printer and macOS device using USB cable by following the below steps.
1. Before we move forward with the connection process, update the printer driver if necessary.

2. To do this, go to the official Canon website, download and install the driver by following the on-screen instructions.

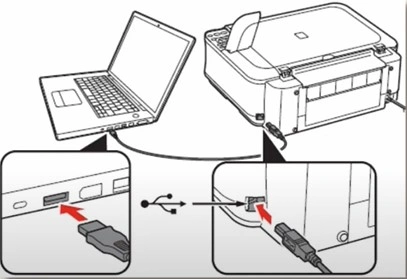
3. Now, connect the USB cable provided with your printer to the Mac device and printer.
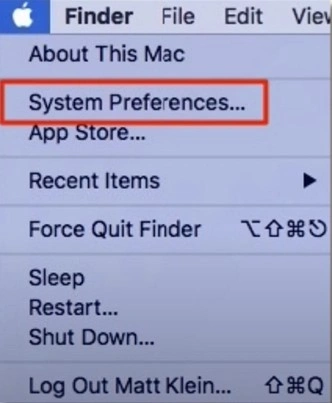
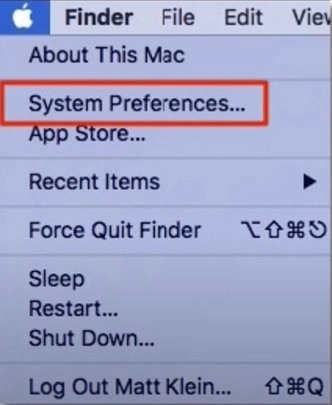
4. Next, you need to navigate to the Apple menu and then choose the System Preferences option.
5. On the open page, select the Printer & Scanners option.
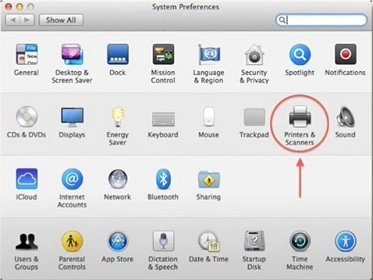
6. After that, click on the plus (+) icon and enter the full name and model number of your printer.
 icon_1725618761.webp)
7. Then, choose your model from the list and click on the Add button.
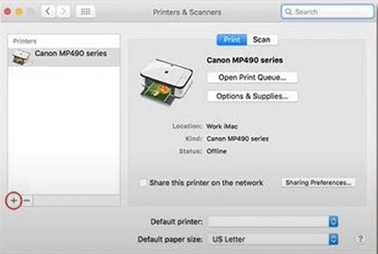
8. Furthermore, complete the setup installation process.
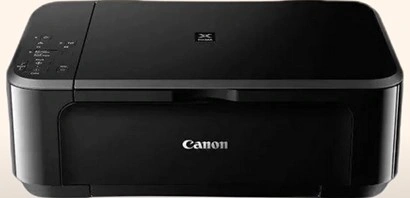
9. Once the connection process is complete, print a test page.
Method 5: Add Connect Printer To Mac Using via AirPort Utility
Here are the steps that will help you connect the Canon and Mac devices using the AirPort utility.
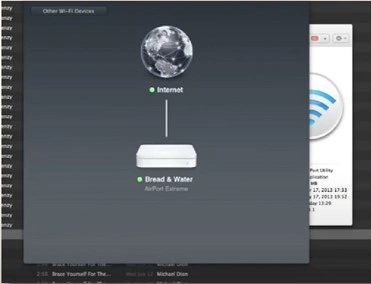
1. Begin by launching the AirPort Utility under the Utilities folder from Applications.
_1725619018.webp)
2. In the next step, choose the Base Station and enter the password if required.

3. From the menu bar, choose Base Station, then click on the Add WPS Printer option.

4. Now, you can choose either the “First Attempt” or “PIN” radio button and click on Continue to connect.
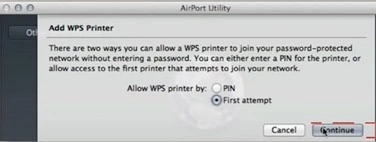
5. If you choose “First Attempt”, push the WPS button on the printer, then click on Done when the printer’s Mac address shows in the AirPort Utility.
6. If you choose the “PIN,” enter the PIN number listed in the printer’s documentation.
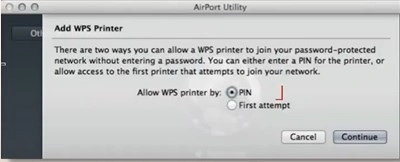
7. Then press Continue and click on Done when the printer’s Mac address appears in the Airport Utility.

Also Read:- How To Fix Canon Printer Error 860? (Working Solutions)
8. Close the AirPort Utility.
9. Now, go to the System Preferences from the Apple menu.
10. Then, click on the Printers & Scanners option.
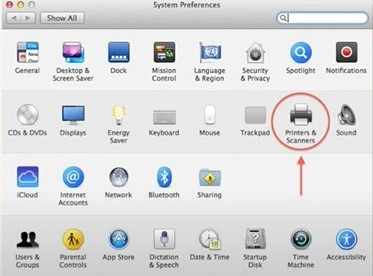
11. After that, click on the plus (+) sign and then click on Add Printers & Scanners option.
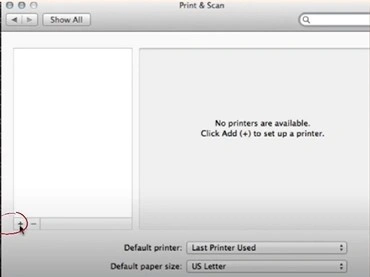
12. In addition, click on the Default tab and then choose the printer name from the list.
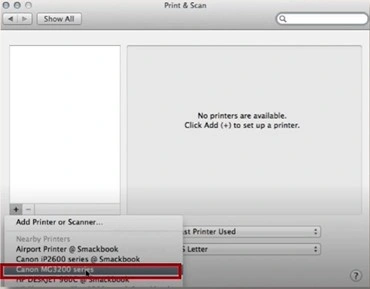
13. Click on Add and then wait for your device to add the printer.
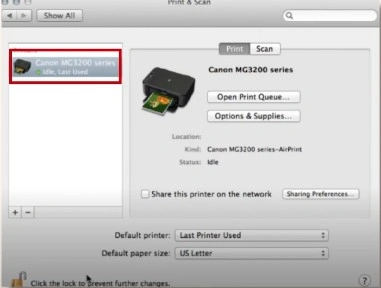
14. Finally, the printer connection to your Mac device will be complete.
Conclusion
It is common to face some errors while connecting your Canon printer to a Mac for the first time. We have shared the top 5 easy-to-follow methods to establish the connection between both devices quickly. You can use any of these methods as per your choice to complete the connection. Moreover, try all the methods if you are having any issues.

