How to Do Canon PIXMA iP8720 Printer Wireless Setup?
Having a problem setting up your Canon iP8720 printer or have no idea where to start? Don’t worry! You are not alone. Connecting the printer for the first time could be hard work if you do not know the right procedure. In addition, various minor/major software or hardware glitches can make the setup more complex. As a result, gaining a full understanding of the whole procedure can make the setup feel like a child’s play.
So, get your hands on the pinpoint instructions to complete the wireless setup without much hassle.
The Procedure to Setup Canon iP8720 Wireless Setup
1. For the first step, turn on the Canon iP8720 printer.
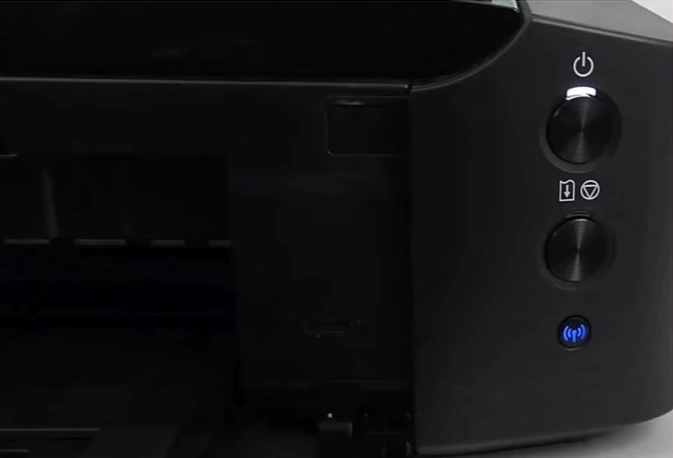
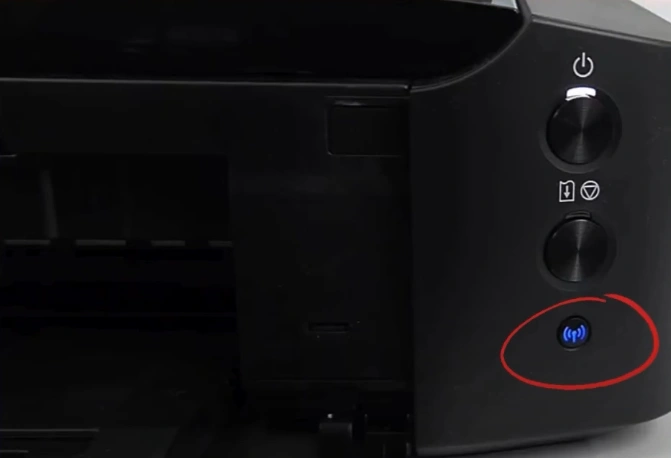
2. Next, press and hold the Wireless button until the power light flashes twice.

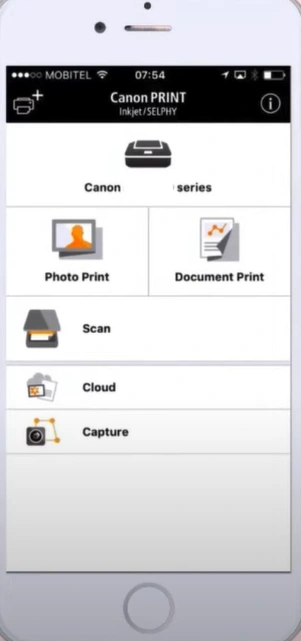
3. Then, open the Canon Print Inkjet Selphy App.
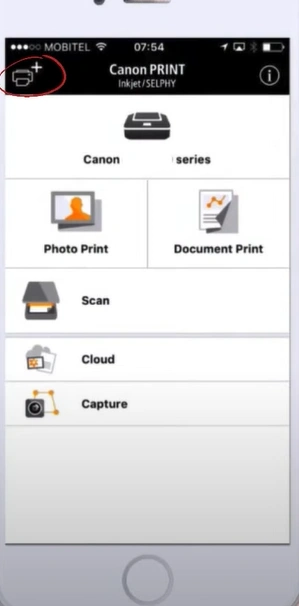
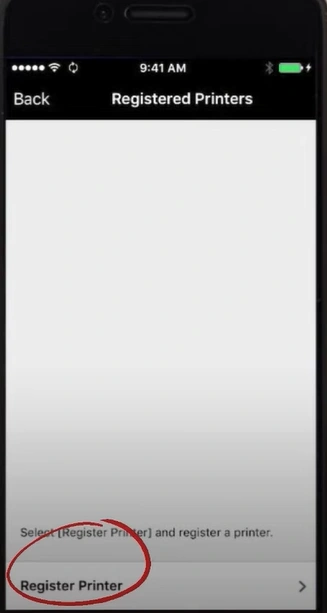
4. Select the + button on the top left side of the screen.
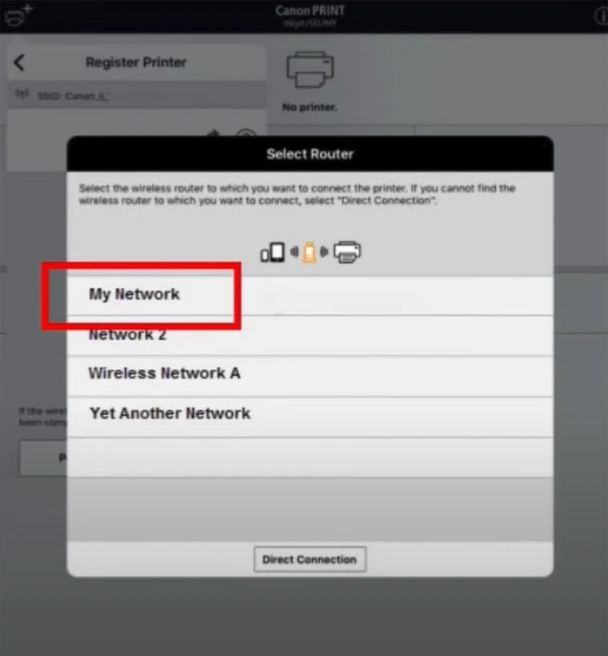
5. Choose Register Printer; it will start looking for the printers.
Also Read:- Fix Canon Print Jobs Stuck in Queue
6. If you get a Not Connected to Router screen, navigate to Wi-Fi Settings.
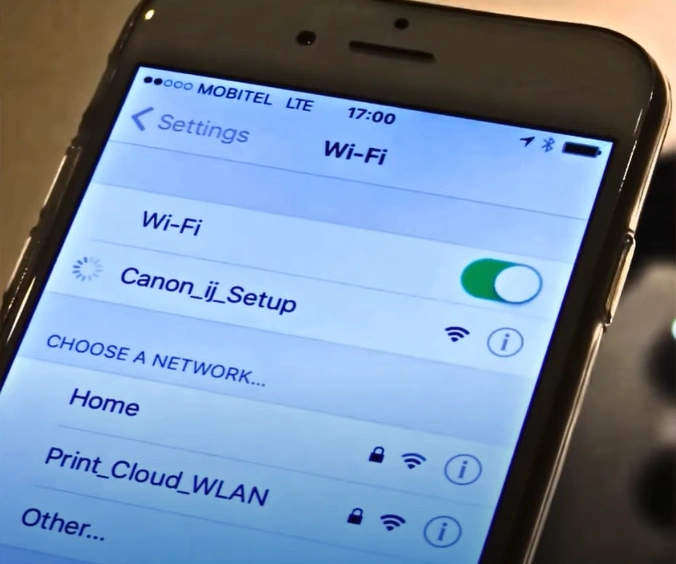
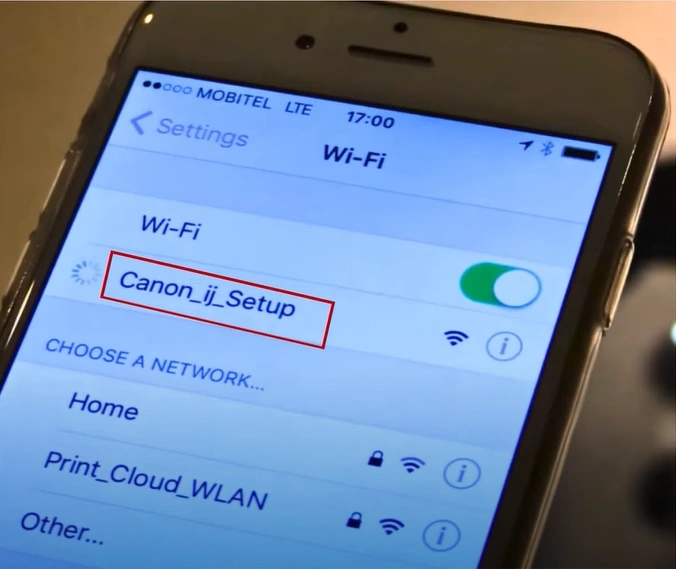
7. Next, tap on the Canon_ij_Setup SSID.
8. Return to the app and click Printer Setup.
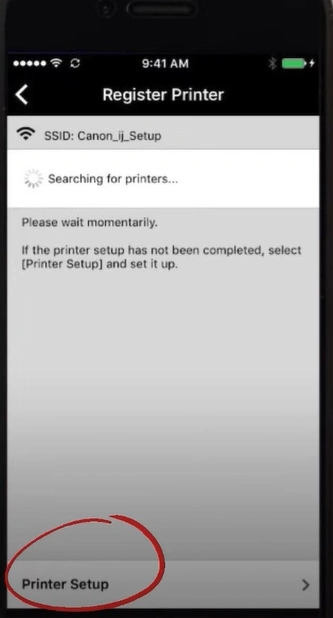
9. In the printer setup screen, select Connect Via Wireless router and tap on OK.

10. Next, choose your wireless network from the list, enter your password, and tap OK. It will start connecting.
11. When the connection is successfully established, the light will remain lit in the Wireless button.
12. Now, you can start using your printer device.
Final Words
If you want to set up the Canon iP8720 printer wirelessly and get started, these steps will help you. Make sure to follow all the steps mentioned here to complete the process thoroughly without facing any problems. In addition, ensure that your printer is placed within the wireless router range. Besides that, try to get your hands on more help if you encounter any problems.

