How to Setup Canon Pixma Printer in Windows and Mac OS?
Canon Pixma printers are among the most popular printers due to their unique technology and fast & high-quality printing. The PIXMA series of printers contains inkjet printers that are designed perfectly for home use. You can use these printers for scanning, printing, and copying, which makes them an all-in-one solution. They also provide high-quality prints of photos.
If you have just bought your new Pixma printer and are looking for a guide to set it up, then we will provide you with just that. We will show you the way to properly set up your new printer. So, let’s get started!
How To Setup Your Printer?
Before moving on to the process of setting up for Windows and Mac, let’s understand the physical setup of the printer.
Prepare The Printer
The first step to setting up your Pixma printer is the preparation of the printer. Follow these steps to do so:
- First, find a flat and horizontal surface to place the printer and make sure that there are no objects near it.
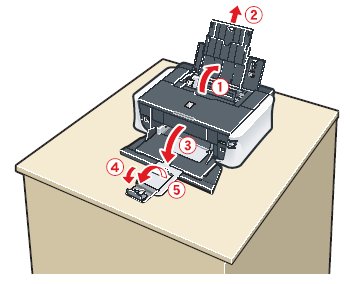
- Now, open the rear tray of the printer and get its paper support to extend.
- Then open its front tray, where you will notice the output tray. Extend that tray using its extension.
- Once the process of extension is complete, plug in the power cable to the socket after connecting its other end to the printer. Make sure that you insert the cable all the way inside the printer. Also, connect the cable only when the software installation is complete.
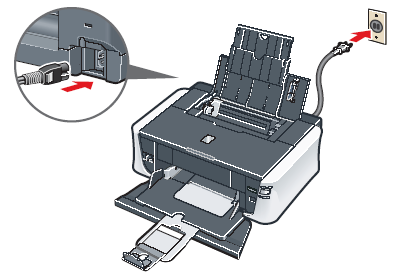
- Now, press the power button and turn on the printer.
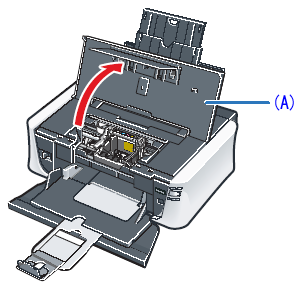
- Open the printer’s top cover, which is marked as (A) in the image below.
Install The Print Head
Print Head installation is the next step. Follow the steps below:
- First, open the package and remove Print Head from it. Be wary of the ink inside the package.
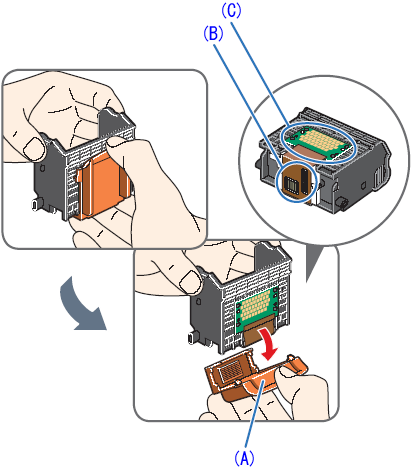
- Then remove its orange-colored protective cap, marked as (A), and discard it. Also, make sure that you do not come in contact with the nozzles and electrical contacts. They are marked as (B) and (C) respectively.
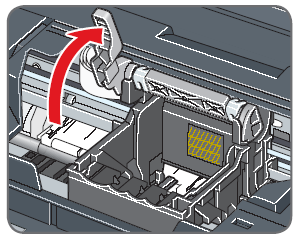
- The next step is to raise the Lock Lever of the print head firmly, as it may be heavy
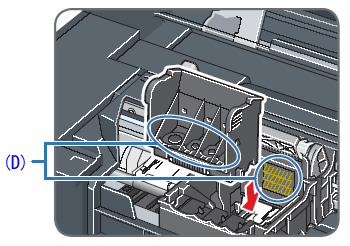
- Insert the Print Head, and do not touch the (D) label from the image below.
- Now push the Print Head so that it is held in place. Then carefully lower the Lock Lever.
- One other thing to note is that leaving the top cover for more than 10 minutes moves the holder of the Print Head to the right. So, close it and reopen it to make it return to the center.
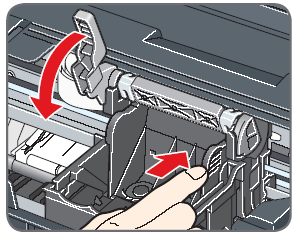
- You will get a better idea of what a properly installed Print Head looks like with the image below. So, use the image to check the proper installation by ensuring that the Lock Lever is completely inside and the locking of the Print Head is firm.
Install The Ink Tanks
The last step in the setup of the Canon printer is the installation of Ink tanks.
- There will be an orange tape with a directional arrow. Peel the tape by removing it in the direction of the arrow, which will remove the protective film.
- Then completely remove the film.
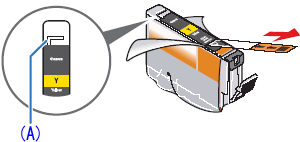
From (A), there may be a leakage of ink in case the air hole gets blocked with the portion of the film that is left.
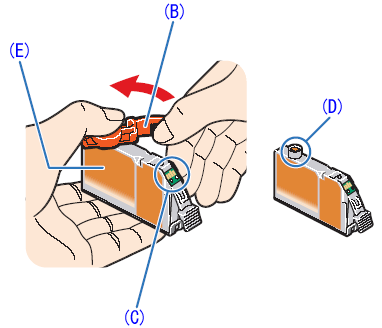
- There is an orange protective cap marked (B) which you can find at the bottom of the tank.
- Also, do not touch (C) and (D), which refer to electrical contacts and ink ports, respectively, and do not press (E).
- Then put the ink tank into the slot and press the “Push” mark, which you will see on the tank. Push it until it fits correctly
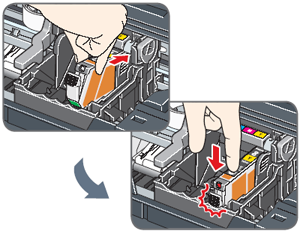
- After putting the tank in, ensure that the ink lamp lights turn red.
- Now install the ink tanks in the order you see in the image below, as per their color labels.

- Close the top cover after the ink tanks are properly placed.
You should also know that the printer will make noise for 2 minutes after the setup and will stop after that. Also, the first few prints may take longer times.
Conditions For Wireless Connection Setup
After the physical setup is complete, you can set up the printer for your system as well as a wireless connection. However, certain conditions must be met before setting up a wireless connection.
- The first requirement is to have an access point that allows internet connectivity. Also, it should be completely functional.
- The next condition is to have a device such as Mac, PC, Tablet, or Smartphone with which you can connect to the internet.
After meeting these two conditions, we can move on to the process of Wireless connection setup in your Pixma printer.
Setup Canon Pixma Printer Using WPS Connection Method
If the access point you are going to use contains a WPS push button, then you can make a wireless connection easily. Most WPS-enabled access points contain WPA or WPA2 security which makes it even better. Now, follow these steps to set up a wireless connection:
- Turn on the printer and then press & hold the button with the wifi icon on it. Keep holding the button until an alarm flashes.
- The light next to the button will start flashing, which is when you should press the WPS button of the access point you are using. Make sure that you press within 2 minutes.
- The light on the printer will keep flashing until it is searching and will stop after making a connection.
How To Setup Canon Pixma Printer For Windows & Mac?
You can also set up your Canon Pixma printer for wireless connection using the standard method. This method is available to both Windows as well as Mac OS users.
For Windows Users
- Start by inserting the CD that came along with your printer.
- Now, run the setup. And if you did not receive a CD, then you can download the software from the official website to continue.
_1686201775.png)
- Then you will come across a display where you have to select a connection method.
- Choose “Wireless Connection” and click “Next.”
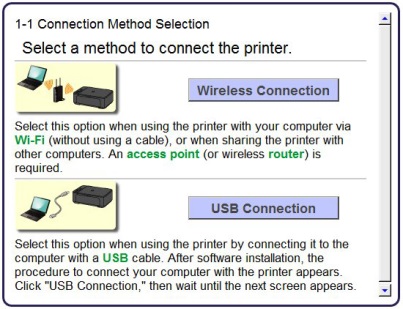
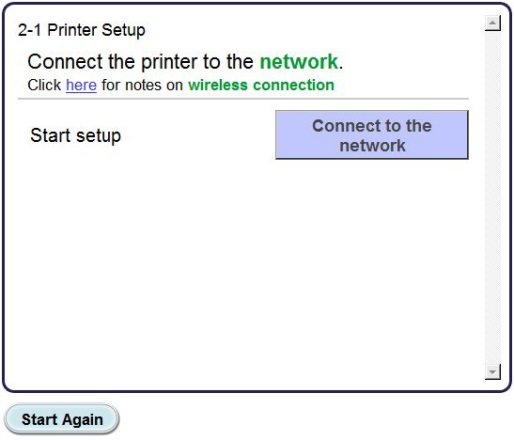
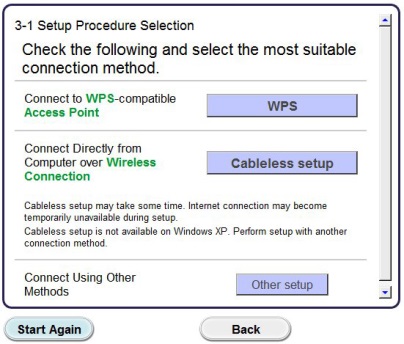
- Click on “Connect to the network” and select “Cableless Setup.”
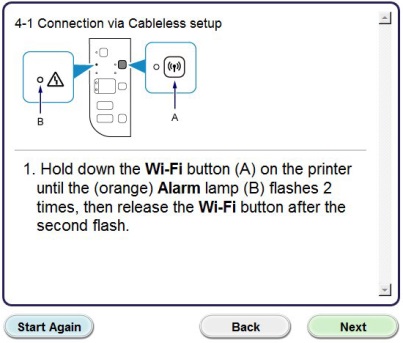
- You will then come across the “Connection via Cableless setup” screen. After which, you need to hold the “Wifi” button (A) of the printer until you see the flashing of (B) 2 times. Release the button after 2 flashes.
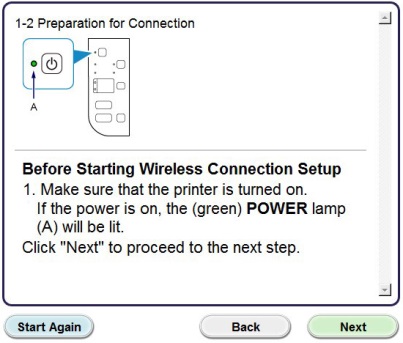
- Confirm the flashing of (A) and green flashing of the power lamp, and then hit “Next.”
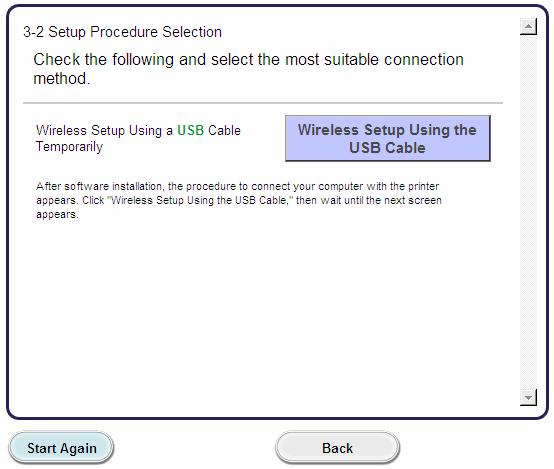
- On the next screen, you should select the procedure. Select “Wireless Setup using the USB cable.”
- Next, you need to select the region.
- Hit “Next” and then select your place of residence.
- Again select “Next,” and then select the software you want to install and again click “Next.”
_1686201418.png)
- Click on “Yes” to agree to the agreement you see on your screen.
- Click on “Next” and then you will come across the screen where you will see your printer model and SSID of the wireless network.
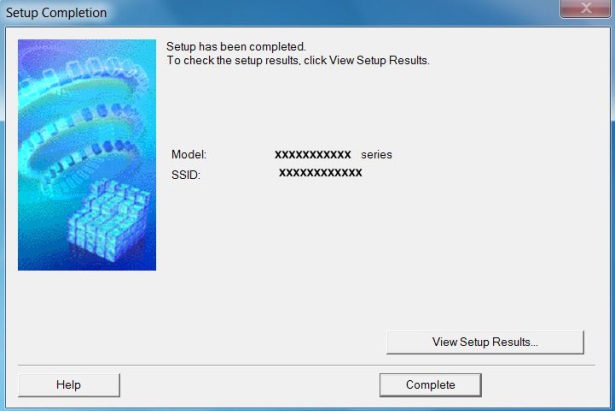
- The cableless connection is now set up.
If the system cannot detect your printer, then you can proceed with the USB setup and hit “Next.”
_1686201326.jpg)
USB Connection For Windows Users
- Connect your printer with the USB cable after you see the following display on your screen.
_1686201236.png)
- You will then see a display with the following screen, which will display your access point. If it is the same access point of the network you are planning to use, then click on “Yes.”
_1686201172.png)
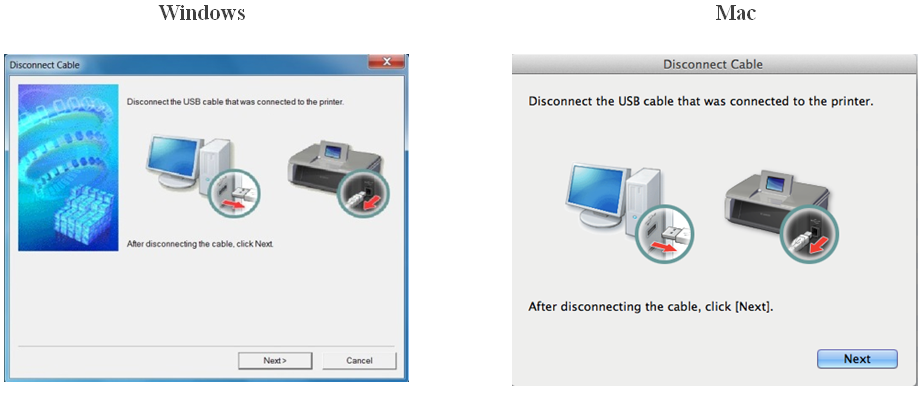
- Disconnect the USB from the printer after you get the following screen and hit “Next.”
- To conclude the setup click on “Complete.”
For Mac Users
- Since the CD is not an option for Mac users, you would need to download the software from the official website.
- Run the setup after downloading it on your Mac
- Click “Next” once you see the below display on your screen.
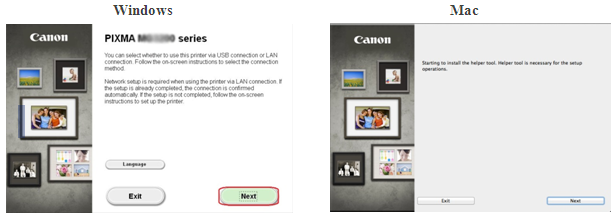
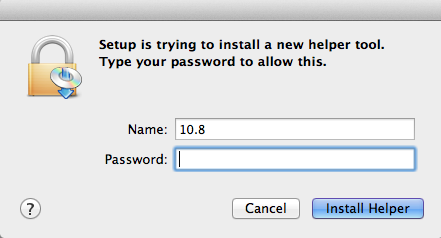
- Now enter the password to allow the installation of the helper tool. Then hit next after the installation starts.
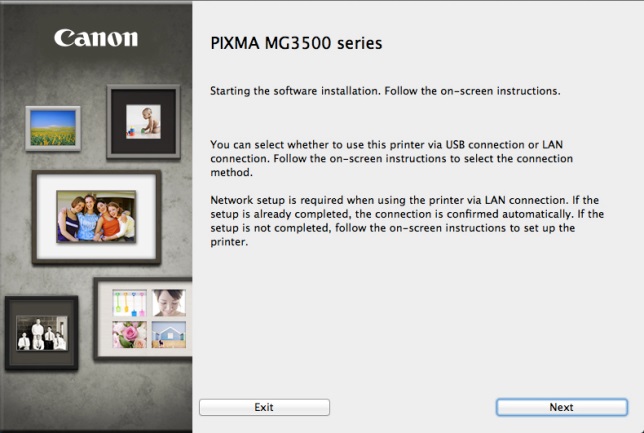
- Select the wireless connection again in the connection method selection and click “Next” to proceed.
- Now, select “Connect to the network” and follow it up by selecting “Cableless setup.” Hold the wifi button of the printer until you see an orange flash twice, and then release the button.
- Confirm the flashing of the wifi lamp and power lamp and hit “Next” again.
- You will then come across the display where you will need to select the place of residence.
- Hit “Next,” select your country and then click on “Next” again.
- You will have to now select the software for installation and then click on “Next.”
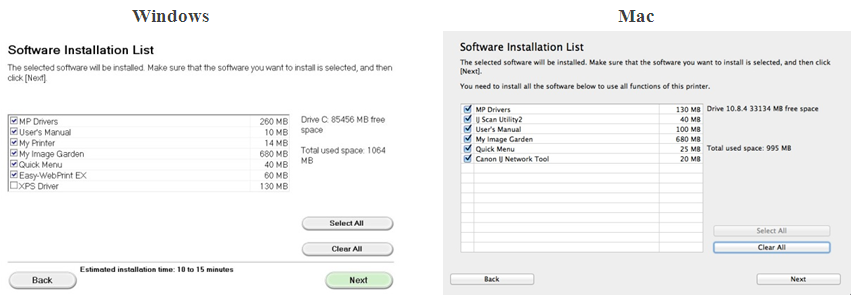
- Click “Yes” when you see the license agreement.
- Then click on “Add Printer” when you see the following screen.
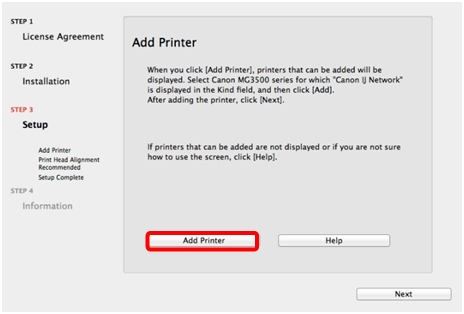
- Select the “Canon IJ Network” driver and click on “Add.”
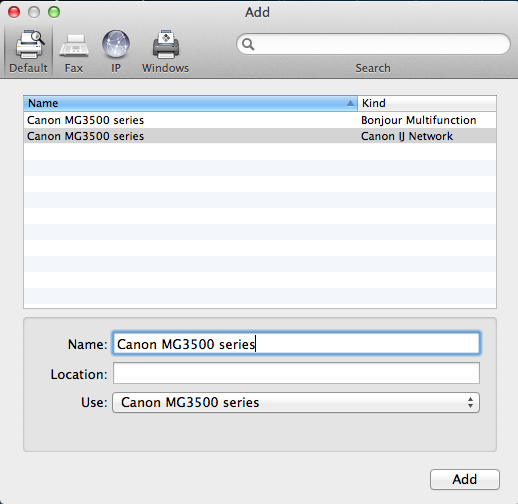
- Finally, hit “Next” to conclude the cableless setup
However, if the printer cannot be detected by the system, then you can follow up with USB installation.
USB Connection For Mac Users
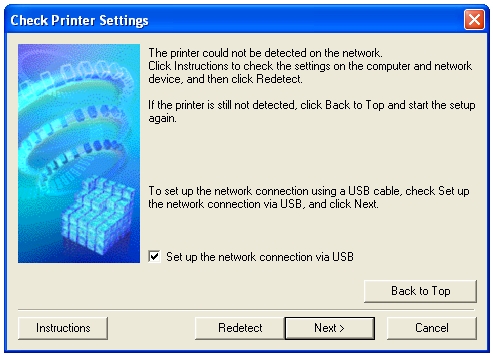
- Click “Next” after checking on “Set up the network connection via USB.”
- Then connect the printer using the USB cable and proceed by clicking “Next.”
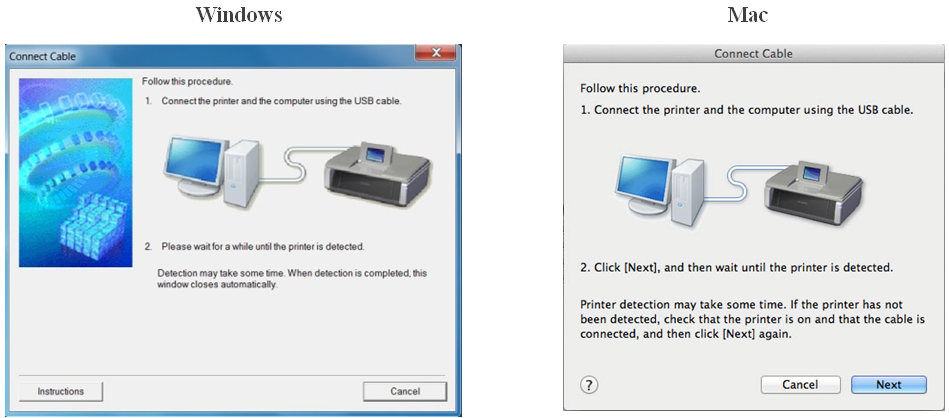
- After the printer is detected, you will see the following screen.
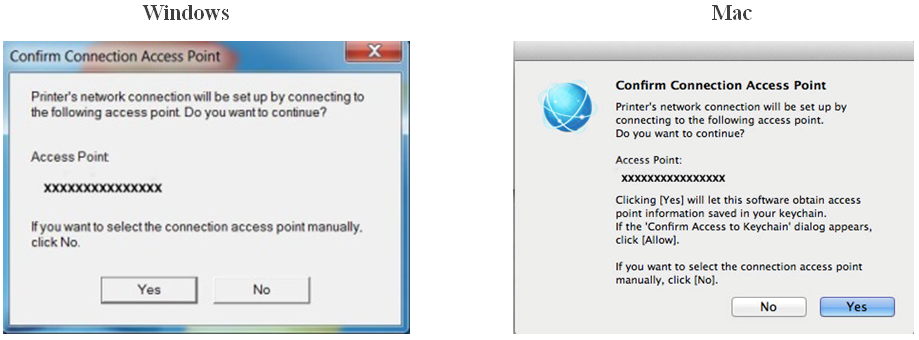
- The screen will display an access point. If it is the access point of the wireless network you want to connect with, then click “Yes” and proceed.
- Click on “Allow” after you see the following display on your screen.
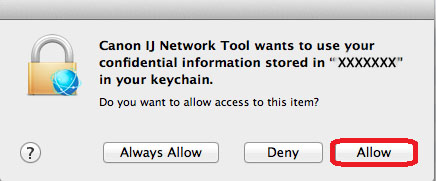
- Now, disconnect the USB cable and then click “Next,” to proceed further.
- After the detection of your printer, you will see the following screen, which will show the name of the access point that is connected to your system. Click “OK,” and then the following screen will appear.
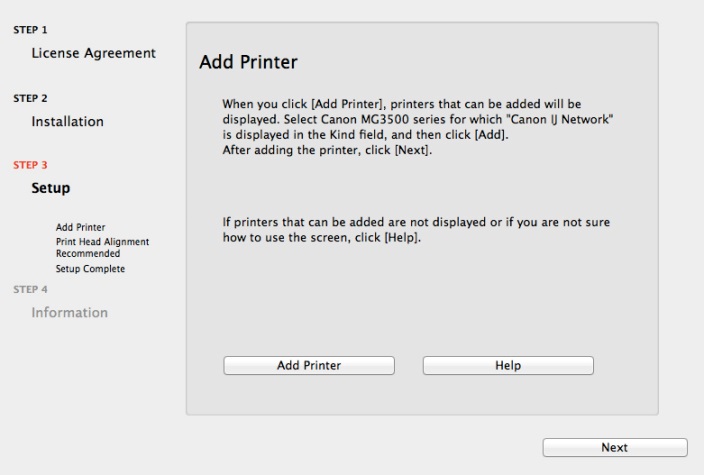
- Click on “Add Printer” and then complete the setup by selecting the “Canon IJ Network” driver and then adding it.

