How to Connect Canon Printer to WiFi? [Top 3 Methods]

Connecting a printer to a WiFi network allows you to print files without any cable clutter. In order to get benefits from it, you can use one or more methods to set up your printer to WiFi. You can do it manually, using the WPS button, or via the cableless setup.
This guide will teach you how to connect Canon printer to WiFi using various ways. Whether connecting the printer to the network for the first time or facing any issue, this blog post will be helpful. All the methods mentioned here are easy to follow. You must choose the correct way and perform it using its step-by-step instructions.
Setup Canon Printer to a Wireless Network (Manual Connect)
The Manual Connect is also called the Standard Setup method. This method to connect the printer to WiFi will allow specifying the network. It even lets you use the printer's operation panel to type the WiFi network password. Follow the below-mentioned steps to connect your printer using this method.
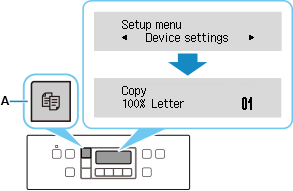
- Press the Setup button and use the arrow keys to select the WiFi setup.
- Push the OK button and select the Manual Connect option.

- Again, press the OK key and choose the wireless router option.
- Push the OK button and, again, press it when asked to do it.
- Type the password and text entry in the box that is case-sensitive.

- If you know the WiFi router's password, see the manual or contact the manufacturer.
- If the Connected message appears on the screen, the WiFi network does not need a password.
- After entering the password, press the OK button and hold it for at least two seconds.
- Tap the Yes option and press the OK key. Now, when the connected screen appears, push OK.

- If your printer fails to set up with the network, press OK and then push the Back button.
- Try to type the password again and push the COPY button. Now, the printer is connected to the wireless network.
Connect Canon Printer to a Wireless Network (WiFi Protected Setup)
The WiFi Protected Setup or the WPS is a technique that allows an easy and secure printer connected to a WiFi network. While using this method, there is no need for the network name or the network key. If your router or the wireless access point has a WPS button, then the below steps will help you.
- First, tap the WiFi icon with a cut mark on the printer LCD.
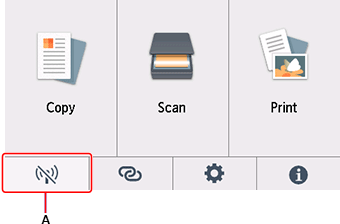
- Then, click on WiFi on the printer's LAN Settings screen.
- Now, tap the Settings button and then click WiFi-Setup.
- After that, tap on the WPS (Push button method) and click OK.
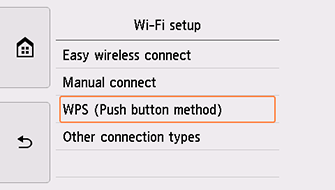
- Push the router's WPS button and hold it for a few minutes.
- As the OK button appears on the screen, tap on it within 2 minutes.
Read Also:- How to Resolve Canon Printer Won t Print? [Top 3 Solutions]
- If any other screen appears on the printer's LCD, click Troubleshooting.
- When the "connected to wireless router" screen appears, click OK.
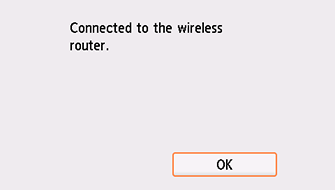
- Click the Home icon button on the left side of the printer's screen.
- Finally, your printer is now set up with a wireless network.
- After a successful network connection, the WiFi icon will appear without a cut mark.
Connect Your Canon Printer to WiFi Network (Cableless Setup)
The Cableless Setup is another WiFi network connection method. As the name denotes, there is no need for cables, and it lets you wirelessly set up the printer to WiFi. You must first prepare for this setup method and then begin the process. Read the below-mentioned step-by-step instructions for the same.
- First, you must prepare the printer for this setup process.
- Then, push the Setup key on the printer to begin preparing the printer.
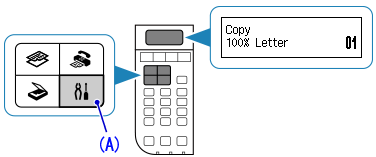
- After that, use the arrow keys to choose the Wireless LAN Setup option.
- Now, press the OK key, select "Other Setup," and push the OK button again.
- Choose Cableless Setup and push OK again. Now, the printer is prepared for the WiFi connection.

- Now, to install the software, visit the Canon site http://canon.com/ijsetup/.
- Choose your region, printer model name, and computer operating system.
- In the Canon Product Setup section, click Download, and the software setup file will get downloaded on the system.
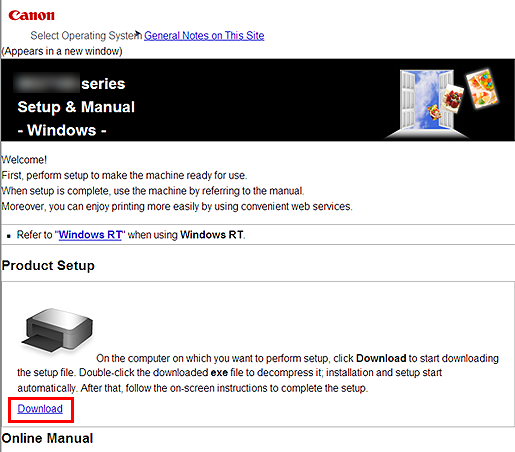
- Double-click on the downloaded software .exe file. It will install the software, and the setup process will start automatically.
- Follow the prompt instructions on the screen to complete the installation process.
- Click on the Wireless LAN Connection option on the printer's startup screen.
- After that, choose "Connect via wireless router (recommended)" and click OK.
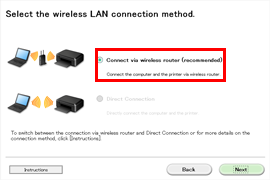
- Now, hit the Cableless Setup button and click the Next button again.
- Follow the prompts on-screen instructions and start with the installation process.
- On the Setup Completion box, hit the Complete button and click Next.
- On the Extended Survey Program, click Agree to install it on the system. If you do not want it, click “Do not agree.”

- When the Test Print window appears on the screen, load the paper on the printer and click Execute.
- After you test print a file, click Next. You can skip the test printing by clicking Next instead of Execute.
- Finally, click Exit to finish the installation and complete the Wireless LAN setup using the cableless connection method.
Frequently Asked Questions
My router does not have a WPS button. How do I connect it wirelessly?
If your router or the access point does not support the WPS, then you can use some other wireless connection methods. The Manual Connect option or the Cableless Setup are various techniques to do the same. Both ways are simple to follow and use in order to connect Canon printer to WiFi.
What is the Easy Wireless Connect process?
An Easy Wireless Connect is a technique to connect your printer to a wireless network. In this method, you need to press the WiFi Connect key and hold it for some minutes. When the LED light flashes, leave the button. Ensure WiFi and horizontal bar light flashes on the screen. After that, download the software to finish the setup.
Why choose the wireless connection over the wired method?
The wireless connection lets users print files moving freely within the network area. It does not enable any cable clutter and allows you to print from any wireless device. For this method, you need an Internet connection, but you must ensure it provides a robust WiFi signal.

