How to Fix Xerox Printer Not Printing Issue?
A bunch of problems can lead to the ‘Xerox printer not printing’ issue, and it could be daunting. Some prominent causes of this problem include low ink levels in cartridges, hardware issues, software issues, outdated drivers, and more. If you want to resolve the problem quickly, you need to try to identify the key cause behind the issue and then take action accordingly.
Moreover, plenty of other troubleshooting methods are also helpful in fixing the problems. To make things easier for you, we are going to explain the top 4 easy-to-follow methods. Let’s begin the process now!
Solution 1: Check the Paper Type
Many times, the wrong paper size and quality can lead to the not printing problem. These are the proper guides to check the paper type on your Xerox printer.
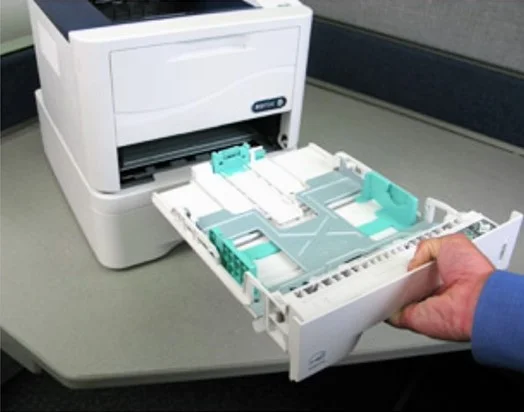
1. First of all, pull out the paper tray from your Xerox printer and check whether there is paper in the tray.
2. Click on the Windows Start icon and type Control Panel in the search bar.

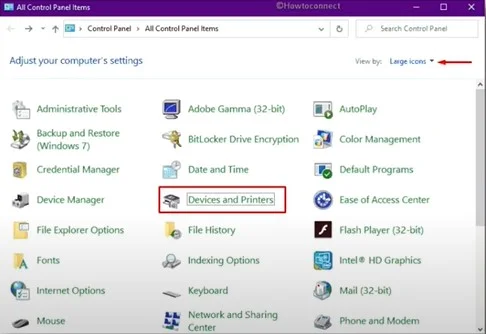
3. Open the control panel, select View by two large icons, and click the Devices and Printers option.
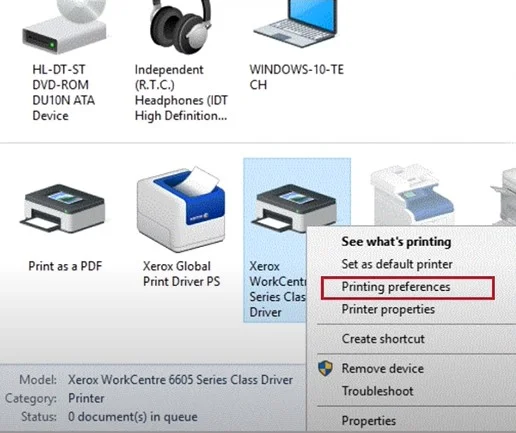
4. Right-click on the Xerox printer model you are using and select the option Printing Preferences.
5. Now, head to the Paper/Quality tab in the Printing Preferences option.
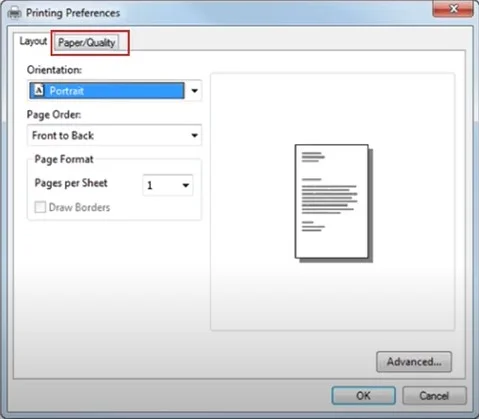
6. In the Media field, select the paper type to ensure that it matches the paper that you are using and click on OK.
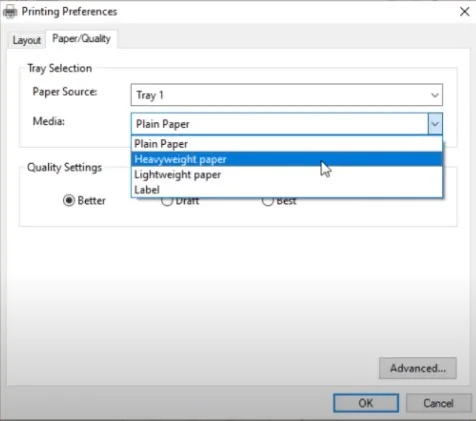
7. Finally, check if the printer is still facing the same issue.
Solution 2: Ensure That You’ve Send the Print Job To The Right Printer
Sometimes, your Xerox printer does not print the documents if you do not send the correct print job. Learn the steps here to check if you sent the correct print job.
1. Move to the Windows search bar on your computer and then search for the control panel.

2. When you are on the Control Panel window, choose large icons for the View By option and then select the option Devices and Printers option.
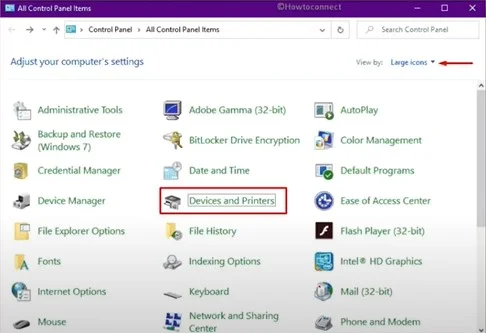
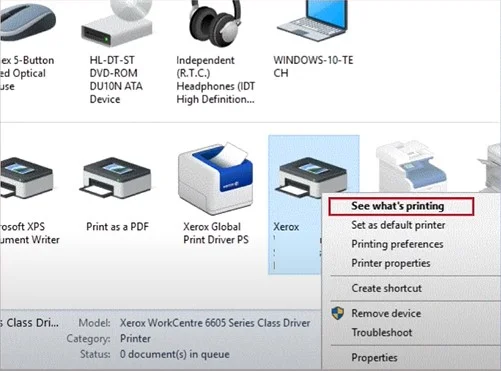
3. Right-click on your printer model name and click on the option See What’s Printing from the open list.
_1725704472.webp)
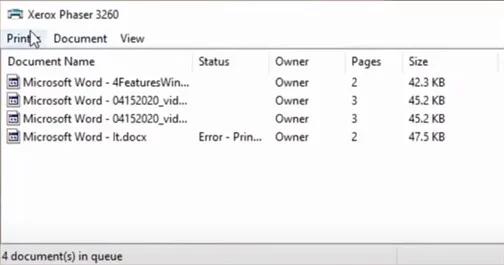
4. Check your printer model on the top, and then check your print job.
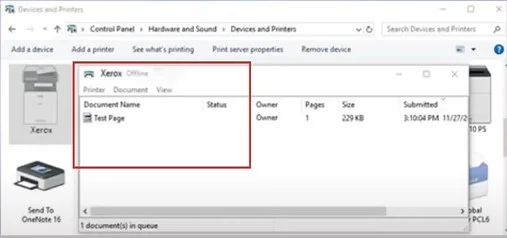
5. Now, check if the printer problem is gone or not.
Solution 3: Delete the Print Job From Queue
When too many print jobs are stuck in the queue then, the Xerox printer will not be able to print the documents. Here are the steps that will help you remove the print job.
1. Type in the control panel from the search bar on your computer device.

2. Next, open the control panel window and click on the Devices and Printers option.
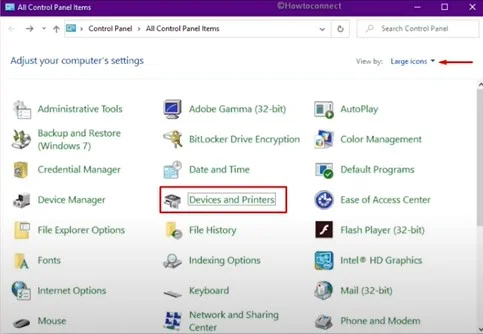
3. And then, navigate to your printer device and right-click on it to select the “See What’s Printing” option.
4. Click on the Printer tab.
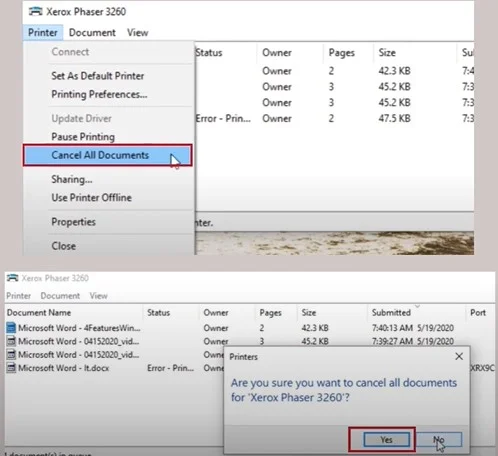
5. From the open results, click on cancel all documents and choose Yes from the prompt.
6. If the problem persists, then move to the next method.
Solution 4: Reinstall the Xerox Printer Driver
When the printer driver has some issues, then it is obvious to get some problems while printing. The following procedure will allow you to reinstall the printer driver on your computer device.
1. Initially, click on the Windows Start icon and then click on Settings.
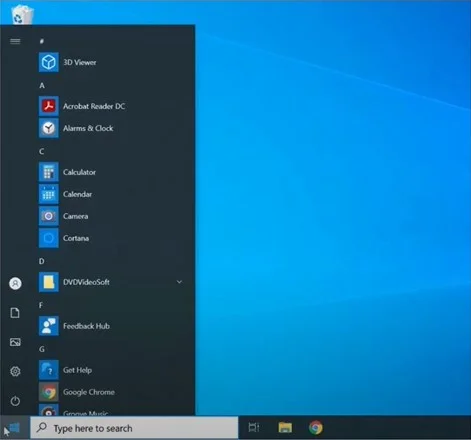
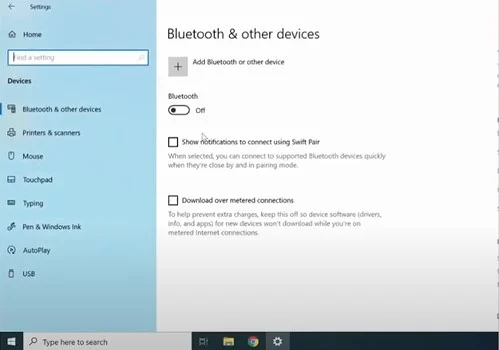
2. Choose the Device option and then click on the Printers and Scanners option.
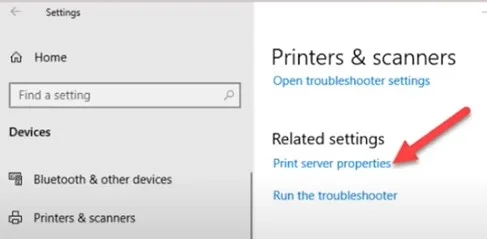
3. Now, scroll down and click on the Printer Server Properties.
4. Next, go to the Drivers tab, choose your driver option, and click on Remove.
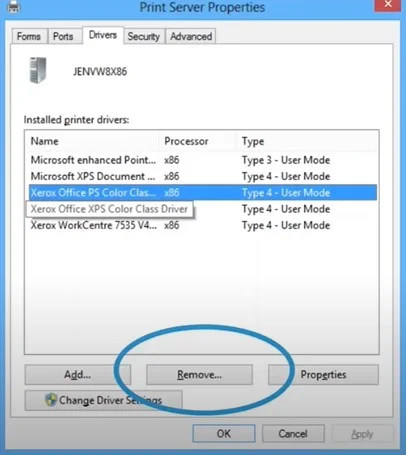
5. In the following prompt, choose the option Remove Driver Only and then click on OK.
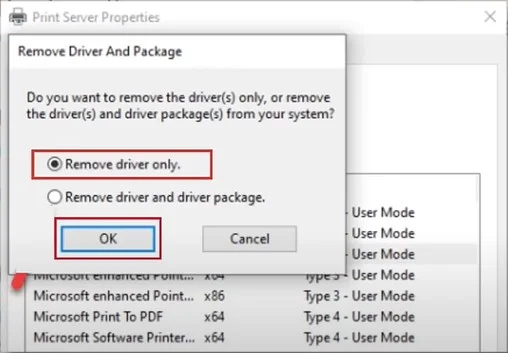
6. After that, open your browser, visit the official website of Xerox, and download your printer driver.
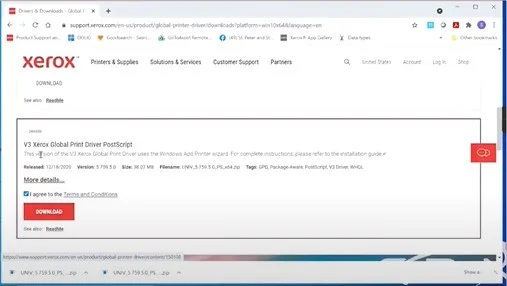
7. Once the Xerox driver download is finished, click on the downloaded file on the device and select Extract All in File Explorer.
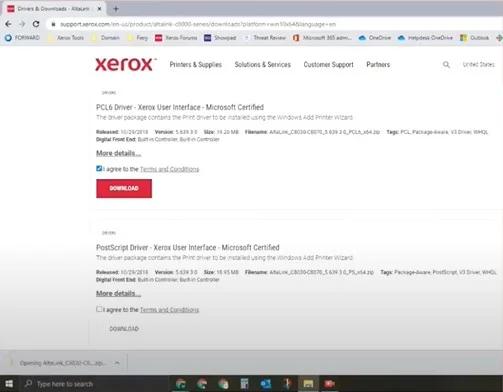
8. Then, click on the Extract key to start extracting the files.
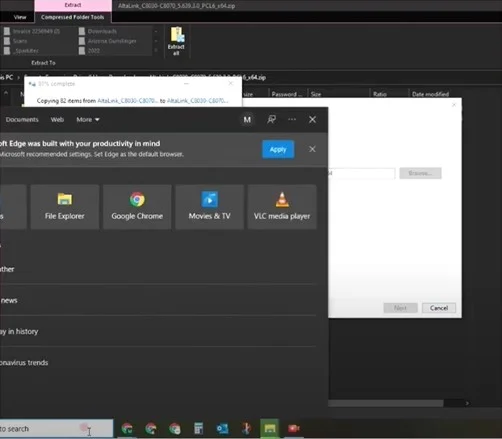
9. Click on the windows start option, then type Run in the search section.
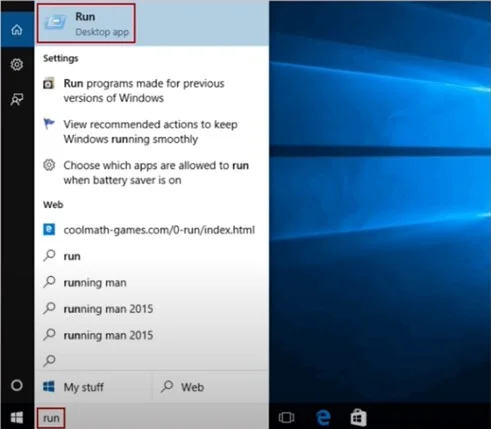
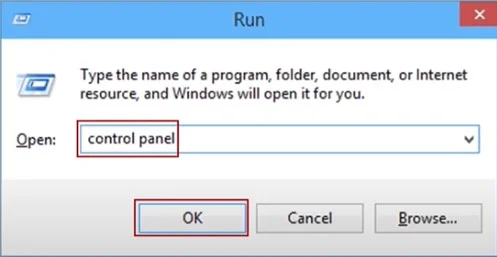
10. Now, in the open Run dialog box, type “control panel” and click on OK.
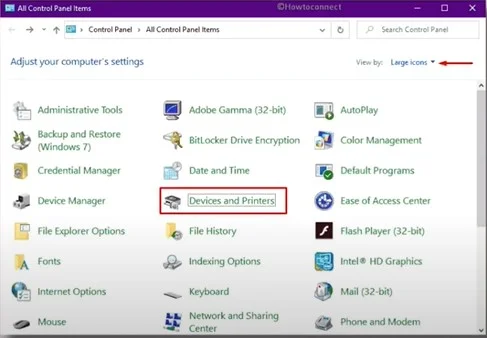
11. When the Control Panel page opens on the screen, choose the Devices and Printers option.
12. Choose Add a printer option and select ‘the printer I want wasn’t listed’ on the prompt.
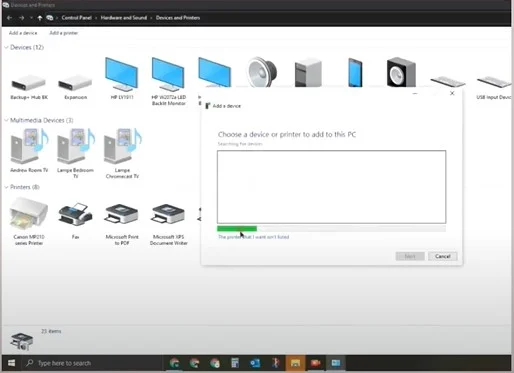
13. On the next page, click on Add a local printer option and click on Next.
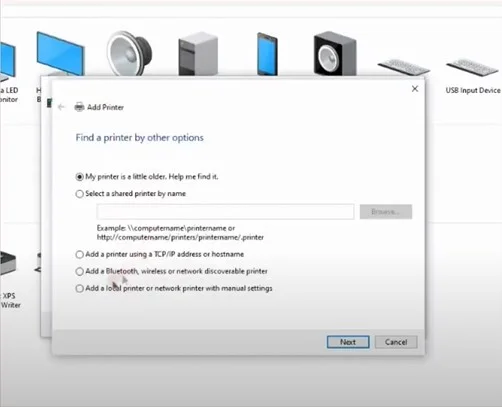
14. Then, choose Create a new port in the Choose a printer port page.
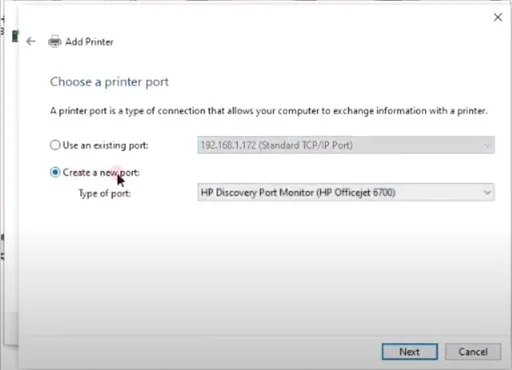
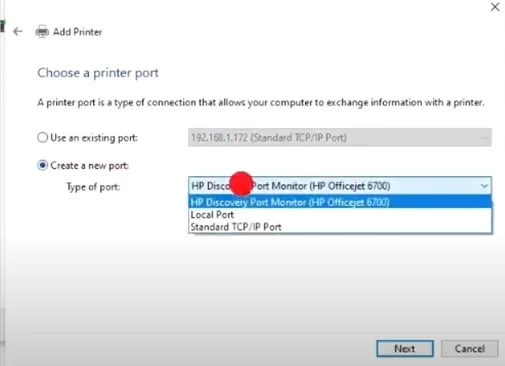
15. After that, choose the type of port as Standard TCP/IP port from the drop-down menus and click on Next.
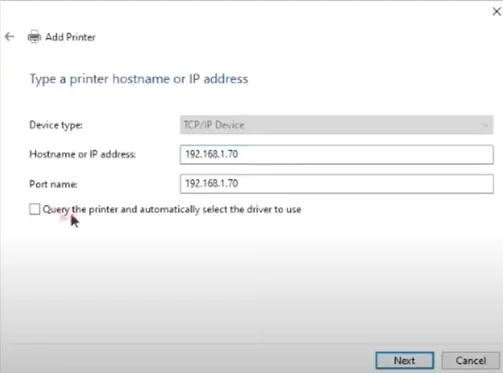
16. In the following window, enter your IP address, and the port name will automatically be filled.
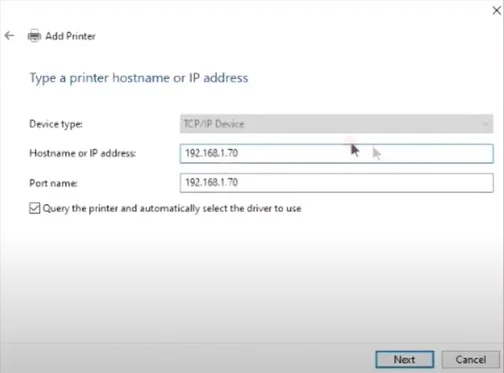
17. Next, uncheck the box of the Query and click on the Next button.
Also Read:- How To Fix Xerox Printer Offline Issue In Windows 10 and 11?
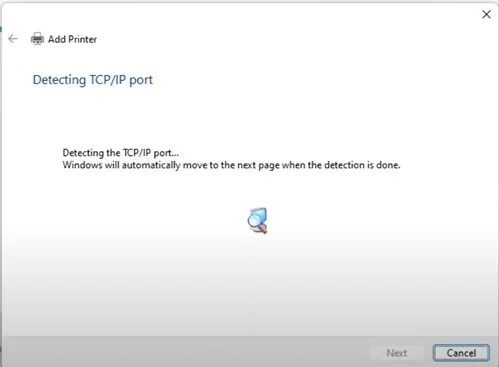
18. While you wait for the window to detect the TCP/IP port, go to File Explorer.
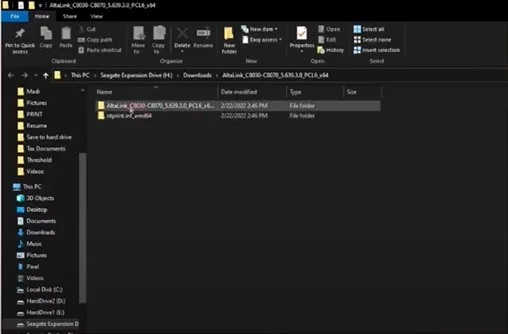
19. Now, go to your extracted files, double-click on the extracted files, and open them.
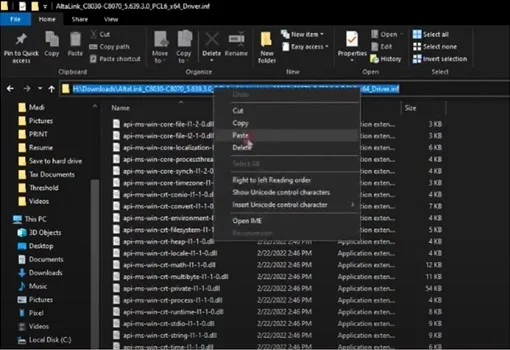
20. Copy the file path from the top bar.
21. Move to the add printer window and select the Have Disk option on the Install the printer driver prompt.
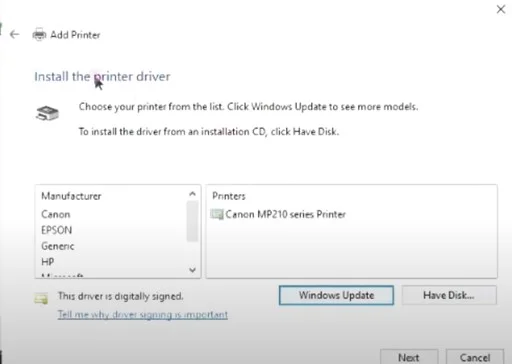
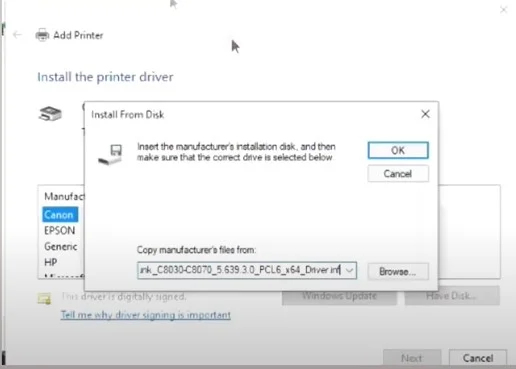
22. Now, page the copied path in the Copy Manufacturer’s file from the field and click on OK.
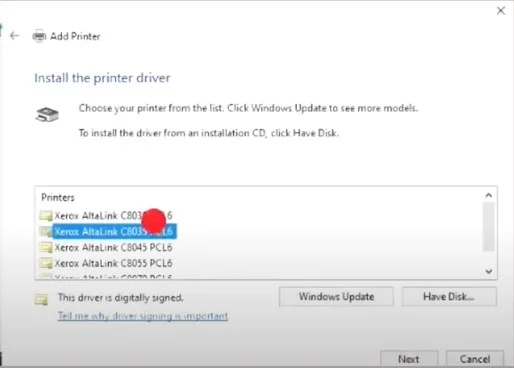
23. After that, choose the correct printer model from the list and choose Next.
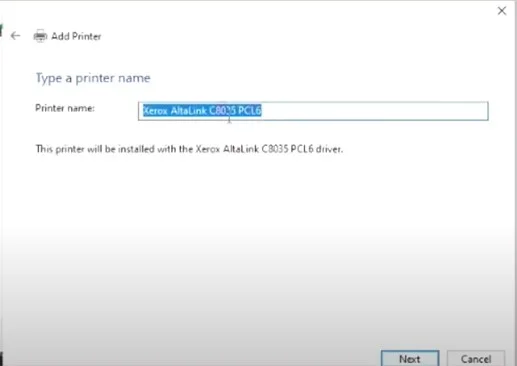
24. In the type printer name screen, change the printer name if you want, then click on Next.
25. The installation process will take some time to complete.
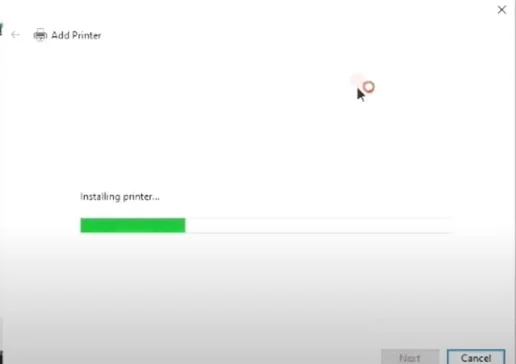
26. Once the printer is successfully installed, click on Finish.
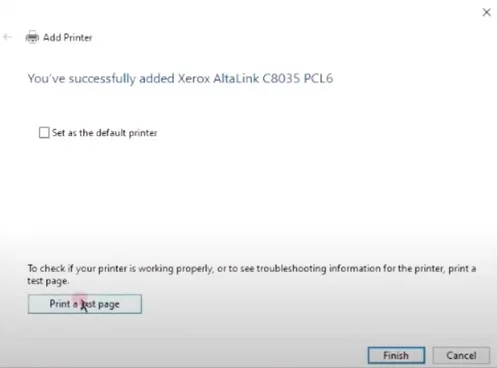
27. Finally, confirm if the printer is error-free or not.
Final Words
There is nothing new if you are getting printer problems while printing. But the good news is that you can use our effective and simple troubleshooting methods to fix the problem quickly. Make sure to follow all the steps properly, and then you can start printing on your Xerox printer again in no time. In addition, our guide will help you prevent your printer issue from getting worse. However, if you think you require further guidance, then it would be best to look for additional resources and help.

