How to Do Canon TS9520 Wireless Setup?

Do you want to complete your Canon TS9520 wireless setup? Well, connecting this printer from scratch is not an easy task. You can encounter numerous software or hardware challenges, such as driver issues, network problems, connection settings, firewall interruptions, etc., that can create hurdles during your printer setup.
Plus, if you are using this printer for the first time, then not knowing its setup process could be another factor. But worry not! Here, discover the multiple pinpoint methods to complete your Canon TS9720 printer wireless setup on various OS devices. So, let's get started right away!
1. Before you move with the Canon printer setup on any device, first follow these steps to connect it to your wireless router.
2. At the start, ensure your device is connected to Wi-Fi or any other internet connection and has a good internet speed.
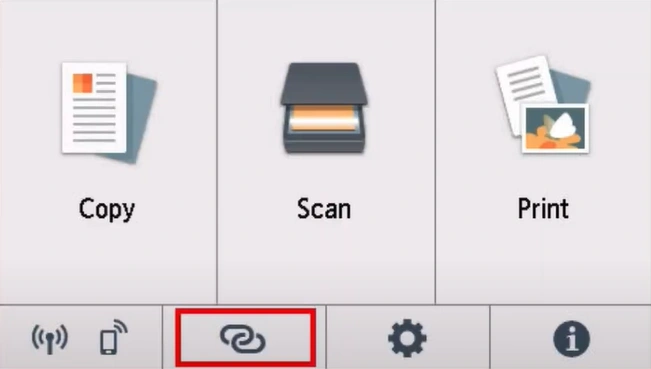
3. Then tap the Link icon on the printer's home screen.

4. Tap on the Yes button/key to confirm that you want to connect the printer to your device.

5. Following a successful connection, follow the instructions on the printer's LCD.
Setup for Windows PC
These are the steps you can use to establish the connection between your Canon printer and your Windows device.
1. Open your web browser and go to Canon's official setup website.
_1746437852.webp)
2. Tap on the link icon in the printer's home screen.
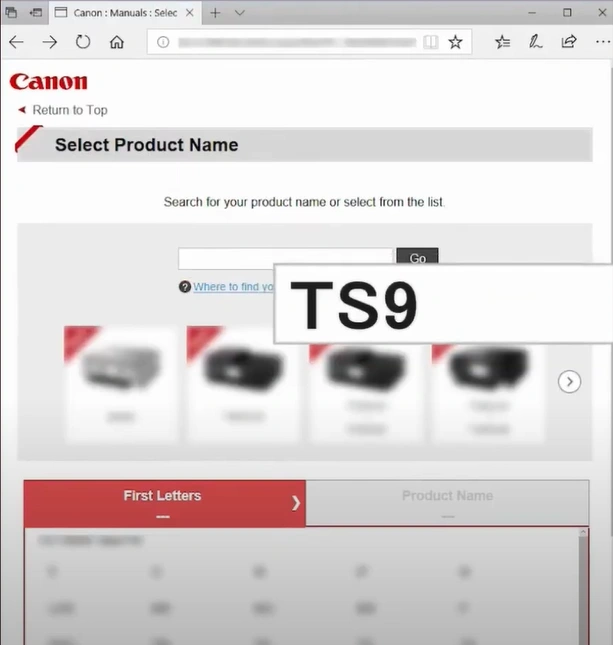
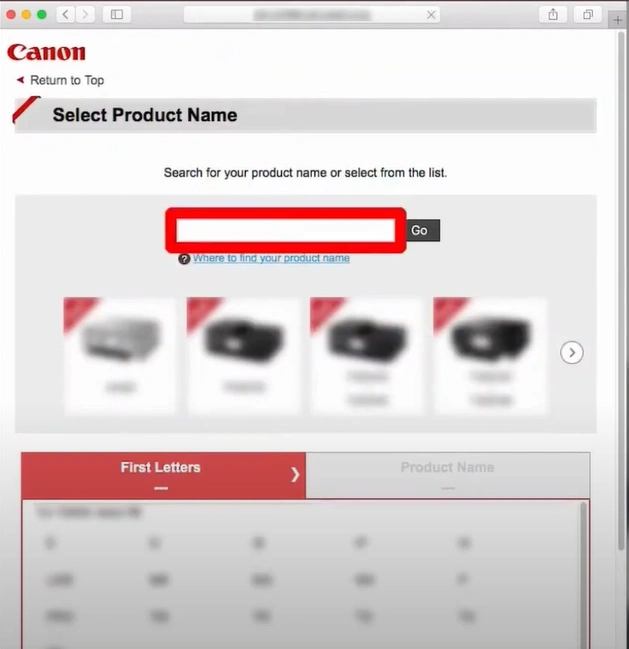
3. Click on Setup, type TS9520 in the search box, and click on Go.
_1746437933.webp)
4. Then, select Start to begin the TS9520 setup process.
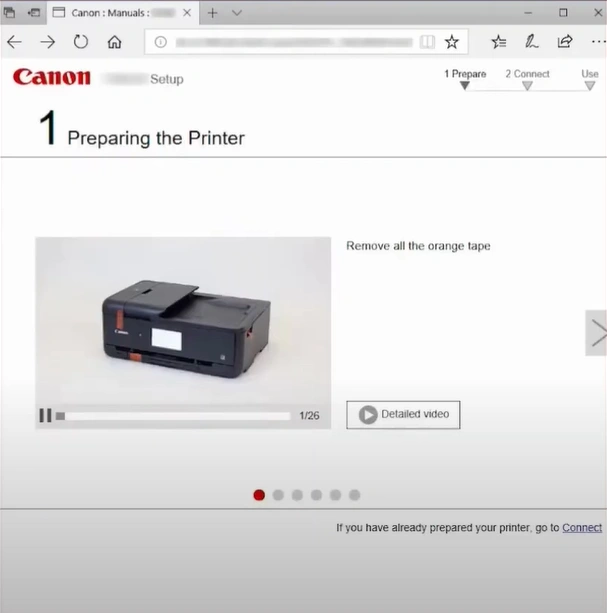
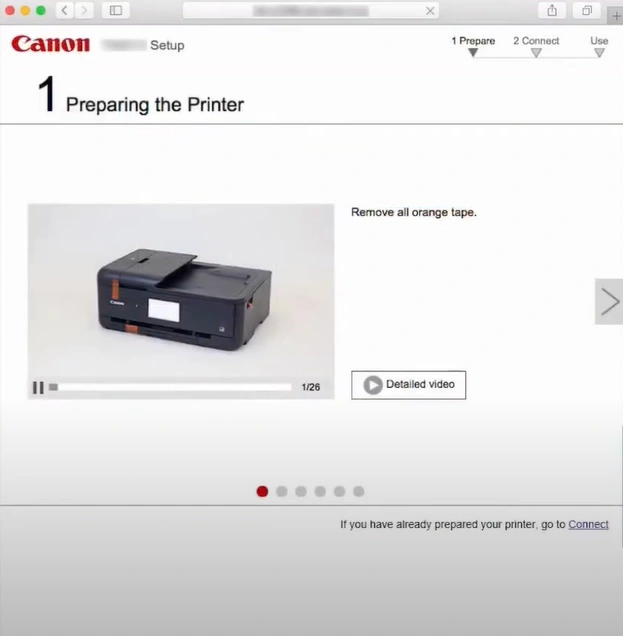
5. Tap on the Connect hypertext if you have already prepared your printer.
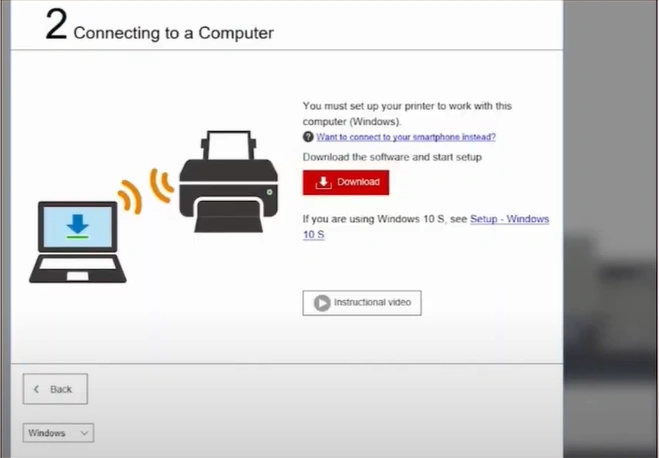
6. Click on the Download button/option, wait for the download to complete, and then open it.
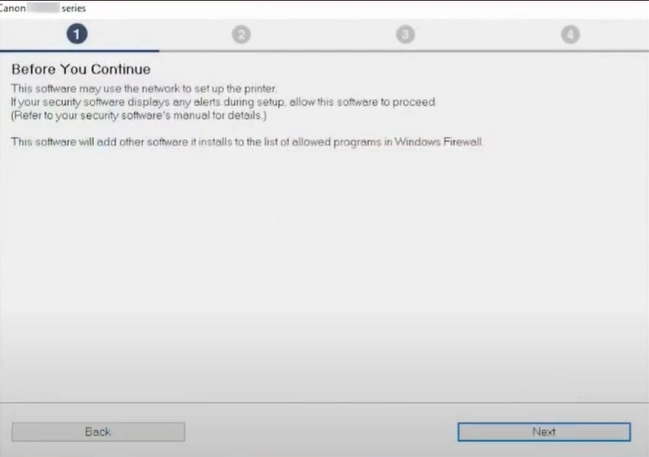
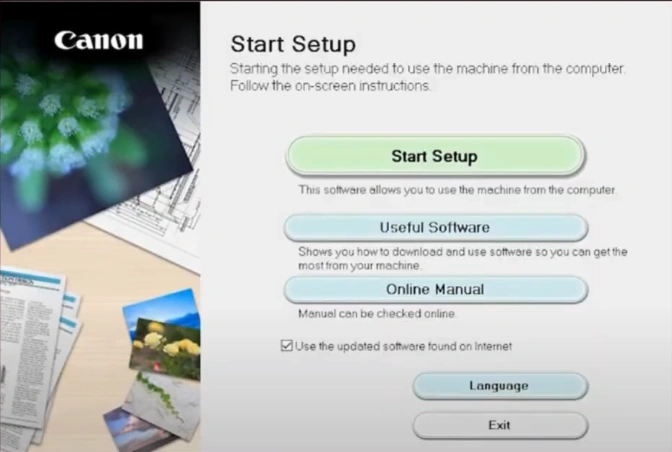
7. Click on the Start Setup, read the information in step 1's window, and click on Next.

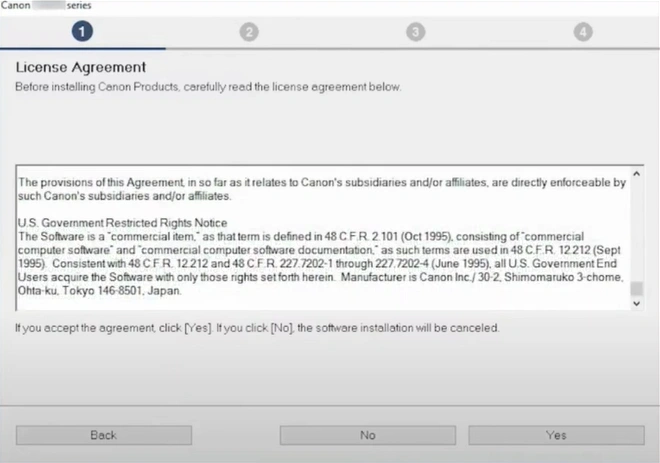
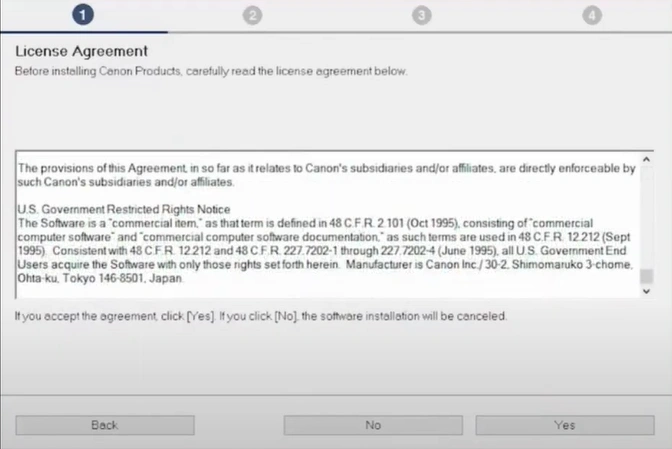
8. Go through the license agreement and click on Yes to agree.
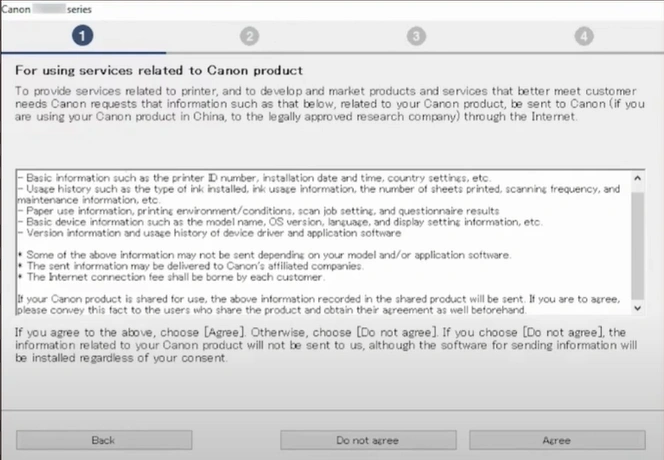
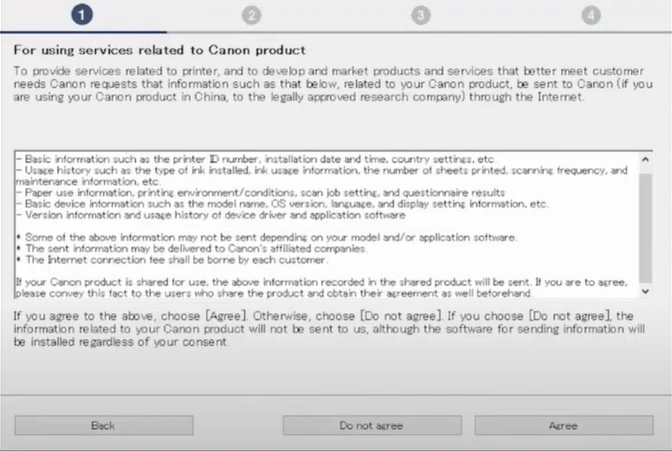
9. Read the guidelines for using services related to the Canon product, then click on the Do not agree or Agree button.
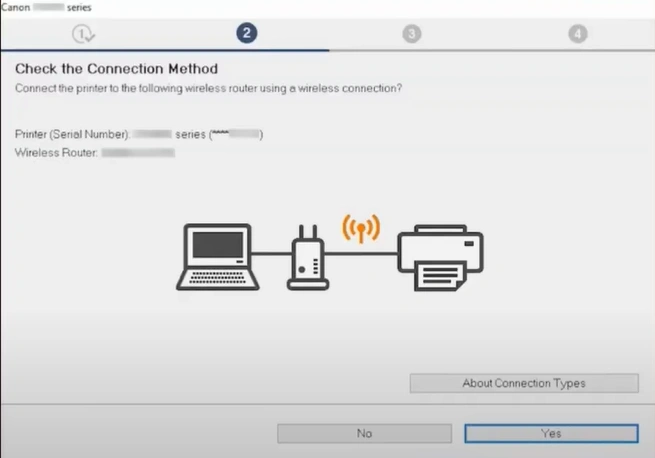
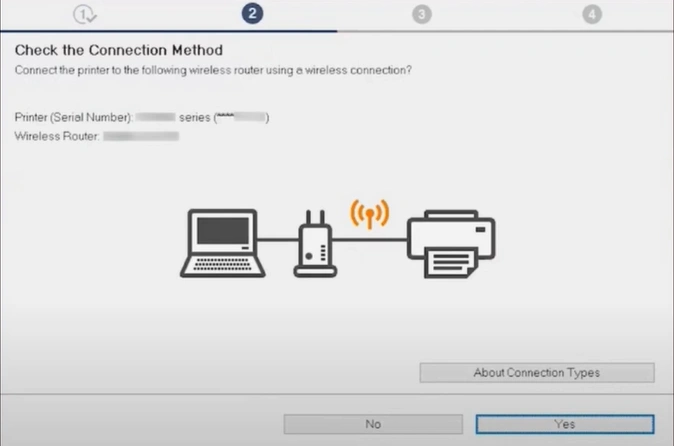
10. Make sure your printer's and wireless router's names are mentioned in the check the connection method window, then click Yes.
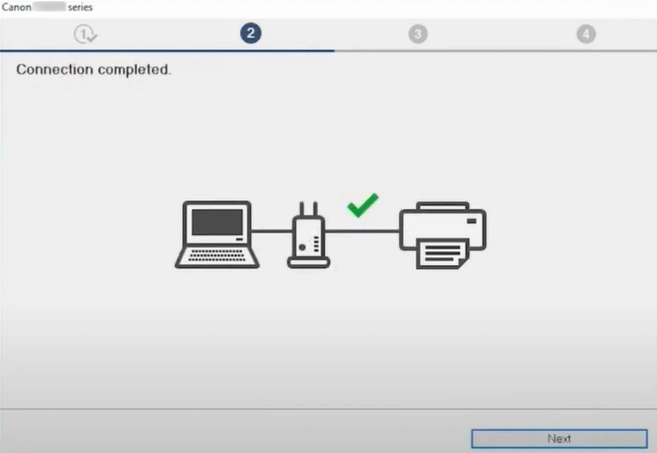
11. After the connection is complete, click on Next.
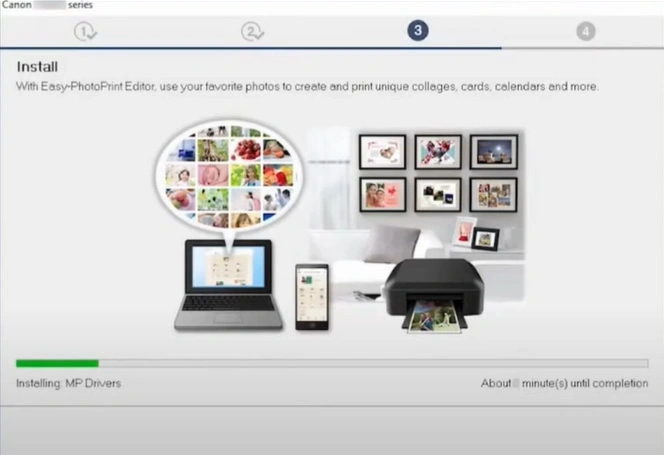
12. Next, wait for the MP drivers to install.
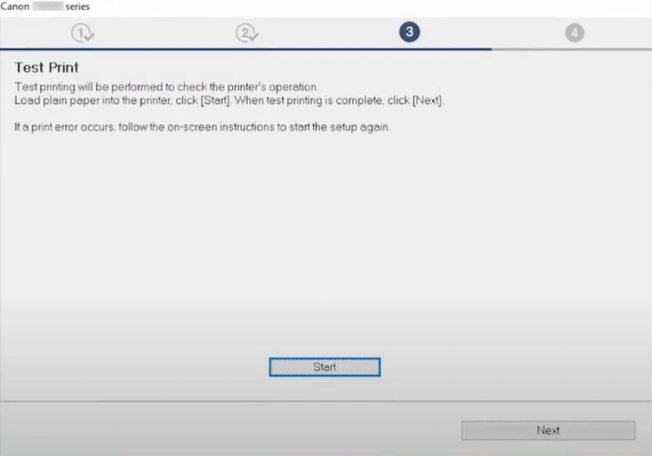
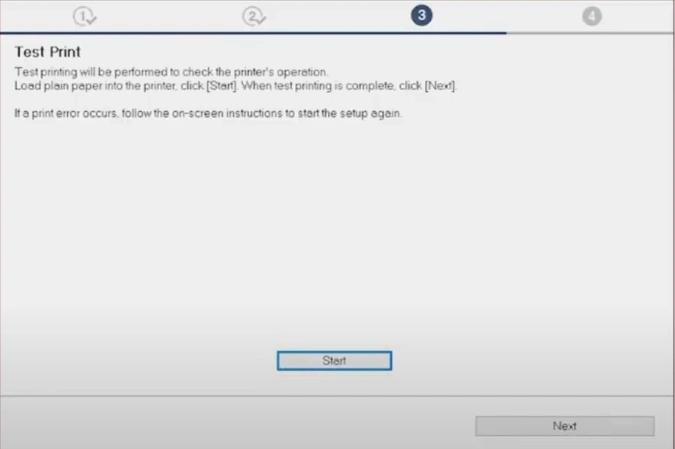
13. In the Test print window, run a test print or skip by clicking on Next.
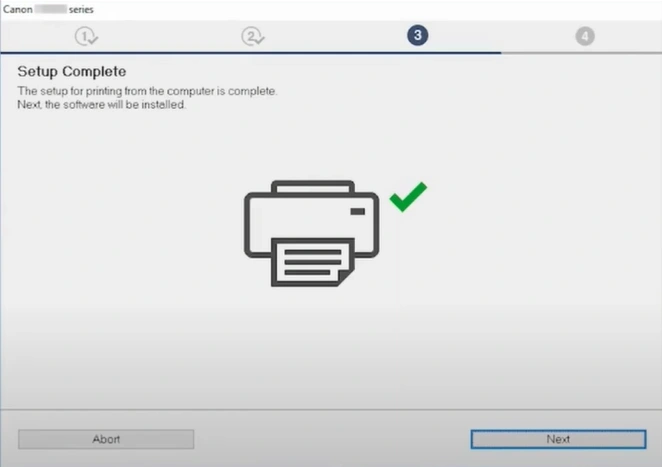
14. Now, in the Setup Complete window, click on the Next button.
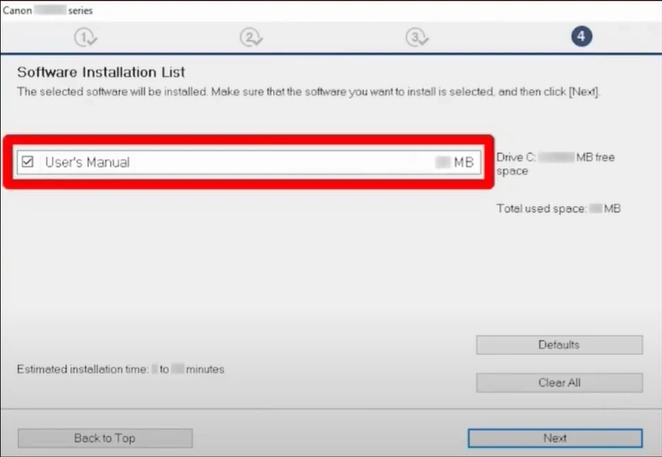
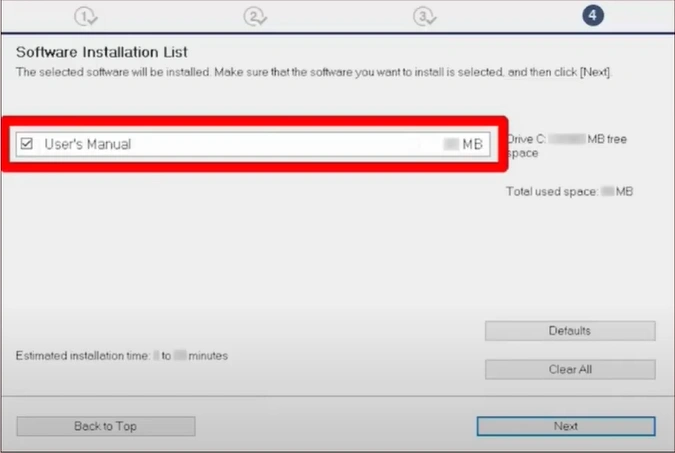
15. In the software installation list, check the software you want to install, then click on Next.
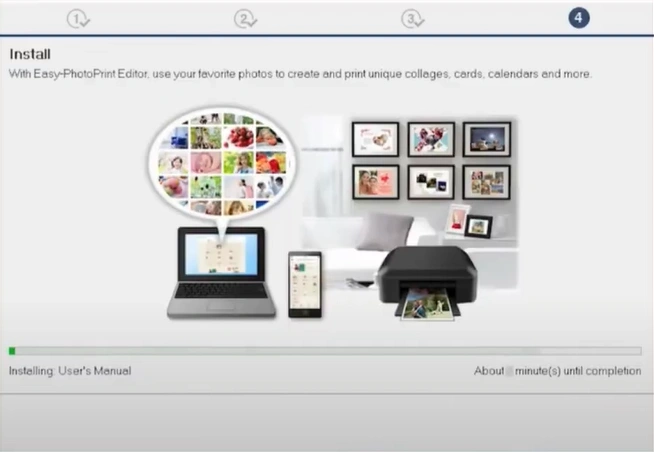
16. Give the software some minutes to install.
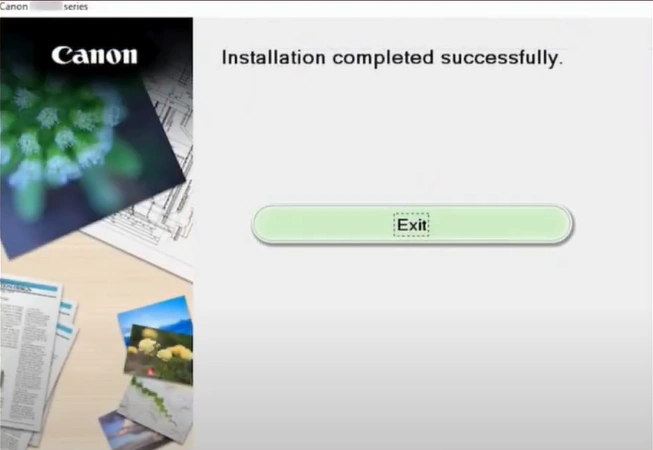
17. At last, click on the Next button and then the Exit button.
Setup Steps For Mac
If you want to set up your Canon TS 9520 printer, then follow the instructions below to do it without any hassle.
1. Initially, open your web browser and visit Canon's official setup website.
_1746439886.webp)
2. Click on the Setup option, type TS9520 in the search box, and click on Go.
3. Click on the Start button, then click on "Yes" if you have already prepared your printer, and go to Connect.
4. Next, click on the Download Button to start the download.
_1746440100.webp)
5. Click on the Next button to install the helper tool.
_1746440206.webp)
6. Click on Start Setup, read the information in the next window, and click on Next.
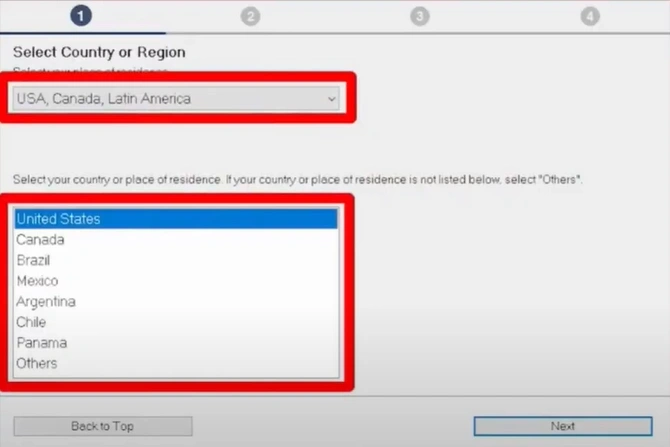
7. Select your country and region, and then click on Next.
8. After that, read the open license agreement and click on Yes to install the software.
9. In the Next window, click the Agree button after reading the information.
10. In the Check the Connection method window, ensure your printer's and wireless router's names are mentioned, then click Yes.
11. Click on Next after the connection is complete.

12. Wait for the MP drivers to install. After that, the troubleshooting will begin.
_1746440688.webp)
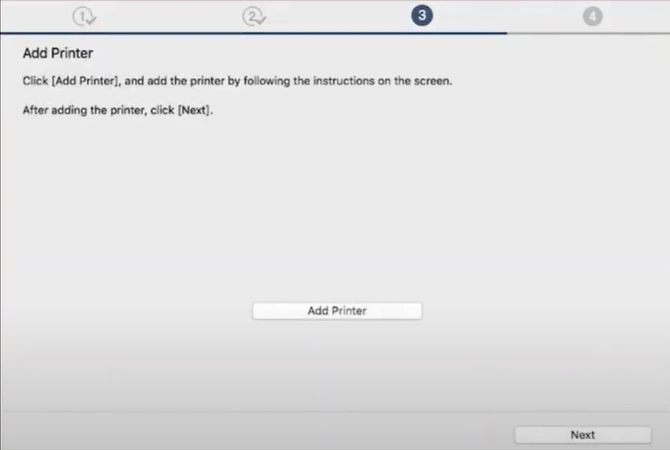
13. Click on Add a Printer and follow the prompts on your Mac.
14. After adding the printer, click on Next.
_1746440787.webp)
15. Click on Start to test print or skip by clicking on Next.
16. In the Setup Complete window, click on the Next button.
_1746440938.webp)
17. In the Software Installation list, check the software you want to install.
18. After installing the software, click on Next, and then select the Exit button. Setup Steps For iOS device
Also Read:- How to Do Canon G3260 WiFi Setup?
Setup Steps For iOS device
These are the quick steps that will help you connect the Canon printer to an iPhone/iPad quickly.
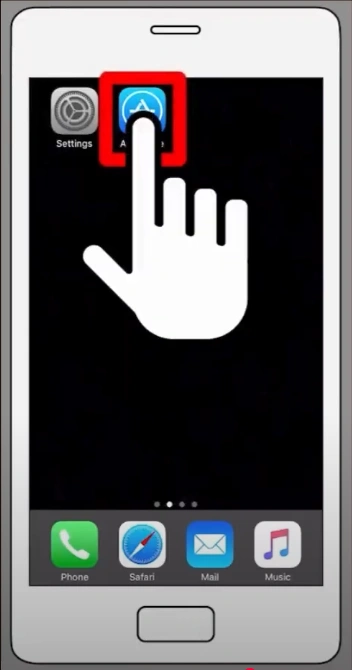
1. On your iOS device, open your App Store and download the Canon Print Inkjet/SELPHY app.
2. Open your Wi-Fi and connect with the Canon IJ network printer.
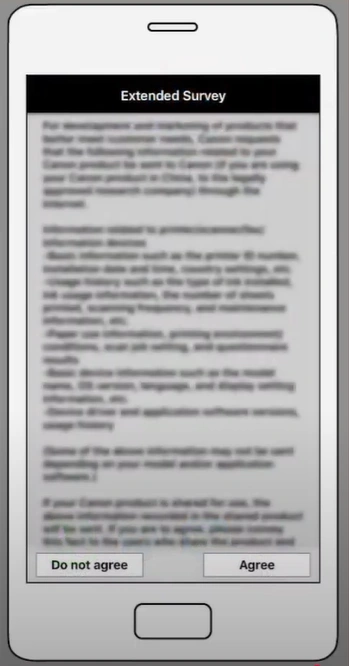
3. Now, launch the downloaded Canon print application, read the information in the Extended Survey, and tap on Agree.
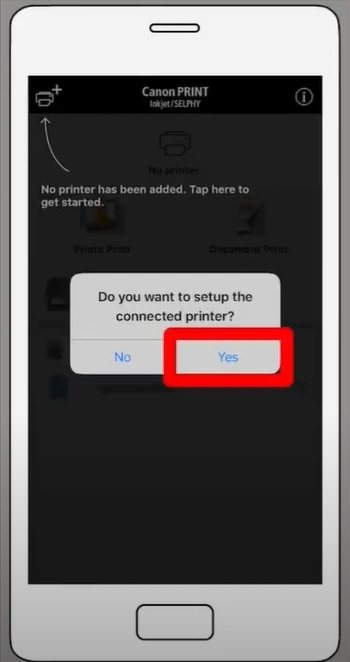
4. If you want to set up the connected printer window, tap on Yes.
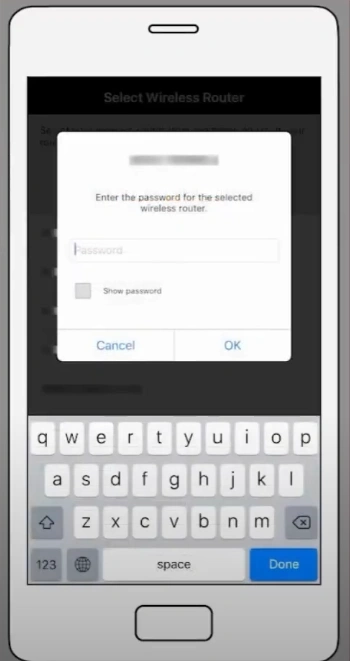
5. Select your Wi-Fi router and enter the password to connect.
6. Now, start printing on Canon using the iOS device.
Setup Steps For an Android Device
To connect your Canon printer on an Android device, these are the instructions you need to follow to establish the connection. Follow all the steps carefully.
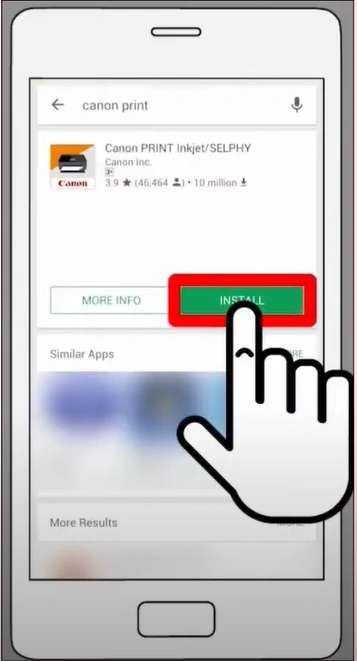
1. Open the Play Store on your Android phone and download & install the Canon Print Inkjet/SELPHY app.

2. If a window appears asking for access, then tap on Accept.
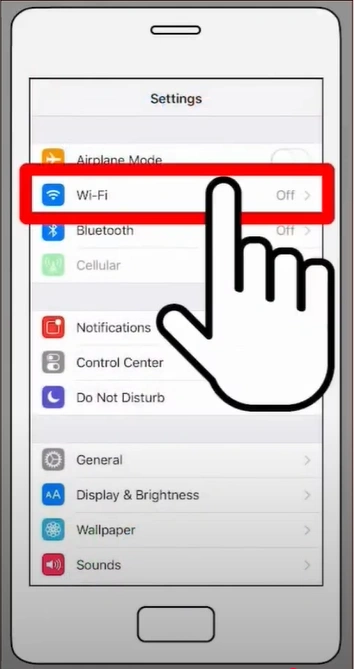
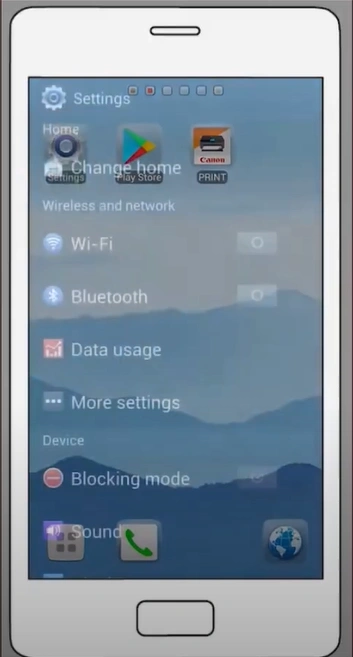
3. Turn on your Wi-Fi on your Android device.
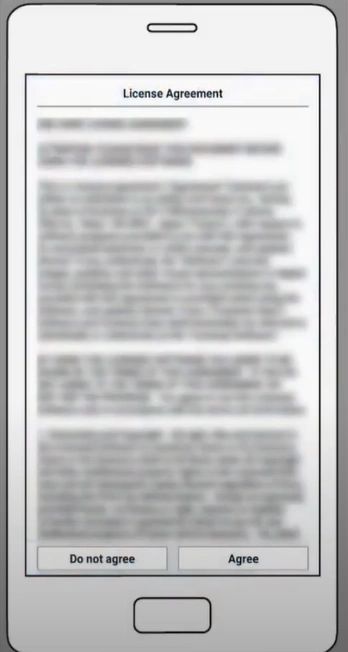
4. Open the Canon print app, read the license agreement, and tap on Agree.
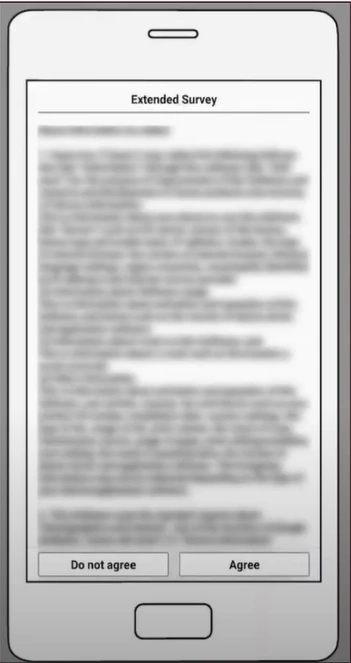
5. Read the information on the Extended Survey and tap on Agree once again.
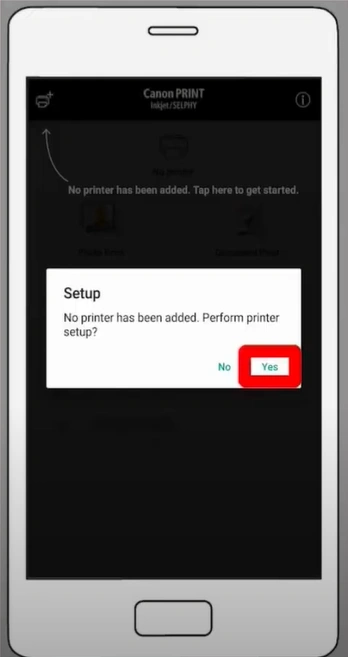
6. If a notification asks to perform printer setup, tap on Yes.
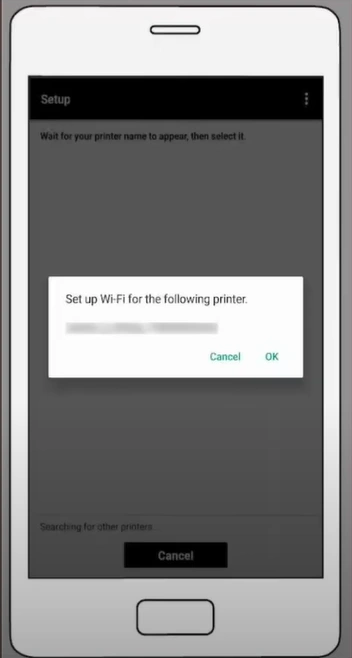
7. Set up your Wi-Fi for the printer by tapping OK.
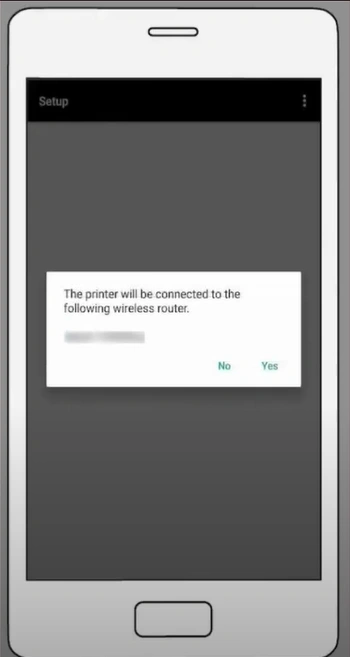
8. Tap Yes to confirm the connection with the mentioned wireless router.
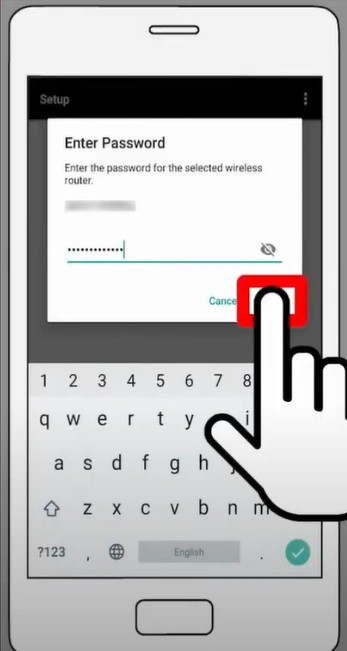
9. Enter the network password and then tap OK.
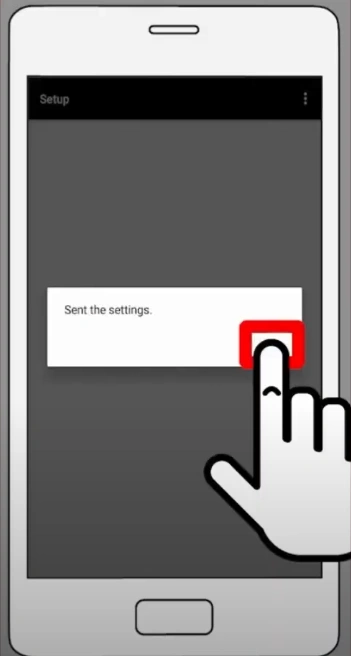
10. In the Set the Setting prompt, tap on the OK option.
11. From now on, your printer will be ready to perform any printing tasks.
Final Words
Now that you have a thorough understanding of the Canon TS9520 printer setup on prominent OS devices, you can follow the steps to complete the setup. Follow the process properly and make sure the printer is compatible with the OS device you are connecting to. Apart from that, you should try to look for more guidance and assistance if the setup is not complete yet or if you are facing any challenges during the process.

