How to Connect the Epson ET-3950 Printer to Wi-Fi at Home or in the Office
To connect an Epson ET-3950 to Wi-Fi, press Home, select the network icon at the top of the screen, and choose Wi-Fi (Recommended) then click on Start Setup then select Wi-Fi Setup Wizard.
Pick your network, type the password, and select Start Setup. A Wi-Fi icon with signal bars at the top of the screen means it worked.
That covers most homes. If your router has a WPS button, or you’d rather set it up from your phone, there are two other routes below. Offices get their own section, because MAC filtering and Ethernet change the picture.
Before you start the process, do not forget to read this
You need the network name and password exactly as they’re written. Both are case-sensitive, so a capital letter in the wrong place is enough to fail.
Finish the first ink fill and initial setup before anything else. Epson’s guide says wireless setup comes after ink installation, not before that which happened in my case.
Keep the printer close to the router for setup this worked for my case. You can move it back once it’s connected.
Check this router setting first
The ET-3950 supports both 2.4 GHz and 5 GHz Wi-Fi. That’s good news, but it creates a trap. Many routers, and nearly all mesh systems, broadcast both bands under one network name which was my case.
Epson’s troubleshooting advice is direct about this: if your router uses a single name for both bands, give each band its own name, such as “PT Home 2.4 GHz” and “PT Home 5 GHz”. Do that in your router’s app or admin page before you start, then connect the printer to one of them by name.
It’s also worth knowing what security the printer accepts. According to Epson, the ET-3950 works with WEP, WPA/WPA2 Personal and WPA3-SAE. Enterprise logins, the kind that ask for a username as well as a password, aren’t on that list.
Three ways to connect the ET-3950
Method 1: the Wi-Fi Setup Wizard on the printer
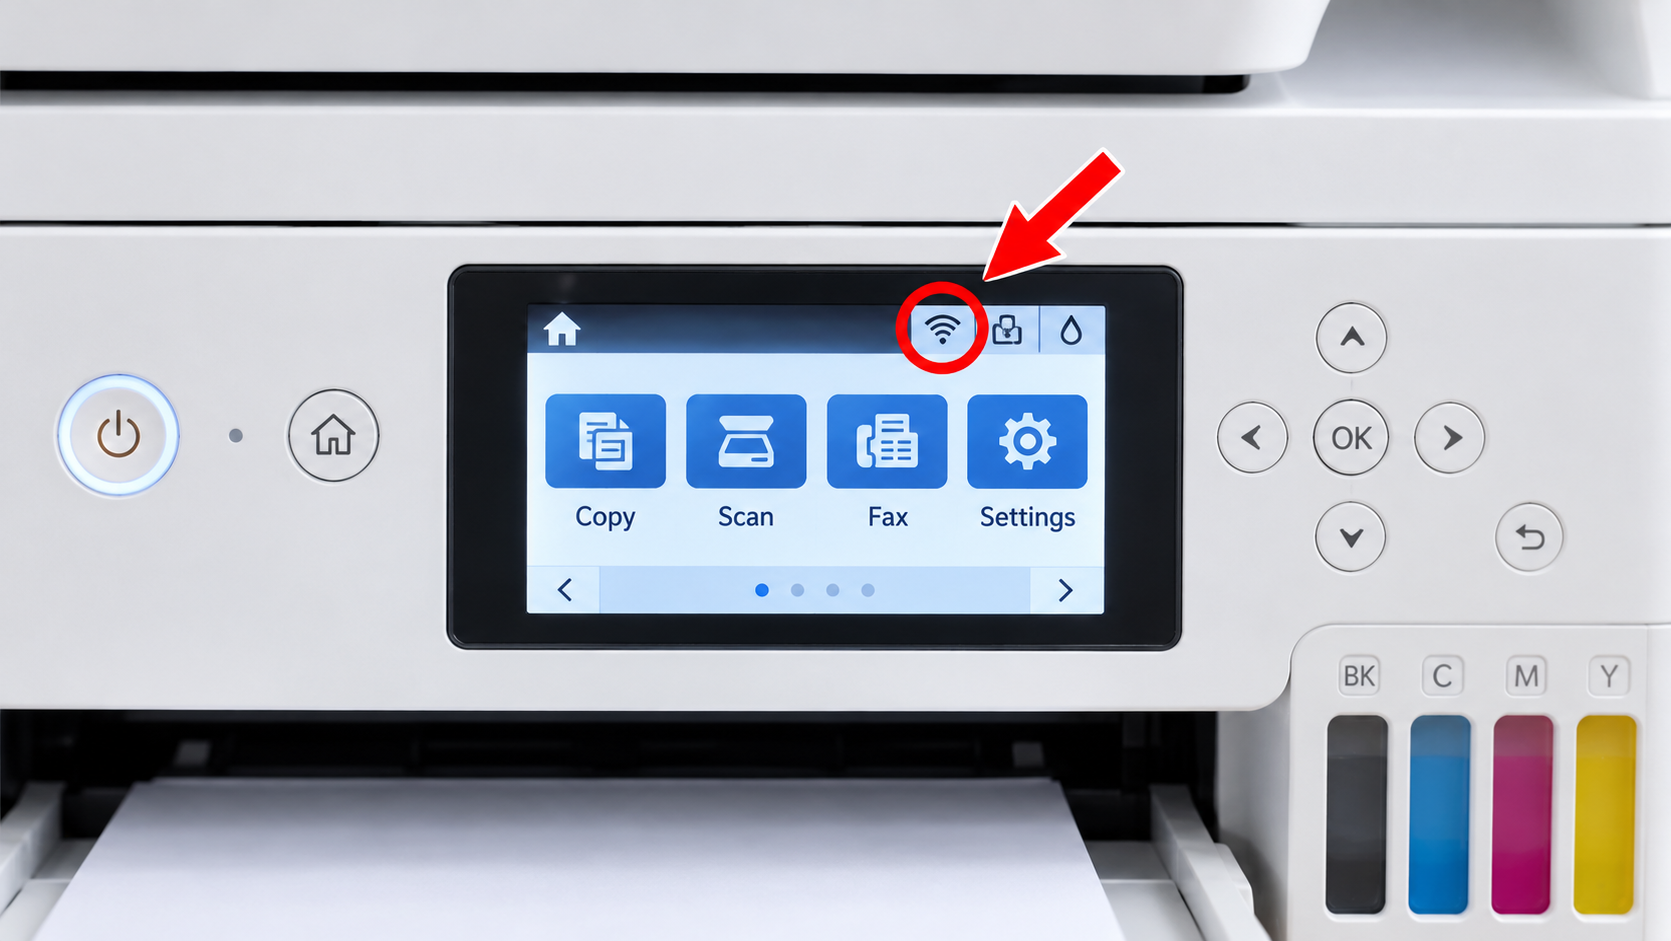
Start on the Home screen; press the Home button if you’re somewhere else. At the top of the screen there’s a small network icon. Highlight it with the arrows and press OK.
Choose Wi-Fi (Recommended). If the printer has never been on a network, you’ll see Start Setup. If it has, you’ll see Change Settings instead. Either one leads to the same place, so pick whichever appears, then select Wi-Fi Setup Wizard.
The printer lists the networks it can see. Select yours and press OK. If it’s not listed, press the + button, choose Enter Manually, and type the network name.
Now the password. Press OK to open the on-screen keyboard and type it in. This is where most setups go wrong, so check each character before you move on. Select OK, confirm the summary, and choose Start Setup.
When the printer reports success, select Close. You should see a Wi-Fi icon with signal bars at the top of the Home screen. If it failed, the printer offers Print Check Report right there. Take it; the report tells you exactly what went wrong (more on that below)
Method 2: WPS push button
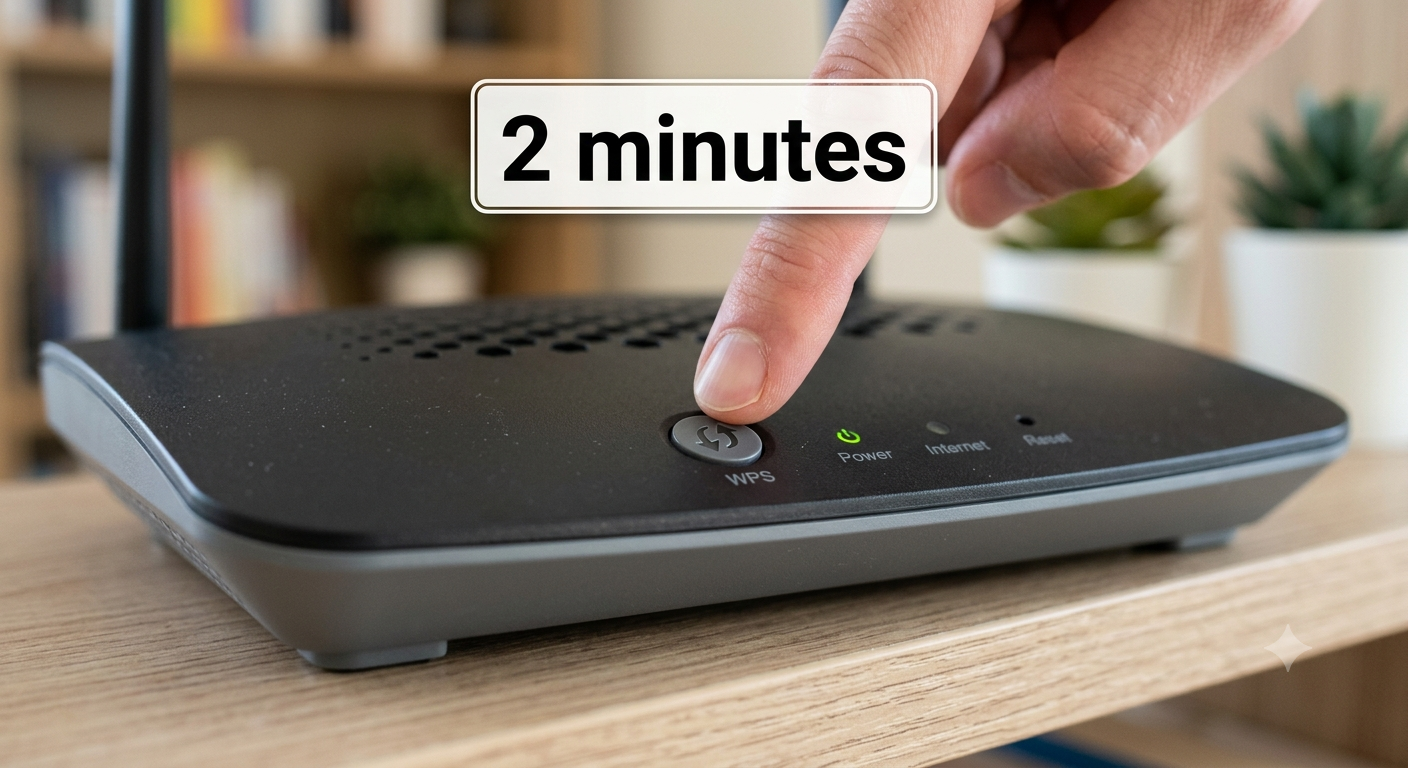
This one skips the password entirely, as long as your router has a physical or app-based WPS button.
On the printer, go to the same place: Home → network icon → Wi-Fi (Recommended) → Start Setup or Change Settings. This time choose Push Button Setup (WPS) and follow the prompts.
Press the WPS button on your router, then select Start Setup on the printer. Epson gives you two minutes between the two. Miss the window and you’ll just need to start again.
One limitation: WPS doesn’t let you pick a band or a specific network name. If your router has several, use Method 1 so you control exactly where the printer lands.
Method 3: Epson Smart Panel on your phone
Connect your phone to the Wi-Fi network you want the printer on, turn on the on your phone Bluetooth, and open Epson Smart Panel. The app uses Bluetooth to find the printer, so keep the phone close to it.(Worked for me)
If the app recognises the ET-3950, follow its prompts. If it doesn’t, tap the + icon and choose the option to set up a new product. Still not showing? Epson’s advice is to connect the printer from its own control panel (Method 1), then add it in the app as a product that’s already on your network.
Setting up the ET-3950 on an office network
Offices add a few wrinkles that home routers don’t.
The ET-3950 has an Ethernet port on the back. If your office prefers wired printers, plug it into a network jack. Just know it can’t use Ethernet and Wi-Fi at the same time; Epson’s connection report flags this as error E-1.
MAC address filtering is the most common office blocker. The printer finds the network, accepts the password, then gets turned away. Print a network status sheet (Settings → General Settings → Network Settings → Network Status → Print Status Sheet) and give the MAC address on it to whoever manages the router.
For visitors or devices that aren’t on your network, Wi-Fi Direct lets up to eight devices connect straight to the printer. Turn it on from the same network icon on the Home screen, under Wi-Fi Direct.
The printer also has a browser-based settings page, Web Config. Type the IP address from the status sheet into a browser on the same network. On the first visit it asks you to set an administrator password, and Epson sets the default to the printer’s serial number, printed on its label.
If it does not connect: read the connection report
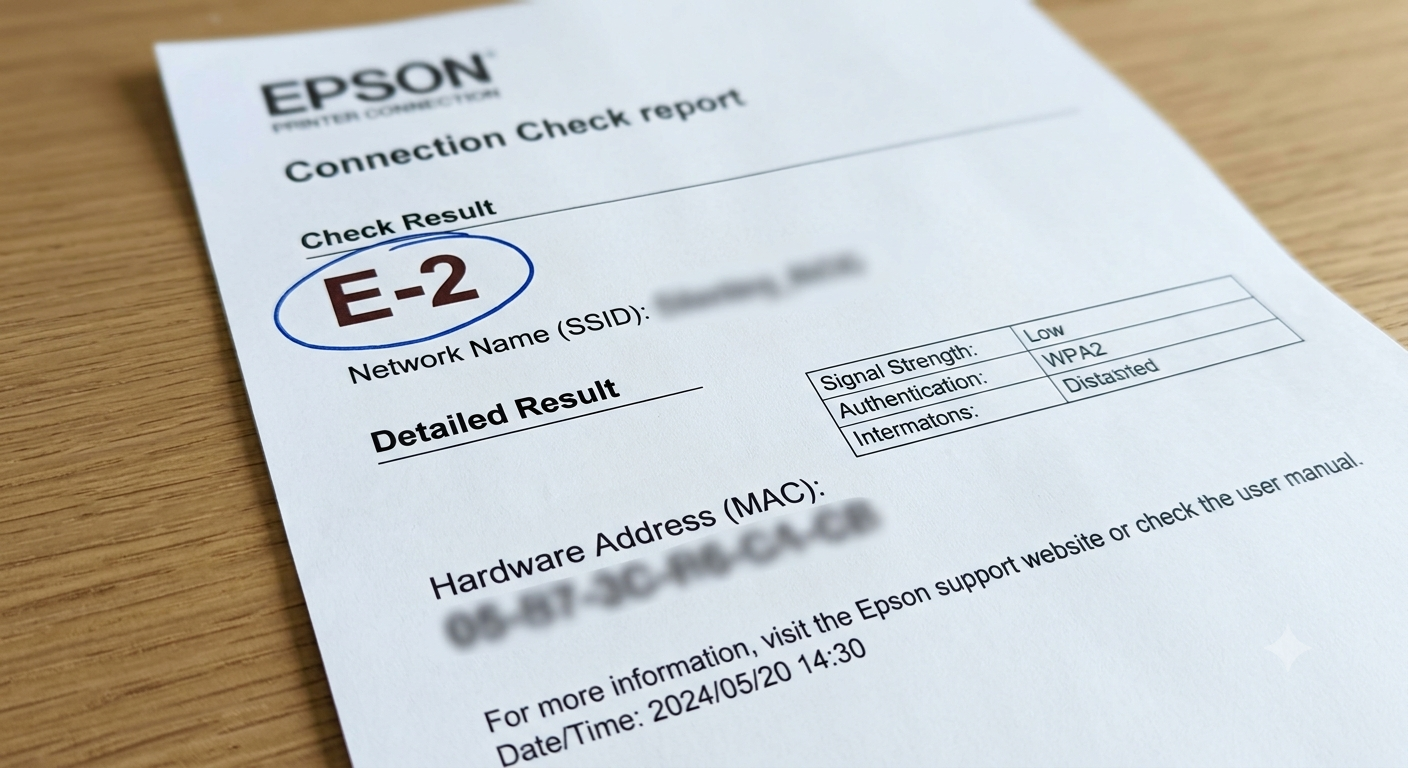
Guessing wastes time. Print the connection report instead: Settings → General Settings → Network Settings → Connection Check → Print Check Report. The error code at the top tells you what to fix.
Epson’s general fix order is worth following when nothing obvious shows up: turn off the router, computer and printer, wait about 10 seconds, then turn them back on in that order: router first, then the computer or phone, then the printer.
Your computer still can’t see the printer
The printer being on Wi-Fi doesn’t mean your computer knows about it. Download the ET-3950 software from Epson’s support page and choose the wireless connection when the installer asks.
If the printer was on USB before, Epson’s steps are to unplug the cable, uninstall the printer software, then reinstall it and pick Wi-Fi. The same applies on Windows after you change routers: uninstall, then reinstall.
Summary
To connect an Epson ET-3950 to Wi-Fi, press Home, select the network icon at the top of the screen, and choose Wi-Fi (Recommended) then click on Start Setup then select Wi-Fi Setup Wizard, then pick your network and type the password. If your router has a WPS button, use that instead, or set it up from your phone with Epson Smart Panel. If it won’t connect, give your router’s 2.4 GHz and 5 GHz bands separate names, and print the connection report to see the error code.
Sources
- Epson ET-3930/ET-3940/ET-3950 Series User’s Guide (PDF)
- Epson: Product Cannot Connect to a Wireless Router or Access Point
- Epson ET-3950 support page (US)
- Epson Australia: EcoTank ET-3950 specifications
Related articles
- How to Connect an Epson Printer to Wi-Fi?
- Epson Printer Not Connecting to Wi-Fi: Step-by-Step Fix
- How to Use the Epson Smart Panel App: Setup, Scan & Print from Phone
- How to Connect an Epson Printer to Mac (Wi-Fi & USB)
- Why Your Printer Won’t Connect to Wi-Fi and How to Fix It
- How to Connect Your Phone to a Printer (iPhone & Android)
- Printer Connected to Wi-Fi but Not Printing
Frequently Asked Questions
Does the Epson ET-3950 work on 5 GHz Wi-Fi?
Yes. Problems usually come from routers that use one name for both 2.4 GHz and 5 GHz, not from 5 GHz itself.
Can I set up Wi-Fi without a computer?
Yes. The Setup Wizard and WPS both run from the printer screen. You only need the computer software to print from that computer.
I got a new router. What now?
Run the Wi-Fi Setup Wizard again and choose Change Settings.
How many devices can use Wi-Fi Direct?
Up to eight at once.